When it comes to the usage and mastery of Linux operating systems, you will always find yourselves learning new cool stuff due to its open-source and extensible nature.
One cool feature available in all Linux operating system distributions is disk partitioning, which is important as it helps with organizing your files and folders, preventing files and folders conflicts, and also in seclusion of the system files from the user files.
While considering disk partitioning in other operating systems (not Linux-based), you are bound to go after a third-party application for you to fully meet your disk partitioning objectives. With Linux, using a third-party application for disk partitioning is an optional step.
Prerequisite
Since disk partitions are critical to the usage and operation of your machine, the power and usage of the Parted tool should be associated with root/sudoer user privileges.
Using Parted as a Disk Partitioner for Linux
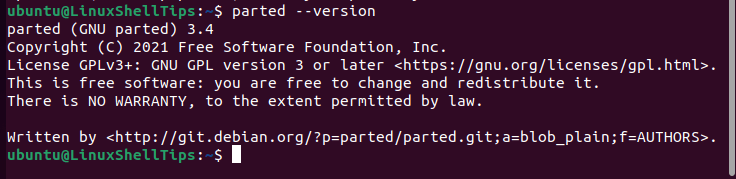
This article introduces the use of Parted as an effective disk partitioning tool. This disk partition tool should be inbuilt into your Linux operating system distribution and you can validate its presence by executing the following command:
$ parted --version
Identify Linux Disk Labels
The command helps list the disk labels present on your Linux system making it easier to identify the one that will be used to create the needed Linux partitions.
$ sudo fdisk -l

From the above command output, we have identified /dev/sda as the targeted disklabel with a logical/physical sector size. Please note that it is impossible to partition a disk label hosting the operating system you are currently using as such a disklabel will have a primary sector size.
Choose Linux Hard Disk for Partitioning
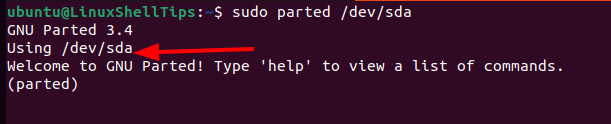
To select /dev/sda for partitioning (in case we have many disk labels present), we will execute the following parted command.
$ sudo parted /dev/sda
The above command should point to the disk label we have selected for partitioning.
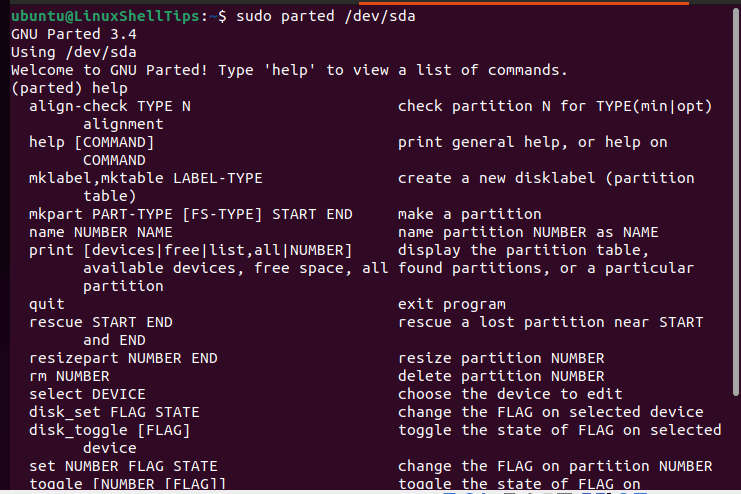
Key in ‘help‘ to view all the commands associated with the parted command, which is a quick and useful reference manual when you find yourself stuck while creating and managing Linux partitions.
(parted) help
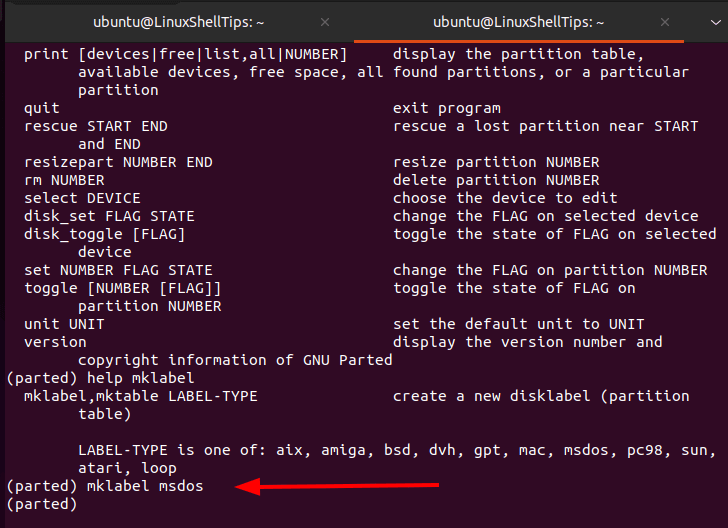
Set Linux Partition Table Type
To create a new partition table type, we need the help of the mklabel command, which lists the possible label types we can use:
(parted) help mklabel
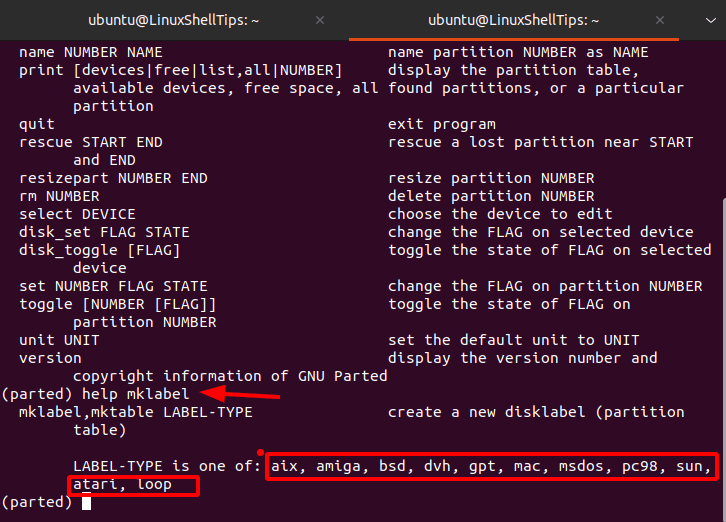
We will use msdos as it is an ideal recommendation for generic Linux.
(parted) mklabel msdos
Create Primary and/or Logical Partition(s) in Linux
We will use the print command to check how much space we have on the Disk we intent to partition.
(parted) print free
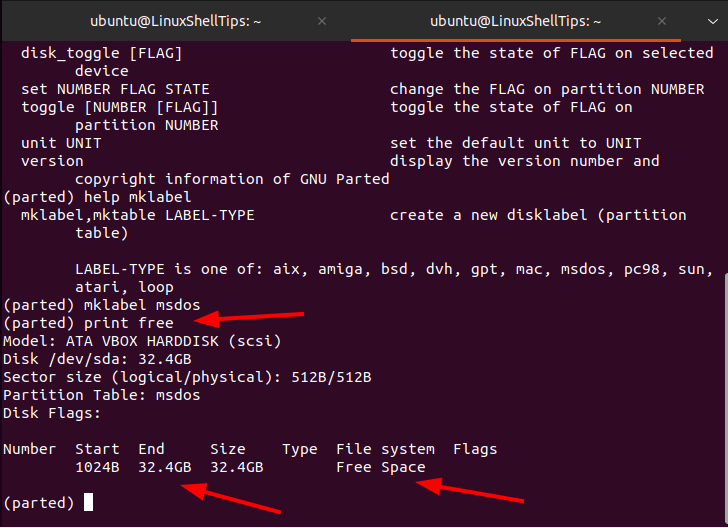
As per the above command output, we have 32.4 GB of free Disk space to use.
We can create partitions from the availed disk space using the mkpart command. The primary partition can be used for the installation of your Linux operating system and the logical partition for the storage of your personal/non-system files.
Let us create a 10GB primary partition and a 5GB logical partition.
To create 10GB Primary Partition:
(parted) mkpart primary
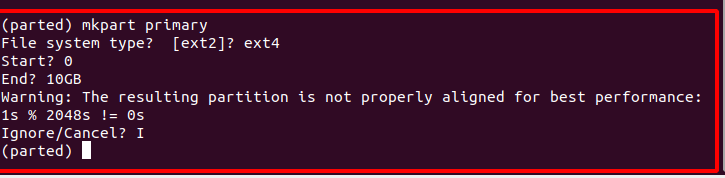
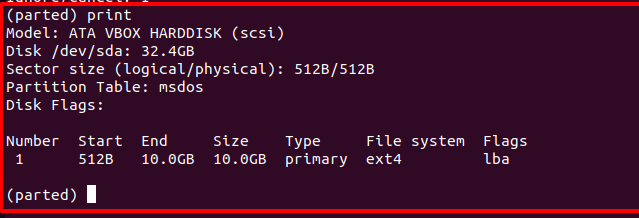
The Start and End values of this partition are 0 and 10GB respectively. To confirm that the partition space has been used.
(parted) print
To create 5GB Primary Partition:
(parted) mkpart extended
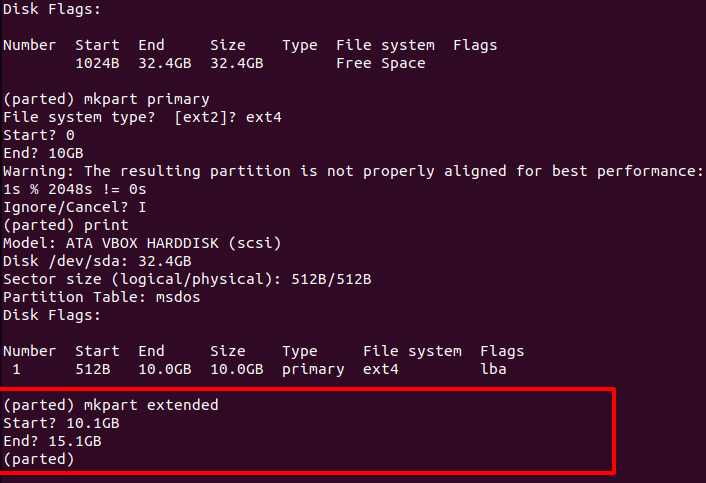
The Start and End values for this 5GB logical partition should begin from 10.1GB (a value higher than the one for the created primary partition) and 15.1GB (Adding 5 to 10.1).
Confirm that the partition space has been used:
(parted) print
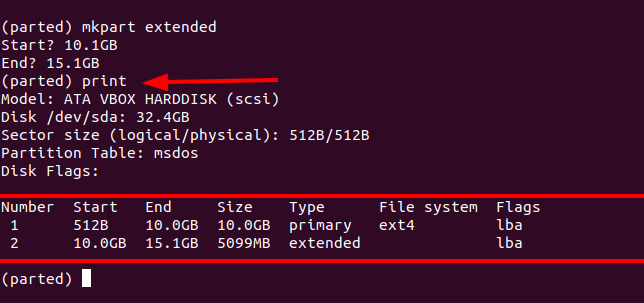
The two created partitions should now be listed with their respectful sizes as per the above screen capture.
Managing Linux Partitions
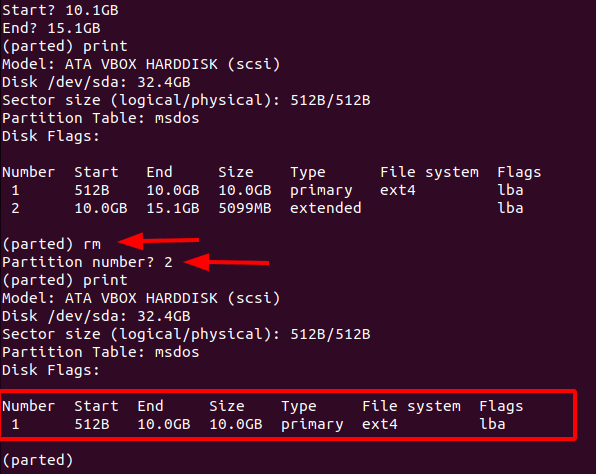
To delete a partition, first, use the print command so that its Number can be listed and then use the rm command to delete it.
To remove partition Number 2 from the above screen capture:
(parted) rm
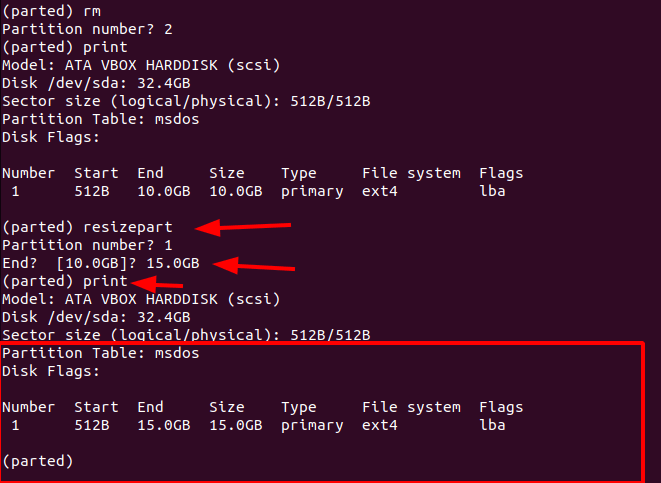
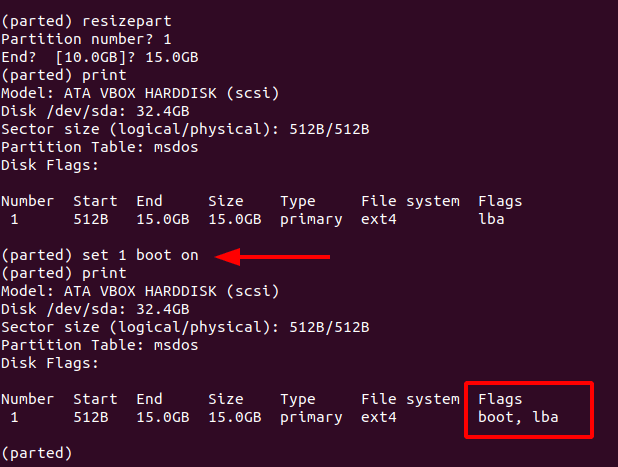
To resize Linux partition 1 by shrinking or increasing its partition size:
(parted) resizepart
To make partition Number 1 bootable:
(parted) set 1 boot on
To quit parted window.
(parted) quit
To learn more on parted commands, reference the command:
(parted) help