The continuous usage of phpMyAdmin as a GUI frontend for managing MySQL/MariaDB databases for sites like WordPress is making website administration achievable even by newbie users. You do not need to arm yourself with the prowess and accuracy of highlighting and implementing long SQL queries to unlock some meaningful strides in database management.
One key aspect of any database management system in a production environment is its ability to create and accommodate users. MySQL/MariaDB RDBMS accommodates two types of users; the Admin user and the normal user.
[ You might also like: Create a New MySQL User with GRANT Permissions via Commandline ]
The admin user has the privilege of managing all the active databases on the system together with the actions of a normal user. A normal user operates on a READ-WRITE rule depending on the role and purpose this database user was created to serve.
This article guide walks you through creating a MySQL/MariaDB database user through the phpMyAdmin frontend.
Creating a New MySQL User Using phpMyAdmin
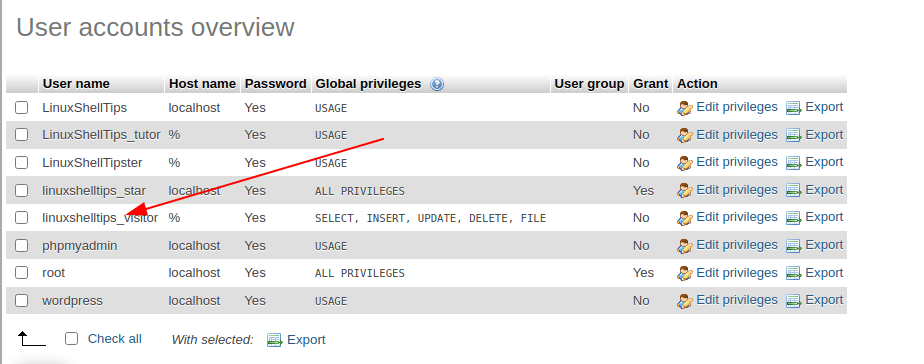
First, Log in to the phpMyAdmin dashboard and click on the “User accounts” tab on your phpMyAdmin dashboard.
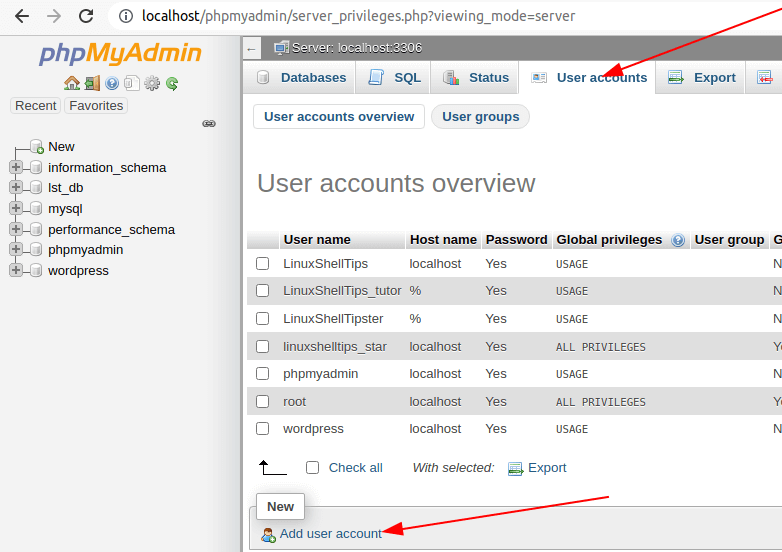
As per the above screen capture, several user-created MySQL/MariaDB database users already existing. Three tabs (Hostname, Global privileges, and Grant) distinguish these users from each other.
The hostname defines the access point from which a database user can access the MySQL/MariaDB database. For instance, the localhost hostname prevents remote users from gaining access to the database. It is only the user with physical access to the database server that can perform any required database administration actions.
To understand the functionalities of the Global privileges and Grant tabs, let us process to create our MySQL/MariaDB user.
Adding a MySQL User Account via phpMyAdmin
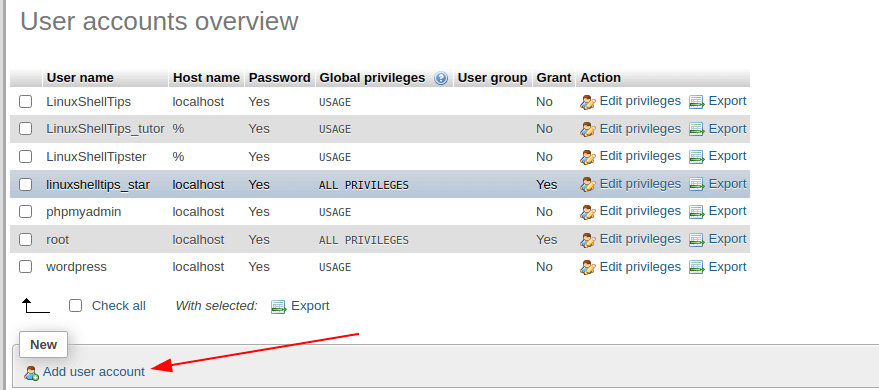
Click on the “Add user account” link as pointed out on the screen capture below.
The link should lead to an interface with four interesting sections:
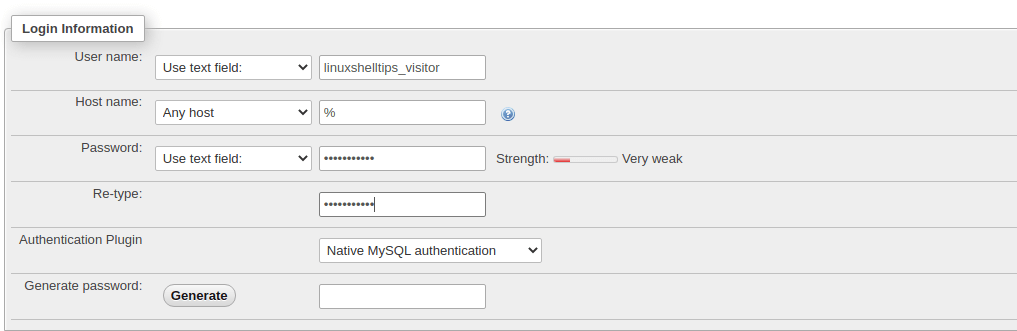
Section 1: Login Information
In this section, specify the MySQL/MariaDB user’s username, hostname, password, and authentication plugin. Use Native MySQL authentication as your authentication plugin.
For the user we want to create in this tutorial, we will summarize our user account creation options as highlighted in the following screenshots.
Section 2: Database for User Account
In this section, choose the option “Grant all privileges on wildcard name…” will transform the user we are about to create from a normal database user to an admin database user with the same privileges as the root MySQL/MariaDB user.

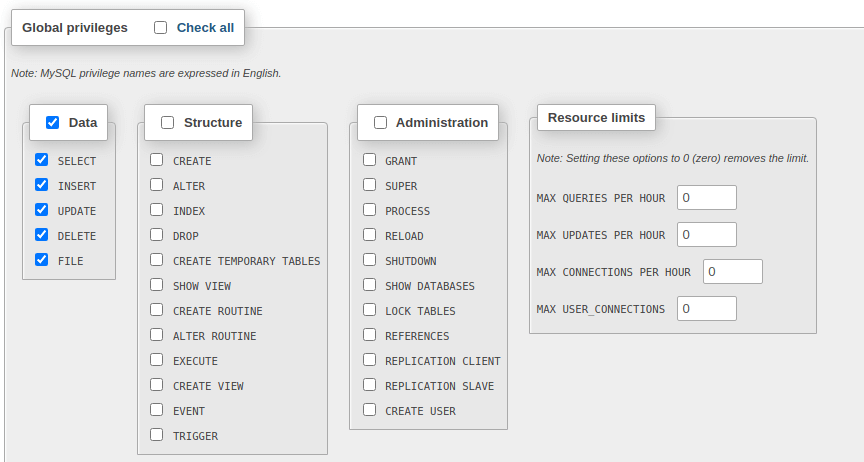
Section 3: Global Privileges
This section gives you more flexibility in determining specific database privileges that this user can have. For example, under Data, you can decide that the user can only SELECT items from a database table and nothing else.
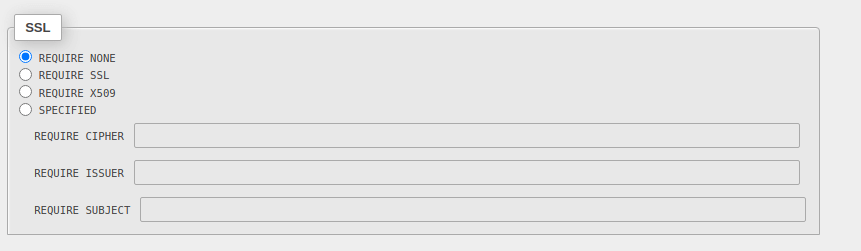
Section 4: SSL
This section determines how a user will be connecting to this database. Viable options include mandatory SSL (Secure Socket Layer) and non-mandatory SSL (REQUIRE NONE).
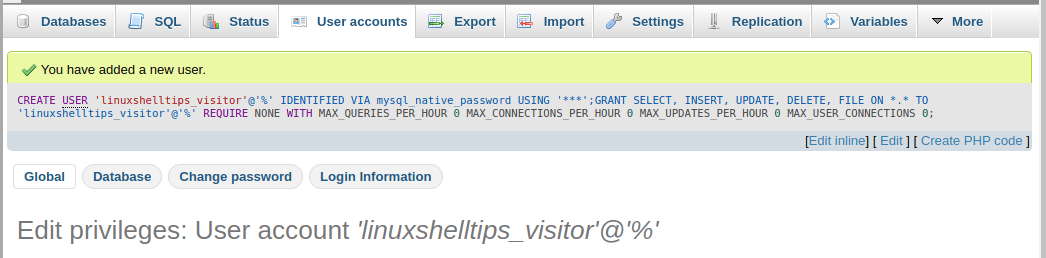
This user will be able to perform SELECT, INSERT, UPDATE, DELETE, and FILE query operations on all database tables.
Creating MySQL/MariaDB users from the phpMyAdmin dashboard has several unique benefits. One of them is the flexibility of customizing specific database actions these users can perform. Also, you can choose to later edit these privileges to either downgrade or upgrade the database functions these users are allowed to perform.