Linux logs are the most important files which tell us what is happening with the Linux kernel, distribution, its boot process, applications, and more. Whenever a problem happens, log files are the first files we have to consult to see what went wrong.
For example, the Linux boot process is so fast that we can’t see it, but fortunately for us, we can read it as it is stored in a /var/log/boot.log file.
On Linux distributions, there are various Linux commands to read log files and in this article we are going to discus how to read and filter log files entries based on date range using journalctl, grep, sed and awk commands.
What are Linux Logs?
Log files are nothing more than text files containing a series of information about the Linux kernel, boot process, logging to the machine, applications, system, and so on.
By reading them, we can resolve critical issues with our distribution such as a device that fails to load within dmesg, Xorg display server log, user log, and more. These log files reside in a special directory called ‘/var/log‘ and we can access it by using the following command:
$ cd /var/log
$ ls -l
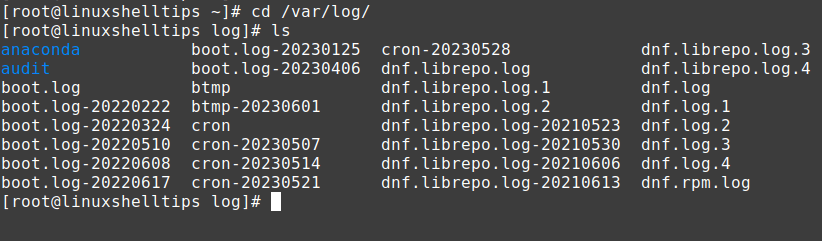
As we can see, there are various log files within the ‘/var/log‘ directory and each of the log files contains a series of vital information that is useful when it comes to resolving critical service or system issues.
How to Read Log Files in Linux
If you are facing difficulty while systematically reading log files in Linux. Then you are in the right place. Simply doing cat to read a log file is a kinda basic way to inspect a log file. But when you want to filter data in an organized way based on time, then we use journalctl, awk, grep, and sed commands.
For instance, in order to read the ‘boot.log.1‘ file, we can use the following cat command.
$ sudo cat boot.log.1 | head
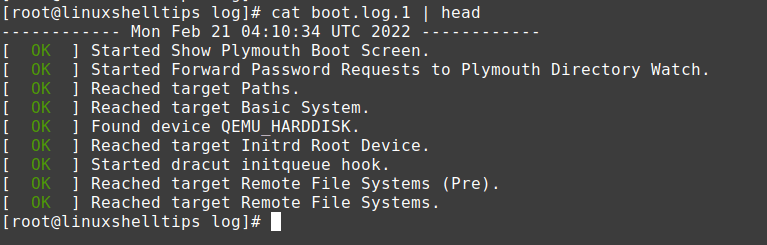
Here’s an explanation of the above command:
- The sudo command allows us to execute commands and read the files that only a ‘root’ user has access to.
- The cat command allows us to read the file contents in Linux.
- The
|is a pipe character that allows us to combine two and more commands in one single command to get the desired result from a file in Linux. - The head command shows the first ten lines of a file.
Now that we know how to read the log files in combination with other commands, let us show how we can filter the results from log files based on their date entries using journalctl, awk, grep, and sed commands.
Filter Linux Logs Using Journalctl Command
One of the easiest ways to filter log files based on their date range is by using the ‘journalctl’ command, which is used for displaying logs from journald and systemd log services.
For instance, if we want to read logs that are two days old, we will use the following command:
$ journalctl --since "5 days ago" | head -n5

An explanation of the above command is the following:
- journalctl – query the systemd journal.
--since– Start showing entries newer than the specified date, or older than the specified date, respectively. The date specifications should be of the format “2012-10-30 18:17:16“.- 5 days ago – show log files that are 5 days old.
- head -n5 – shows only the first five lines of the logs.
We can also filter the logs at exact date and time, by using the following ‘journalctl’ command in the format below.
$ journalctl --since "2023-05-25" --until "2023-05-30 21:50"
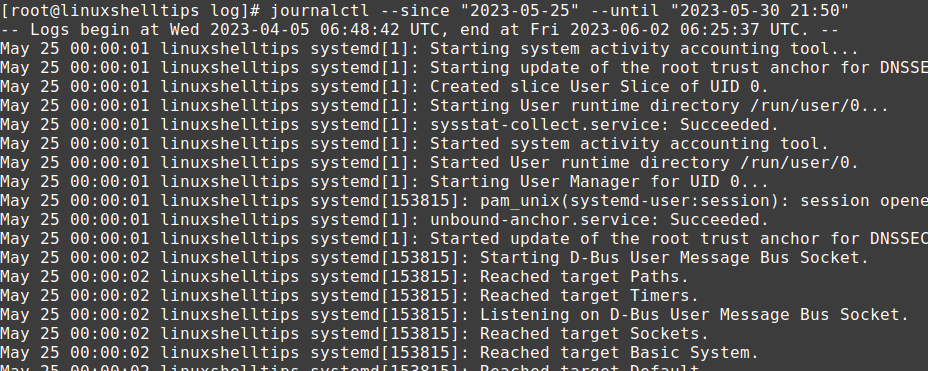
As we can see the log files are shown from ‘2023-05-25’ until ‘2023-05-30’ until the exact time of 21:50. This method of log filtering with ‘journalctl’ can be very useful when it comes to the critical services that failed to load, and using this method we can filter exact time and date for specific entry within the log file.
Filter Linux Logs Using Awk Command
The awk is a popular command-line tool used to manipulate data in files and generate a report based on a given pattern in the Linux system.
Today, we will filter /var/log/firewalld file based on a date range.
$ sudo awk -vDate='date -d '2023-05-31' -vDate2='date -d '2023-06-01' /var/log/firewalld | head -n5
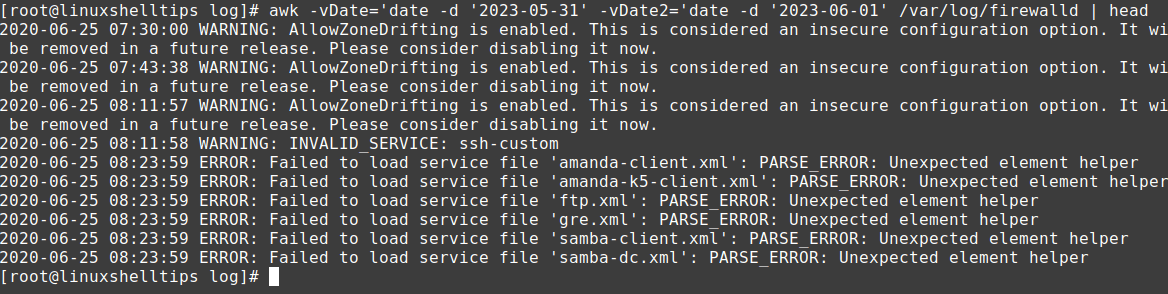
Let’s break the command apart for a better understanding of what each argument does.
- awk – pattern scanning and processing language.
- vDate=’date -d ‘2023-05-31’ – print ‘firewalld’ file lines starting from 2023-05-31 to 2023-06-01.
|– pipe character that allows us to combine two and more commands in one single command to get the desired result from a file in Linux.- head -n5 – shows only the first five lines from the ‘firewalld’ file.
Filter Linux Logs Using Grep Command
Another very useful command that we can use to filter log files is the grep command, which basically allows us to print the lines in files that match certain patterns.
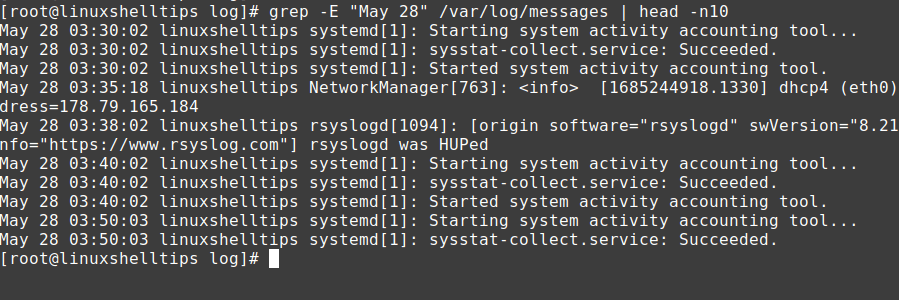
Here’s one very simple example of how to use the ‘grep‘ command to print the lines from the ‘messages‘ file from yesterday.
$ sudo grep -E "May 28" /var/log/messages | head -n10
To get data between a range of date examples from 28th May to 31st May, use the below command.
$ sudo grep -E "May 28|May 31" messages
The parameter -E is called extended regex which is used to set patterns lastly, you need to provide a log file or log directory.
Filter Linux Logs Using Sed Command
Now we will show you how to filter logs using the sed command line. To get data between a range of dates with certain time examples from 11 May 18:45:06 to 11 May 19:00:01, use the below command.
$ sudo sed -n '/May 11 18:45:06 /,/May 11 19:00:01/p' /var/log/syslog
Sample Output:
May 11 18:45:06 LINUX dbus-daemon[856]: [system] Activating via systemd: service name='org.freedesktop.hostname1' unit='dbus-org.freedesktop.hostname1.service' requested by ':1.301' (uid=1000 pid=35830 comm="/usr/bin/gnome-screenshot --gapplication-service " label="unconfined")
May 11 18:45:06 LINUX systemd[1]: Starting Hostname Service...
May 11 18:45:06 LINUX dbus-daemon[856]: [system] Successfully activated service 'org.freedesktop.hostname1'
May 11 18:45:06 LINUX systemd[1]: Started Hostname Service.
May 11 18:45:36 LINUX systemd[1]: systemd-hostnamed.service: Succeeded.
May 11 18:47:22 LINUX dbus-daemon[856]: [system] Activating via systemd: service name='org.freedesktop.hostname1' unit='dbus-org.freedesktop.hostname1.service' requested by ':1.303' (uid=1000 pid=35830 comm="/usr/bin/gnome-screenshot --gapplication-service " label="unconfined")
May 11 18:47:22 LINUX systemd[1]: Starting Hostname Service...
May 11 18:47:22 LINUX dbus-daemon[856]: [system] Successfully activated service 'org.freedesktop.hostname1'
May 11 18:47:22 LINUX systemd[1]: Started Hostname Service.
May 11 18:47:52 LINUX systemd[1]: systemd-hostnamed.service: Succeeded.
May 11 18:50:01 LINUX CRON[36057]: (shen) CMD (~/duckdns/duck.sh >/dev/null 2>&1)
May 11 18:55:01 LINUX CRON[36206]: (shen) CMD (~/duckdns/duck.sh >/dev/null 2>&1)
May 11 19:00:01 LINUX CRON[36473]: (shen) CMD (~/duckdns/duck.sh >/dev/null 2>&1)
The -n parameter with sed will not print the output of each line. Now the /pattern1/,/pattern2/ will be the expression. In the last -p parameters suggest sed verify the next expression according to a given pattern. After all this, you need to provide the log file or log file location.
Conclusion
In this article, we have shown what are log files in Linux and where they reside. We have also demonstrated how to use various Linux commands to read the log files by only showing the desired number of lines in the terminal.
Also, we have learned how to filter log files that are five days old, but also how to filter log files from a certain date and time. If you have any queries or issues, feel free to ask your query in the comment section.