Network Time Protocol (NTP) is a networking protocol that synchronizes time and date settings across computer systems in a network. It is responsible for maintaining accurate time and date settings in computer systems in order for them to run critical tasks such as cron jobs, shell scripts, and real-time applications.
NTP has since been replaced by chronyd, a networking daemon that is an implementation of the Network Time Protocol. The Chronyd service synchronizes the system clock with online NTP servers or an on-premise NTP server.
Chronyd is tailored to function in unfavorable networking environments such as in heavily congested networks and intermittent network connections. It records impressive time accuracy within a few milliseconds for systems synchronized over the internet and tens of microseconds for computers on a LAN.
In this article, we will install Chrony NTP on RHEL 9/8 server, and later configure a client system to obtain time and date settings from the NTP server.
Testing Environment
NTP Server RHEL 9 - 192.168.2.106
NTP Client RHEL 9 - 192.168.2.103
1. Configuring Timezone in RHEL
To start off with the installation of Chrony NTP, head over to your RHEL server and update the package lists.
$ sudo dnf update
Since our mission is to configure our server as the NTP server from which client systems will derive their time and date settings, the next step is to ensure that the timezone settings are accurate
To display the system’s timezone, including current time and date settings, run the command:
$ timedatectl
The command displays time and timezone information. In the output below, you can see that I am in the Africa/Nairobi timezone.

In Linux, timezones are stored in the /usr/share/zoneinfo directory. There are a total of 423 available time zones as of the time of writing this guide.
To list all the available timezones use the timedatectl command.
$ timedatectl list-timezones

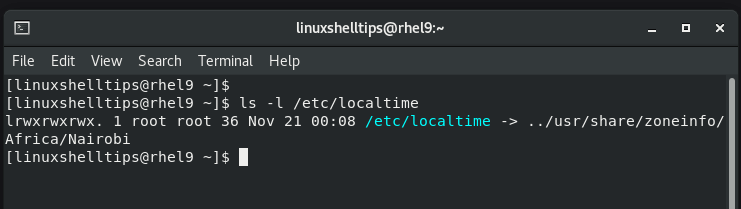
To view the current timezone setting for your RHEL server, run the following command:
$ ls -l /etc/localtime
To set or change the timezone for your server, use the following syntax
$ sudo timedatectl set-timezone <timezone>
For example, if your current region is London, set the timezone as shown.
$ sudo timedatectl set-timezone Europe/London
2. Install Chrony NTP Server on RHEL
With the correct timezone configured, install Chrony as shown.
$ sudo dnf install chrony -y
When the installation is complete, start and enable the Chronyd service to start on system startup.
$ sudo systemctl start chronyd
$ sudo systemctl enable chronyd
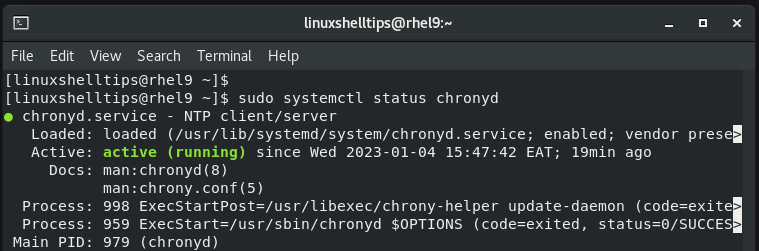
Also, be sure to confirm that the Chrony daemon is running as follows.
$ sudo systemctl status chronyd
3. Configure Chrony NTP Server on RHEL
Once the installation of Chrony is complete, you need to make a few tweaks to the default configuration /etc/chrony.conf file that contains the NTP settings.
In this file, I’m going to specify the NTP pools in my region (Kenya) using NTP Server Pool.
The NTP homepage provides a comprehensive list of global NTP pools which are used by hundreds of millions of systems around the globe. You can select your preferred NTP pools from the regions provided.
Therefore, access the file as shown.
$ sudo vim /etc/chrony.conf
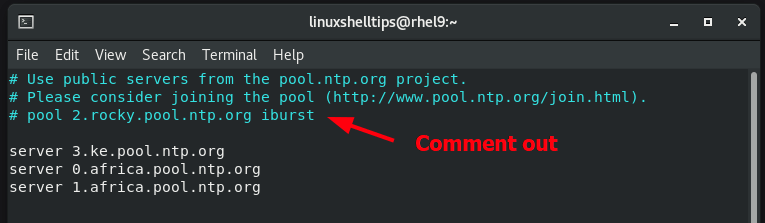
Comment out the first NTP pool and specify your preferred list of NTP pools as shown.
server 3.ke.pool.ntp.org
server 0.africa.pool.ntp.org
server 1.africa.pool.ntp.org
Save the changes and exit the configuration file. Next, enable NTP synchronization
$ sudo timedatectl set-ntp true
To apply the changes made, restart the chronyd service.
$ sudo systemctl restart chronyd
To track how the chronyd daemon is tracking, execute the following command.
$ chronyc tracking
On your terminal, you will see statistics about system time and time offset as shown.
4. Configure Client to Synchronize Time with Chrony NTP
Next, you need to allow clients on your network access to the server in order to synchronize time and date settings. Once again, head back to the configuration file.
$ sudo vim /etc/chrony.conf
Append this line to specify the network subnet of which the NTP server is a part. Here, my network subnet is 192.168.2.0/24.
allow 192.168.2.0/24

Save the changes made and exit the configuration file.
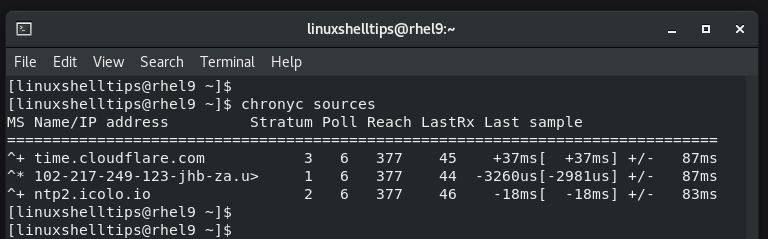
Next, verify that your NTP server is using online NTP servers for time synchronization.
$ chronyc sources
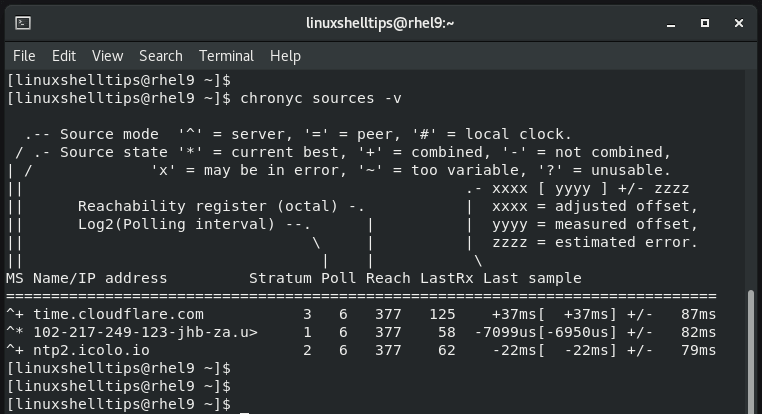
For detailed output use the -v flag as shown.
$ chronyc sources -v
If you have Firewalld running, consider allowing NTP traffic by running the following commands.
$ sudo firewall-cmd  --add-service=ntp --permanent
$ sudo firewall-cmd --reload
5. Configure Chrony NTP Client to Sync Time with NTP Server
The next thing to do is to configure a client system to receive time and date settings from the NTP server. Ensure that the client is in the same timezone as the NTP server. In our case, this is will be Africa/Nairobi.
You can easily configure the timezone on the command line as follows.
$ sudo timedatectl set-timezone Africa/Nairobi
Of course, be sure to replace Africa/Nairobi with your time zone.
On the client, ensure that Chrony is installed as shown.
$ sudo dnf install chrony
Once installed, start and enable the Chrony daemon.
$ sudo systemctl start chronyd
$ sudo systemctl enable chronyd
Next, we need to configure the client to sync date and time settings from the NTP server. As such, modify the configuration file:
$ sudo vim /etc/chrony.conf
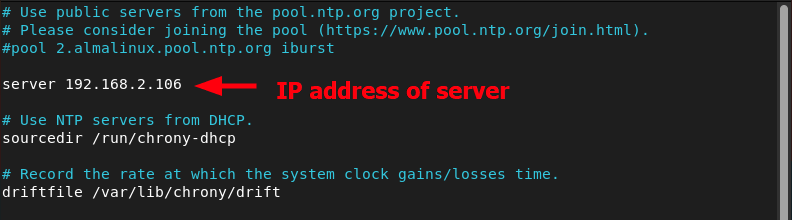
Comment out the pool address and add the following line where the IP address corresponds to that of the NTP server.
server 192.168.2.106
Save the changes made and exit the configuration file.
Then start the NTP synchronization.
$ sudo timedatectl set-ntp true
To apply the changes made, restart the Chronyd service.
$ sudo systemctl restart chronyd
Then verify the time synchronization as follows.
$ sudo chronyc sources
From the output below, It’s apparent that the client is obtaining time and date settings from the NTP server.

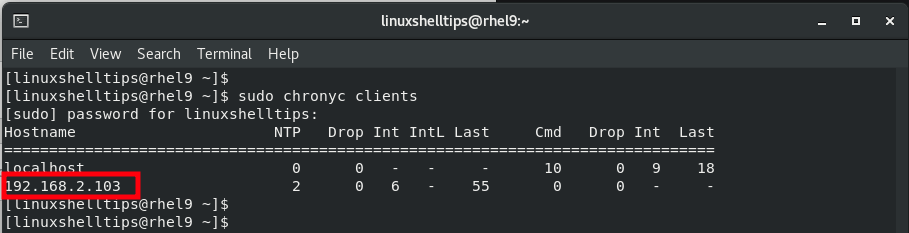
Back at the server, you can verify the NTP clients. You should see the IP address of the NTP client listed as shown below.
$ sudo chronyc clients
In this guide, we have demonstrated how to install the Chrony NTP server on RHEL 9/8 and how a client system can be configured to obtain time and date settings from the server.