Chrony is an implementation of the now deprecated Network Time Protocol (NTP). It synchronizes the system clock with online NTP servers, and reference clocks and is tailored to perform well in a range of conditions. These include congested networks, intermittent network connections, and systems that do not run continuously or run on a virtual machine.
Chrony maintains a high accuracy of time between systems synchronized over the internet. The accuracy attained is typically within a few milliseconds while on a LAN network, this is in tens of microseconds. It supports Linux and UNIX systems such as FreeBSD and NetBSD.
In this guide, we will install Chrony NTP Server to synchronize time on Rocky Linux 8/9.
Step 1: Set Timezone in Rocky Linux
To get off the ground, update the system packages and repositories as shown.
$ sudo dnf update
Once the update is complete, configure the right timezone for your Rocky Linux system.
If your intention is to configure your system as the NTP Server from which other systems will derive their time and date, then you need to ensure that the time and date are accurately configured on the server.
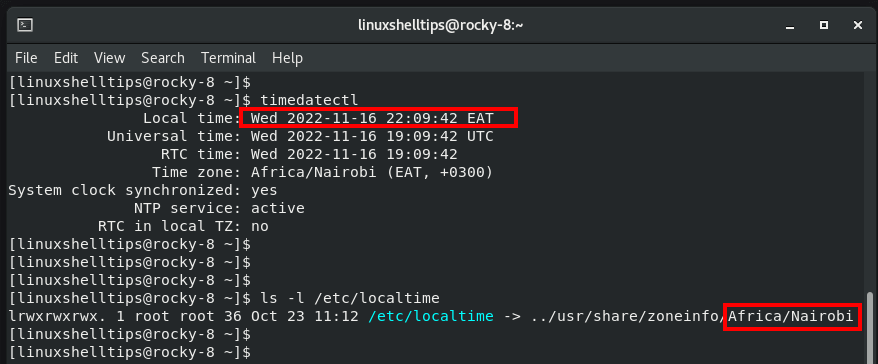
To check the current time and date including the time zone, run the command.
$ timedatectl
The command provides details such as the local time, UTC time, RTC time, time zone, the state of clock synchronization, and NTP service.
In addition, you can also find your current timezone by viewing the /etc/localtime file as follows.
$ ls -l /etc/localtime
If your local time was not set correctly, you can set it using the following commands.
$ sudo timedatectl set-ntp no
$ sudo timedatectl set-time HH:MM:SS
$ sudo timedatectl set-time 18:05:00
$ timedatectl
Step 2: Install Chrony NTP Server on Rocky Linux
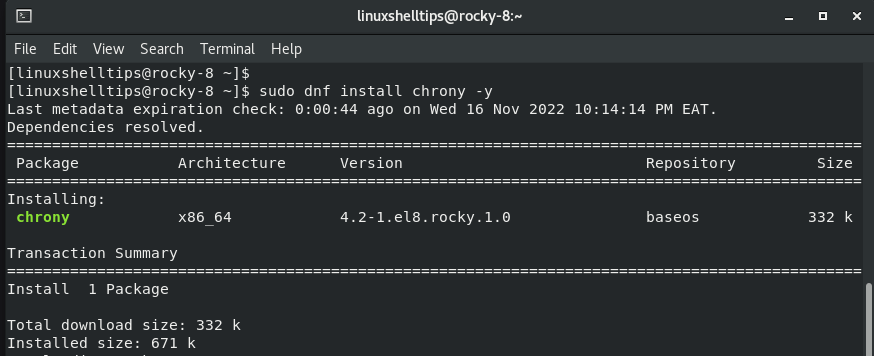
To install the Chrony server, run the command:
$ sudo dnf install chrony -y
Once the installation is complete, start and enable Chronyd service as shown.
$ sudo systemctl start chronyd
$ sudo systemctl enable chronyd
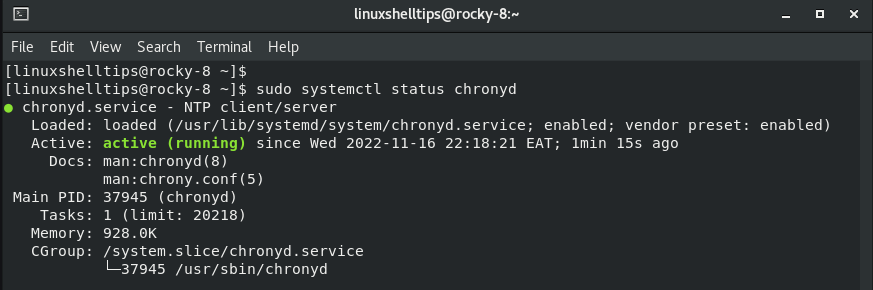
In addition, be sure to verify that the Chrony daemon is running.
$ sudo systemctl status chronyd
Step 3: Configure Chrony NTP on Rocky Linux Server
The default configuration file for Chrony is found in the /etc/chrony.conf file. The file contains information about NTP pools currently in use and other NTP settings.
In this file, we are going to define the NTP pools closest to my geographical region (Kenya) using ke.pool.ntp.org.
To find a list of NTP pools closest to your region, visit the NTP homepage and select your preferred region.
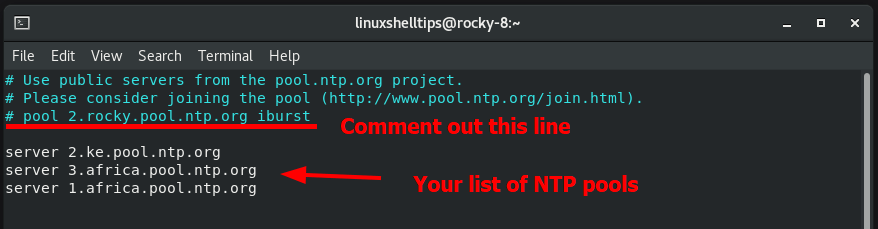
In my case, I used the following NTP pools.
server 3.ke.pool.ntp.org
server 3.africa.pool.ntp.org
server 1.africa.pool.ntp.org
Access the configuration file.
$ sudo vim /etc/chrony.conf
Next, comment out the first NTP pool and add your preferred list of NTP pools as shown.
Save the changes and exit the configuration file.
Next, enable NTP synchronization.
$ sudo timedatectl set-ntp true
To apply the changes, restart the Chrony daemon.
$ sudo systemctl restart chronyd
Next, run the following command to track how the chronyd daemon is tracking:
$ chronyc tracking
This displays statistics about system time and offset as provided below.
Step 4: Allow NTP Client to Synchronize Time with Chrony Server
Since our goal is to make our server the NTP server from which other clients in the NTP will derive the time and date settings, we need to allow NTP client access.
In the configuration file /etc/chrony.conf, add the following attribute, and specify your network subnet. In my case, the subnet is 192.168.2.0/24.
allow 192.168.2.0/24
The server will now listen to incoming requests from clients in the local network.
Again, to apply the changes, restart the Chrony daemon.
$ sudo systemctl restart chronyd
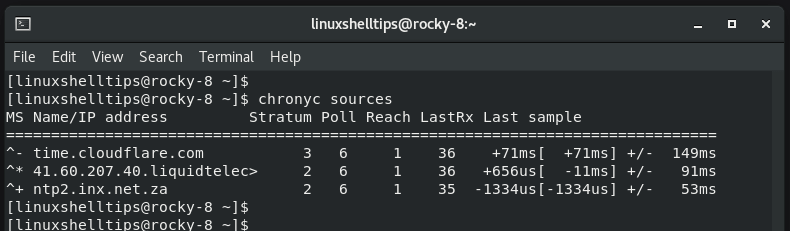
Then verify the NTP servers that Chronyd daemon is using for time synchronization.
$ chronyc sources
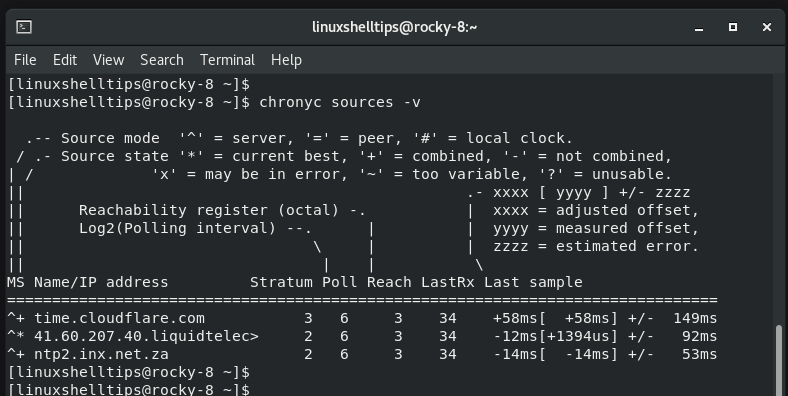
For more verbose output pass the -v flag as shown.
$ chronyc sources -v
If you have a firewall installed and enabled, consider allowing NTP traffic.
$ sudo firewall-cmd --add-service=ntp --permanent
$ sudo firewall-cmd --reload
Step 5: Configure NTP Client to Sync Time with Chrony Server
We are done configuring the NTP server. The next step is to configure the client machines which will get the time and date settings from the chrony server
First, ensure that the client is in the same time zone as the server. You can set the timezone using the timedatectl command as follows. Be sure to replace Africa/Nairobi with your time zone.
$ sudo timedatectl set-timezone Africa/Nairobi
Next, install Chrony as follows.
$ sudo dnf install chrony
Once installed, start and enable the Chrony daemon.
$ sudo systemctl start chronyd
$ sudo systemctl enable chronyd
Now, modify the configuration file:
$ sudo vim /etc/chrony.conf
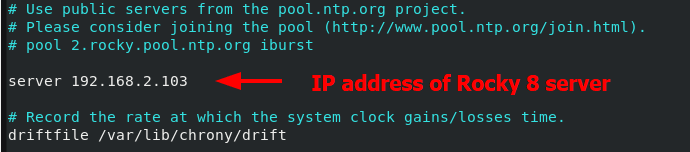
Comment out the pool address and add this line where the IP address corresponds to the IP of the NTP server.
server 192.168.2.103
Save the changes and exit.
Next, start the NTP synchronization
$ sudo timedatectl set-ntp true
To apply the changes, restart the Chrony service.
$ sudo systemctl restart chronyd
Step 6: Verify Time Synchronization on NTP Clients
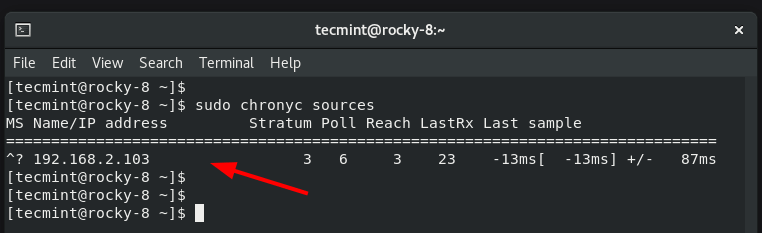
Now verify the time synchronization as follows.
$ sudo chronyc sources
From the output, you can see that the Name/IP address column reflects the IP address of the Rocky NTP server. This shows that the client is synchronizing time and date settings from the server.
To verify Chrony tracking run the command:
$ chronyc tracking
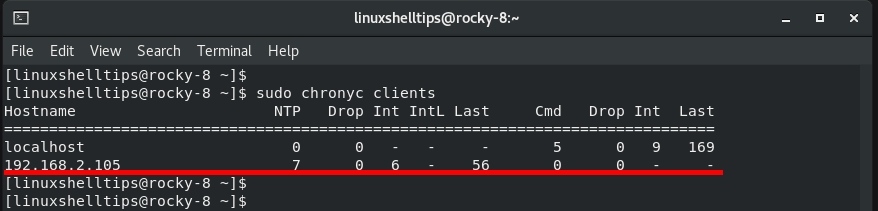
Back at the server, you can verify the NTP clients. You should see your NTP client listed as indicated below.
$ sudo chronyc clients
Conclusion
Chrony is a powerful time synchronization tool that is an implementation of the NTP protocol. In this guide, we installed the Chrony NTP server on Rocky Linux 9/8 and configured a client system to synchronize time using the NTP server.
That is all for this guide. Your feedback is much welcome.