Docker is an open-source containerization technology that is designed to create, deploy and run container-based applications. In this article, you will learn how to install the Docker Community Edition (CE) on Linux Mint 20.
If you have any older version of docker already installed in your machine you have to remove it.
$ sudo apt-get remove docker docker-engine docker.io containerd runc
Let’s get started…
How to Install Docker in Linux Mint
Now there are three ways you can install Docker in Linux Mint.
- Setting up docker repository.
- Download and install the .deb package locally.
- Using Docker installation script.
1. Install Docker Using Repository
Using this method we will add the Docker repository to the apt package manager index and will install the docker from there. By default apt will not support HTTPS, you have to enable it.
$ sudo apt update
$ sudo apt install apt-transport-https ca-certificates curl gnupg lsb-release -y
Now add GPG key for docker.
$ curl -fsSL https://download.docker.com/linux/ubuntu/gpg | sudo gpg --dearmor -o /usr/share/keyrings/docker-archive-keyring.gpg
Now add the stable repository. As per the official documentation, if you use Linux Mint and if you face any installation issue then replace $(lsb_release -cs) with your parent Ubuntu distribution. In my case, my parent ubuntu distribution will be focal.
echo \
  "deb [arch=amd64 signed-by=/usr/share/keyrings/docker-archive-keyring.gpg] https://download.docker.com/linux/ubuntu \
  focal stable" | sudo tee /etc/apt/sources.list.d/docker.list > /dev/null
Update the repository and install the docker package using the below command.
$ sudo apt update
$ sudo apt-get install docker-ce docker-ce-cli containerd.io
2. Install Docker Manually Using Deb Package
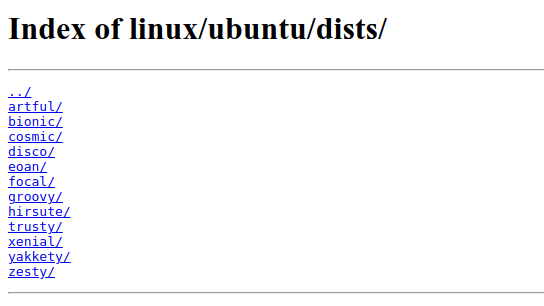
In this method, we will download the .deb file and install it locally using the apt or dpkg command. Go to the docker index page from where you can download the .deb file. If you take a look at the below image there is no package for ulyana so I will download .deb from focal.
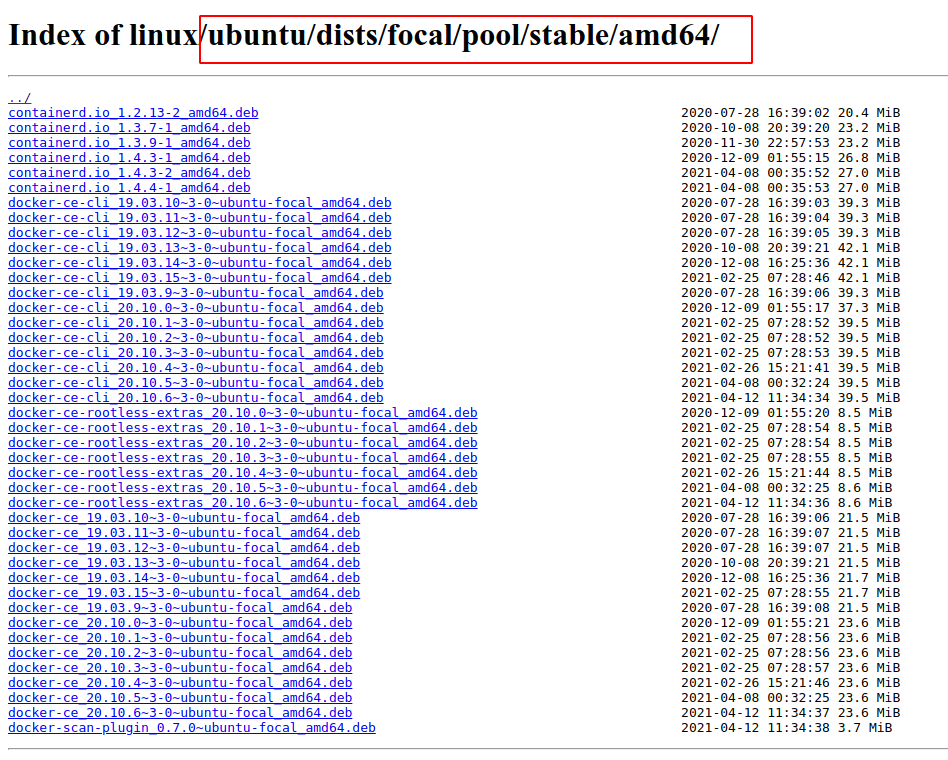
You can go inside “ubuntu/dists/focal/pool/stable/amd64/” and download .deb package for the Docker Engine version you wish to install.
Once you have downloaded the packages go inside the directory where the file is downloaded and run the following command.
$ sudo dpkg -i /home/karthick/downloads/package.deb
3. Install Docker Using Installation Script
In this method, you will install docker using a shell script which will take care of installing docker in your machine. This script will try to install the latest version that is released under the edge channel. If you already have docker installed in your machine, running this script will cause issues. Run the following command to download and run the script.
$ curl -fsSL https://get.docker.com -o get-docker.sh
$ sudo sh get-docker.sh
How to Validate the Docker Installation
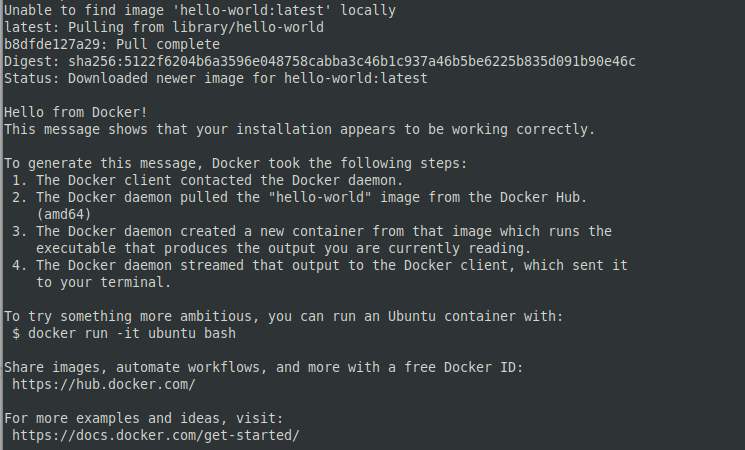
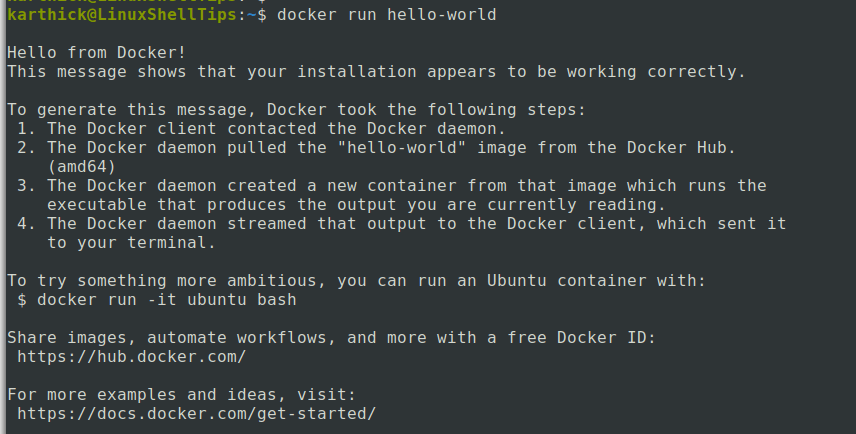
You can choose any of the three methods described in previous sections for installing docker. Once the installation is completed you can run the “hello-world” container to check if your installation is successful.
$ sudo docker run hello-world
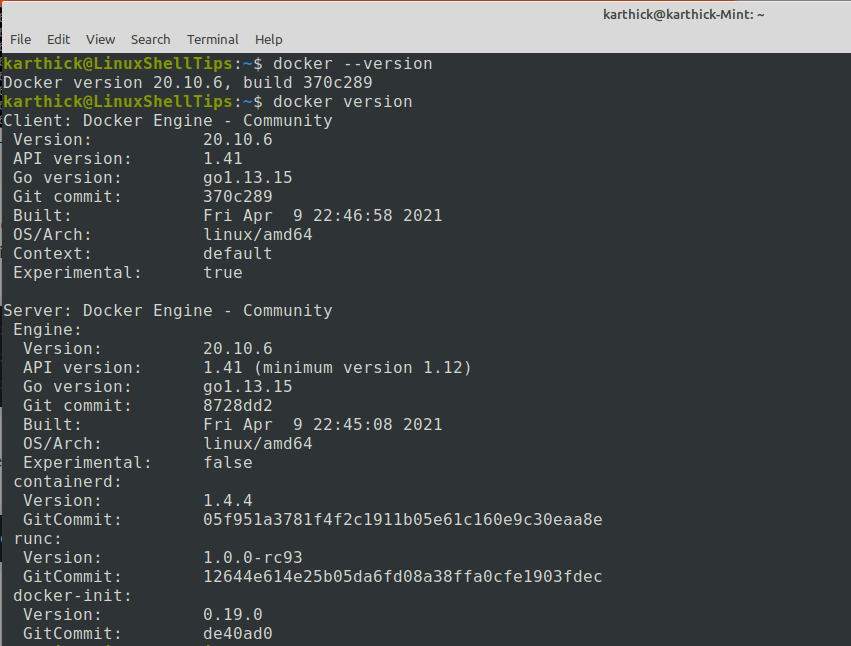
To check the docker version run the following command.
$ docker --version
$ docker version
In Ubuntu-based distribution, docker will be automatically started and enabled to start during boot.
$ systemctl is-active docker
$ systemctl is-enabled docker
$ systemctl status docker
$ systemctl start docker
$ systemctl stop docker
How to Run Docker as a Normal User
Instead of binding with TCP socket docker binds with Unix socket which is accessible only by root. If you wish not to use sudo every time to work with docker then you can create a group called docker and add non-root users into the group.
$ sudo groupadd docker
$ sudo usermod -aG docker karthick
Now open a new terminal and run the hello-world container without sudo. From the below image you can see I am able to successfully run the container without sudo privilege.
$ sudo docker run hello-world
That’s it for this article. If you have any feedback use the comment section.
Man, the article is misleading for the method to install docker manually through the deb package.
I followed your instruction and went to the download site, went into ..focal/pool/stable/ location.
There are a multitude of packages listed there.
As per your article, “download .deb file of the version of docker engine you want to install”.
Dude, I downloaded one deb file which was the latest date, I did ‘docker –version‘ which worked fine, but to my surprise when I did ‘sudo docker run hello-world‘ it says docker engine not running!!
I thought, how, I just installed it as per your instruction, and wasted my time doing different commands. then from the docker docs, I saw YOU NEED TO DOWNLOAD MULTIPLE FILES FROM DOWNLOAD SITE AND THEN INSTALL EACH OF THEM.
Dude, you didn’t even explain how many files (s) to download and install!!
You mentioned “download .deb FILE“, see singular.!!
I used the install script successfully the first time through. After playing with the installation for a while. I thought it would be a good idea to clean up and start again with a clean slate.
So:
1. I removed my docker installation with the remove docker instructions given at the beginning.
2. I ran the script again and it failed promptly with GPG errors. So figured the removal might not have been complete, and sure enough, there was a hidden folder .docker still present which I deleted, and for good measure, I deleted the get-docker.sh.
3. I got a fresh copy of the script. and tried again. This time I had execution privileges problems with the script. I recalled that I had had the same problem the first time through, and corrected it with chmod a+x.
4. Finally, the script ran as it should.
I am not certain that what I did was proper, but I can proceed now. This script is great. In the process I explored the other two methods without success: With the first method, I kept having problems with GPG errors and so moved on to Method 2. where I was unable to find the .deb file you referred to. So I moved on to method 3, where I had success.
Thank you so much for this! I’ve been trying to get Docker Desktop installed in Mint for a couple of days now and never could get it to work. I’ve searched and searched, followed guide after guide and none of them worked until I found yours, which finally allowed me to install Desktop.
Thank you for this great article on Docker…
As a day-1 Linux Mint user (with no previous Linux experience), I’ve been rather impressed that this distro meets & often exceeds my previous Windows experience.
Unfortunately, my self-taught CLI lessons have been less than stellar; at a rate of probably 20%, I run into errors after eliminating syntax issues, spelling, etc.
Having followed the tutorial all the way through the “groupadd” section, I attempt to run the su-less “hello-world” command in docker & am met with:
docker: Got permission denied while trying to connect to the Docker daemon socket at unix:///var/run/docker.sock: Post “http://%2Fvar%2Frun%2Fdocker.sock/v1.24/containers/create”: dial unix /var/run/docker.sock: connect: permission denied.
See ‘docker run –help’.
Previous CLI obstacles I’ve encountered have almost always been either incorrect permissions or generating terminal commands from the wrong directory. I suspect the former is the case here after a perusal of the error message. However, I don’t know what directory or file requires permission or what permission it requires (x would be my guess).
@bobkarr,
just open the terminal and type this command to fix it…
That absolutely solved it! Why wasn’t it in the tutorial? I would have been lost without this comment.