The fastest way to create, launch, and manage a content-based website is through CMS (Content Management System) software. CMS presents a unique approach to website design and development such that any user without an in-depth technical background can quickly adapt to its usage.
It is due to the resourcefulness of numerous plugins and themes available for installation. Joomla is a world-renowned content management system (CMS) powered by PHP programming language. It is a free and open-source CMS that relies on an sql-based database engine for data storage.
This article will give us a walk-through on the installation and configuration of Joomla CMS on the Ubuntu 22.04/20.04 operating system.
Prerequisites
Make sure you are a sudoer/root user or have such privileges on the Ubuntu 20.04 system you are using.
Installing Apache and PHP in Ubuntu
Your Ubuntu system needs to be up-to-date for it to give the best performance and user experience.
$ sudo apt update && sudo apt upgrade -y
Apache is an ideal and compatible web server software for Joomla CMS. Also, since PHP is the primary development language behind the creation of Joomla CMS.
Before installing Apache and PHP, we need to have a few following dependencies installed on the system.
$ sudo apt install lsb-release ca-certificates apt-transport-https software-properties-common language-pack-en-base -y
$ sudo locale-gen en_US.UTF-8
Once the above dependencies are installed, you can install Apache and PHP as shown.
$ sudo apt install apache2 -y
$ sudo add-apt-repository ppa:ondrej/php
$ sudo apt install php8.1
$ sudo apt install openssl php8.1-imagick php8.1-curl php8.1-gd php8.1-imap php8.1-intl php8.1-ldap php8.1-mbstring php8.1-mysql php8.1-smbclient php8.1-ssh2  php8.1-xml php8.1-zip libapache2-mod-php8.1
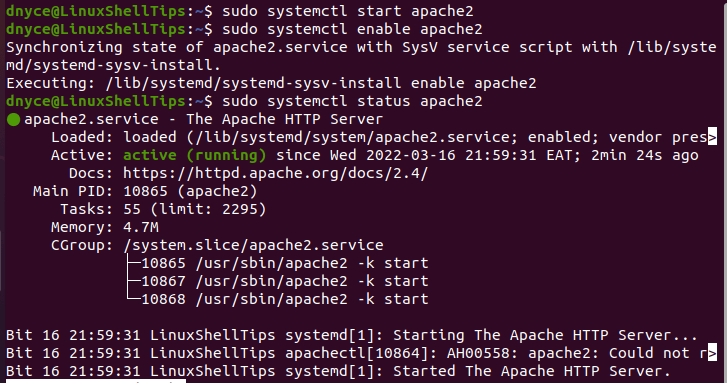
Next, start, enable and verify the status of the Apache server.
$ sudo systemctl start apache2
$ sudo systemctl enable apache2
$ sudo systemctl status apache2
Install MariaDB Database Server
We need a database server that will be responsible for storing and processing user/CMS-generated data. MariaDB is an ideal open-source server for this task. To install it on Ubuntu, execute the following terminal command:
$ sudo apt install mariadb-server
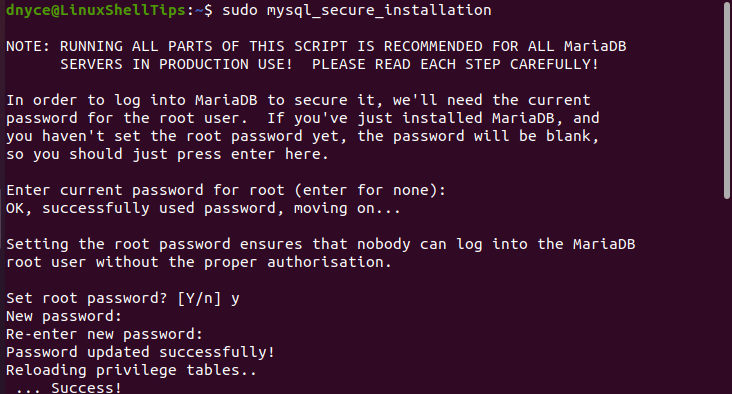
After the MariaDB server installation process completes, secure it by executing the following command on your terminal.
$ sudo mysql_secure_installation
Through this command, you can set the root database user password, remove anonymous user, disallow root login remotely, remove test the database, and reload privilege tables..
Create MySQL Database for Joomla
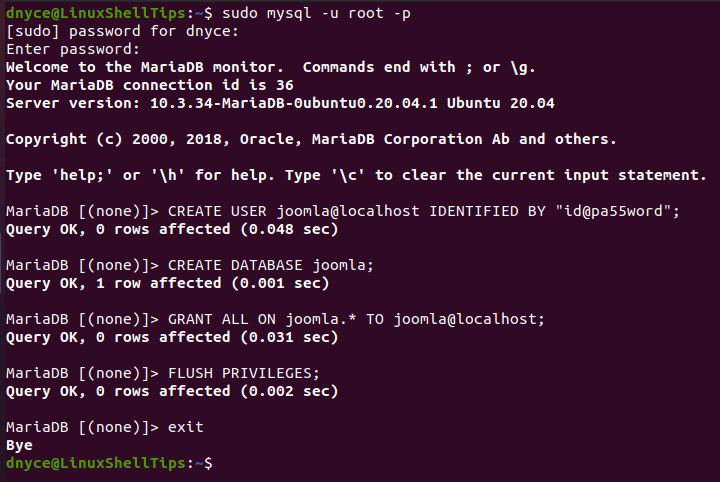
Access the database as a Sudoer user due to Ubuntu’s default use of Unix_auth_socket_plugin for MySQL.
$ sudo mysql -u root -p
We now need to create a Joomla user and database.
MariaDB [(none)]> CREATE USER joomla@localhost IDENTIFIED BY "Your_joomla_user_password";
MariaDB [(none)]> CREATE DATABASE joomla;
MariaDB [(none)]> GRANT ALL ON joomla.* TO joomla@localhost;
MariaDB [(none)]> FLUSH PRIVILEGES;
MariaDB [(none)]> EXIT;
With the above commands, we created a Joomla database user, a Joomla database, and assigned all the database privileges to the created user.
Install Joomla CMS on Ubuntu
To install the latest Joomla version, head over to the Joomla download page or use the following wget command to download it.
$ wget https://downloads.joomla.org/cms/joomla4/4-1-0/Joomla_4-1-0-Stable-Full_Package.tar.gz -O joomla.tar.gz
Next, extract joomla to /var/www/html/joomla directory and set appropriate permissions.
$ sudo mkdir -p /var/www/html/joomla
$ sudo tar -xvf joomla.tar.gz -C /var/www/html/joomla
$ sudo chown -R www-data:www-data /var/www/html/joomla/
$ sudo chmod -R 755 /var/www/html/joomla/
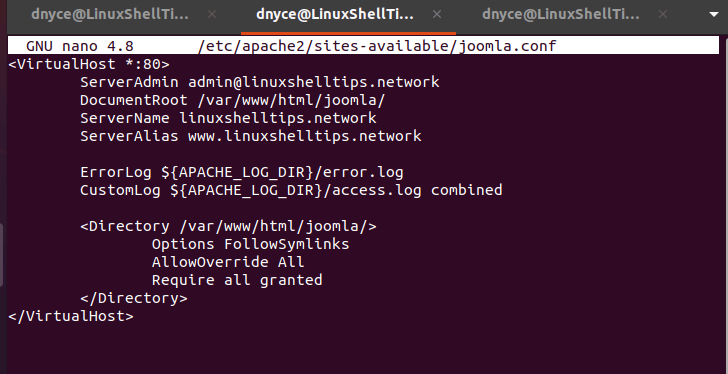
Next, create an Apache virtual host for Joomla.
$ sudo nano /etc/apache2/sites-available/joomla.conf
Add the following virtual host configuration.
<VirtualHost *:80>
    ServerAdmin [email protected]
    DocumentRoot /var/www/html/joomla/
    ServerName linuxshelltips.network
    ServerAlias www.linuxshelltips.network
    ErrorLog ${APACHE_LOG_DIR}/error.log
    CustomLog ${APACHE_LOG_DIR}/access.log combined

    <Directory /var/www/html/joomla/>
            Options FollowSymLinks
            AllowOverride All
            Require all granted
    </Directory>
</VirtualHost>
Enable the configuration file:
$ sudo a2ensite joomla.conf
$ sudo a2enmod rewrite
Finally, restart the Apache service.
$ sudo systemctl restart apache2
Finalizing Joomla Installation via Web Browser
Access your Server Name from a web browser to complete Joomla’s setup.
http://linuxshelltips.lan.network
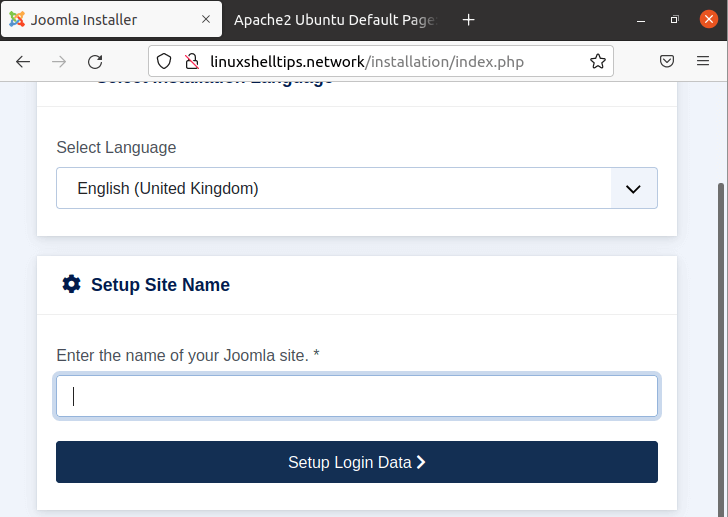
Key-in the needed information to configure your Joomla site.
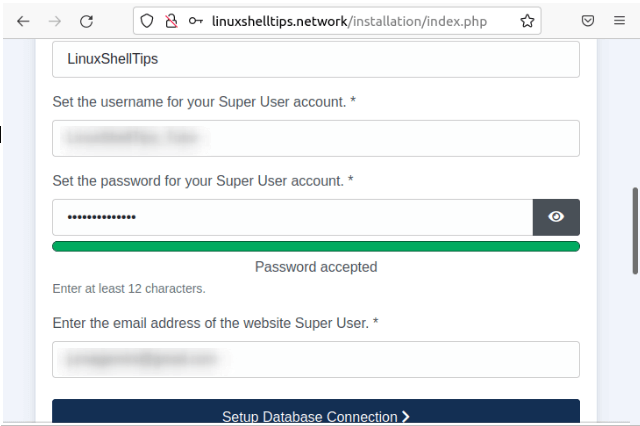
Fill in the Site’s Login Data.
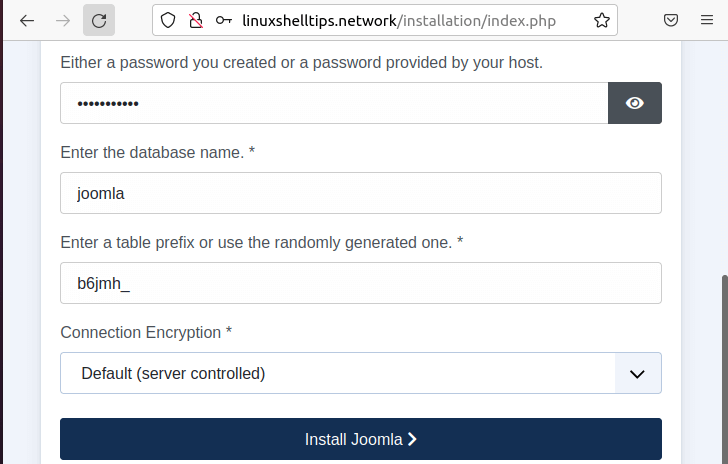
Configure the database with the MariaDB credentials you created earlier.
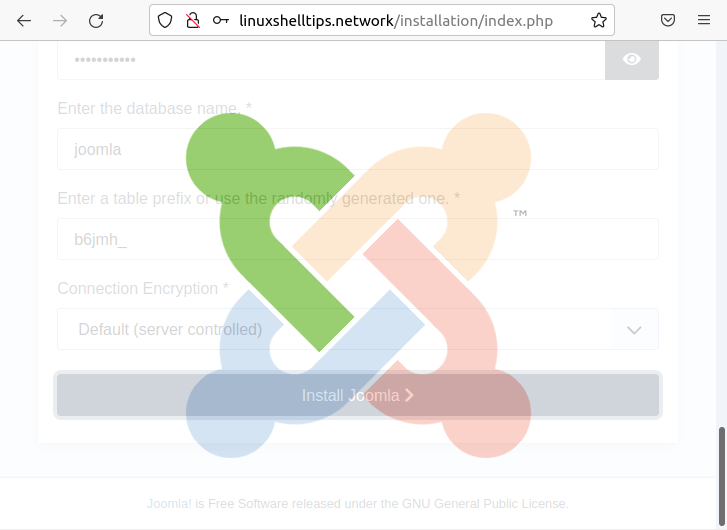
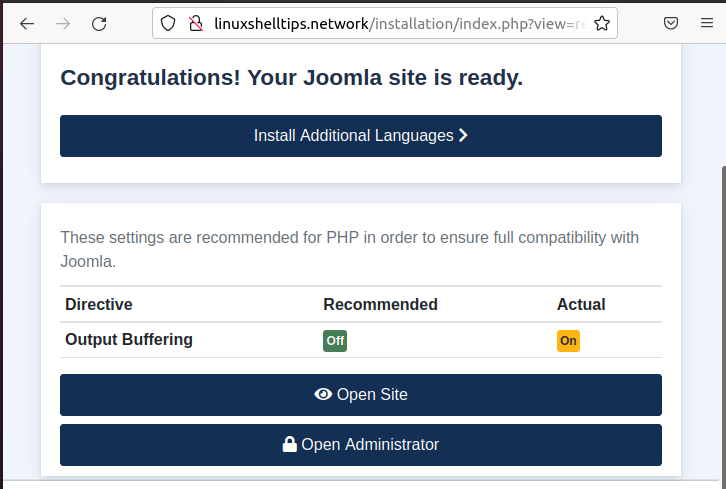
The installation process should then begin. Be patient as it could take some time to complete.
Afterward, you should be greeted by the following interface:
From here, you should be able to find your way around managing and publishing content on Joomla. With this article, you are ready to take Joomla CMS to the next level.