Brief: This article guide will walk us through the installation of Node.js on the Rocky Linux 9 and Rocky Linux 8 distributions and also demonstrate its basic usage.
Node.js is a JavaScript runtime that is free and open-source to the Linux community. As for its development, it’s built on Chrome’s V8 JavaScript engine.
Node.js enables developers and users to build scalable and high-performance network applications. Its wide range of features makes it ideal for the development of distributed device applications as it attributes the apps as data-intensive and real-time.
Installing Node.js on Rocky Linux Using AppStream Repository
First, make sure to keep the Rocky Linux system packages up-to-date by running the following command.
# dnf update -y
Next, we will be using the default AppStream repository to install the available Node.js version as shown.
# dnf module list nodejs        [List Node.js Stream]
# dnf module enable nodejs:16   [Enable Node.js 16 Stream]
# dnf install nodejs -y         [Install Node.js 16 Version]
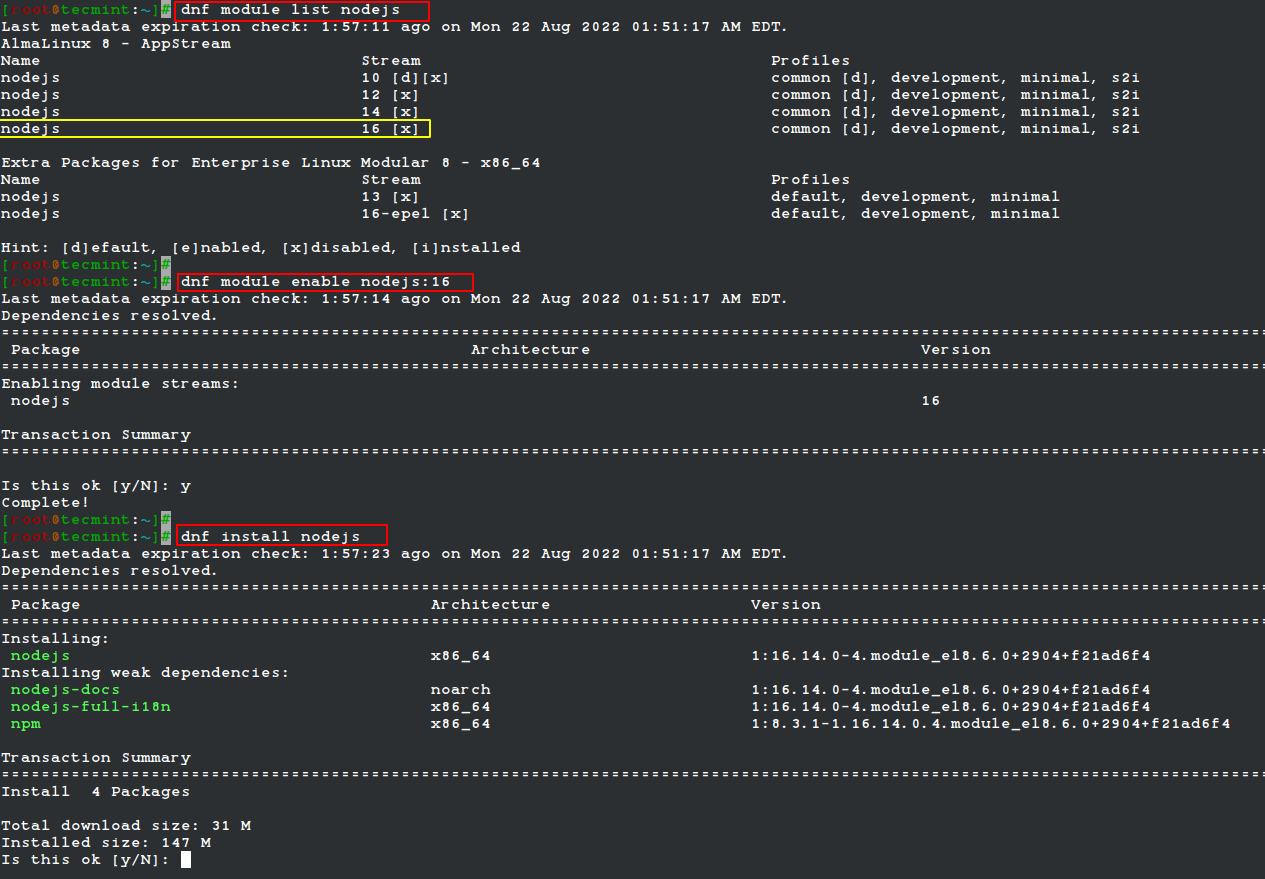
Once installed, you can verify Node.js by running the following command:
# node -v && npm -v

v16.4.0
8.3.1
Installing Node.js on Rocky Linux Using NodeSource Repository
The NodeSource repository allows us to fetch the latest Node.js version release via the dnf package manager. At the time of writing this article, the latest current release is Node.js 18.
We will use the curl command to download the NodeSource repository as shown.
# curl -fsSL https://rpm.nodesource.com/setup_current.x | sudo -E bash -
With the NodeSource repository installed, we should be able to retrieve and install the latest Node.js version.
# dnf update
# dnf -y install nodejs
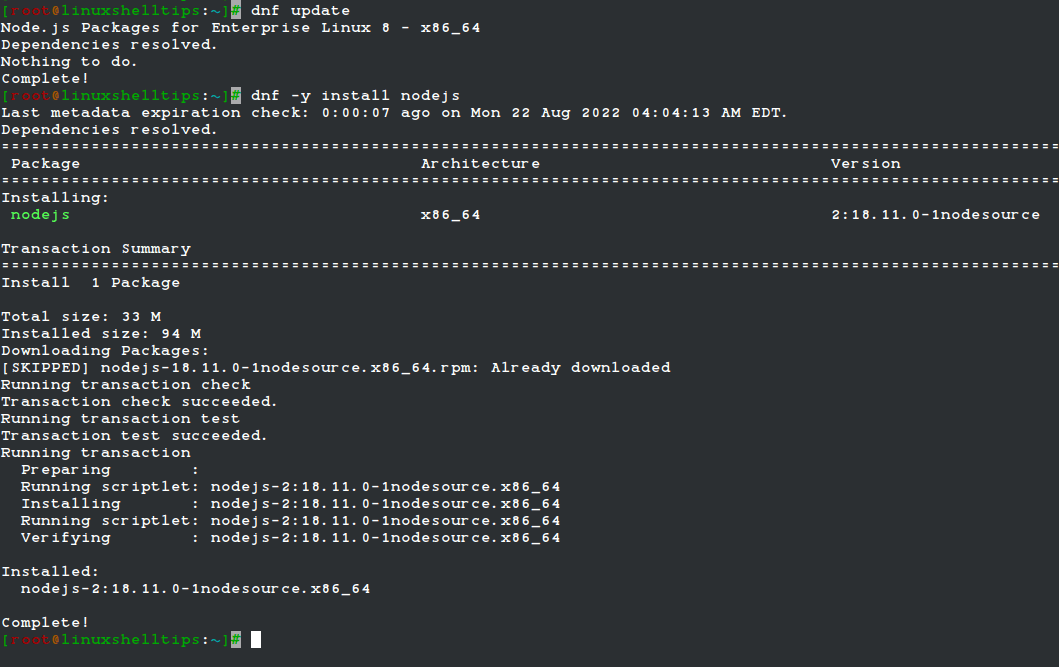
After the Node.js installation process completes, confirm the installed Node.js version:
# node -v && npm -v

v18.11.0
8.19.2
Getting Started with Node.js in Rocky Linux
With the latest version of Node.js installed on your Rocky Linux system, you can now get started on your first project.
To use the Node.js package manager (npm), make use of the command.
$ npm -h

The above command should give you a quick preview of the use of the npm package manager in managing your projects.
To configure your first web server, create a file with a .js extension and implement the following content:
$ nano my_app.js
Add the following data:
const http = require('http');
const hostname = '127.0.0.1';
const port = 3000;
const server = http.createServer((req, res) => {
      res.statusCode = 200;
      res.setHeader('Content-Type', 'text/plain');
      res.end('Hello LinuxShellTips World and welcome to Node.js on Rocky Linux'); });
server.listen(port, hostname, () => {
      console.log(`Server running at http://${hostname}:${port}/`);
});
Execute the above file with the command:
$ node my_app.js
With the Node.js server running, visit:
http://127.0.0.1:3000

Your Rocky Linux system is now ready to explore what Node.js has to offer.