OBS Studio is the go-to application software for Linux users that have always craved to own and customize their own video streaming server from the comfort of their Linux desktop or server OS distribution.
OBS Studio is a free and open-source software implying that once it is fully installed on your Linux operating system, you have the freedom of exploring it to your satisfaction without worrying about things like the renewal of an expired software license.
[ You might also like: How to Install Jellyfin Media Server in Ubuntu, Debian & Mint ]
Therefore, this video streaming server software offers optimum capturing, recording, and live streaming performances related to your current/targeted media files.
OBS Studio Prime Features
Some of OBS Studio video streaming server software prime features include the following:
-
- Modular Dock UI – This feature makes it possible to customize/rearrange the app’s layout to your preference.
- Streamlined Settings Panel – With this feature, your broadcast or recording can be scaled/tweaked due to numerous configuration options available.
- Customization Options – OBS configuration options are powerful and easily usable. Also, adjusting its configuration properties take little to no effort.
- Audio Mixer – Its audio mixer is very intuitive and equipped with per-source filters like gain, noise suppression, and noise gate.
- Custom Transitions – It gives OBS Studio the power to seamlessly switch between scenes (after unlimited scenes setup).
- Video/Audio Mixing – The video/audio mixing and capturing are in real-time without losing the high-performance aspect. From here, creating multiple sourced scenes from capture cards, browser windows, images, webcams, text, and window captures is highly viable.
Also, OBS Studio usage is not just limited to personal projects as it is also ideal for creating professional productions because of its different and customizable transitions, set hotkeys, studio mode, and multiview features.
Installing OBS Studio in Linux
Your Linux system needs to be up to date for optimal performance of the OBS Studio software we are going to install.
$ sudo dnf update && sudo dnf upgrade -y          [On RHEL/CentOS/Fedora and Rocky Linux/AlmaLinux]
$ sudo apt update && sudo apt upgrade -y          [On Debian, Ubuntu and Mint]
$ sudo zypper refresh && sudo zypper update -y    [On OpenSUSE]
$ sudo pacman -Syu                                [On Arch Linux]
Next, you will need to install the v4l2loopback-dkms module for virtual camera support and then install OBS Studio with the following commands on respective Linux distributions.
Install OBS Studio in Red Hat/Fedora-based Linux
The OBS Studio is included in the RPM Fusion repository, so you need to install it with the following commands:
$ sudo dnf install https://download1.rpmfusion.org/free/fedora/rpmfusion-free-release-$(rpm -E %fedora).noarch.rpm https://download1.rpmfusion.org/nonfree/fedora/rpmfusion-nonfree-release-$(rpm -E %fedora).noarch.rpm
$ sudo dnf install obs-studio
$ sudo dnf install xorg-x11-drv-nvidia-cuda         [For NVIDIA Hardware]
$ sudo dnf install xorg-x11-drv-nvidia-340xx-cuda   [For Older Card]
Install OBS Studio in Debian/Ubuntu-based Linux
The OBS Studio is included in the default repositories, so you need to install it with the following commands:
$ sudo apt install v4l2loopback-dkms
$ sudo apt install ffmpeg
$ sudo add-apt-repository ppa:obsproject/obs-studio
$ sudo apt update
$ sudo apt install obs-studio -y
Install OBS Studio in Arch Linux-based/Manjaro
$ sudo pacman -Sy v4l2loopback-dkms
$ sudo pacman -S obs-studio
Install OBS Studio in OpenSUSE
$ sudo zypper install v4l2loopback-kmp-default
$ sudo zypper ar -cfp 90 http://ftp.gwdg.de/pub/linux/misc/packman/suse/openSUSE_Tumbleweed/ packman  [For openSUSE Tumbleweed]
$ sudo zypper ar -cfp 90 'https://ftp.gwdg.de/pub/linux/misc/packman/suse/openSUSE_Leap_$releasever/' [For openSUSE Leap]
$ sudo zypper dup --from packman --allow-vendor-change
$ sudo zypper in obs-studio
Install OBS Studio in Gentoo
$ sudo emerge media-video/obs-studio
Launching OBS Studio in Linux
Launch OBS Studio from the Applications Menu.
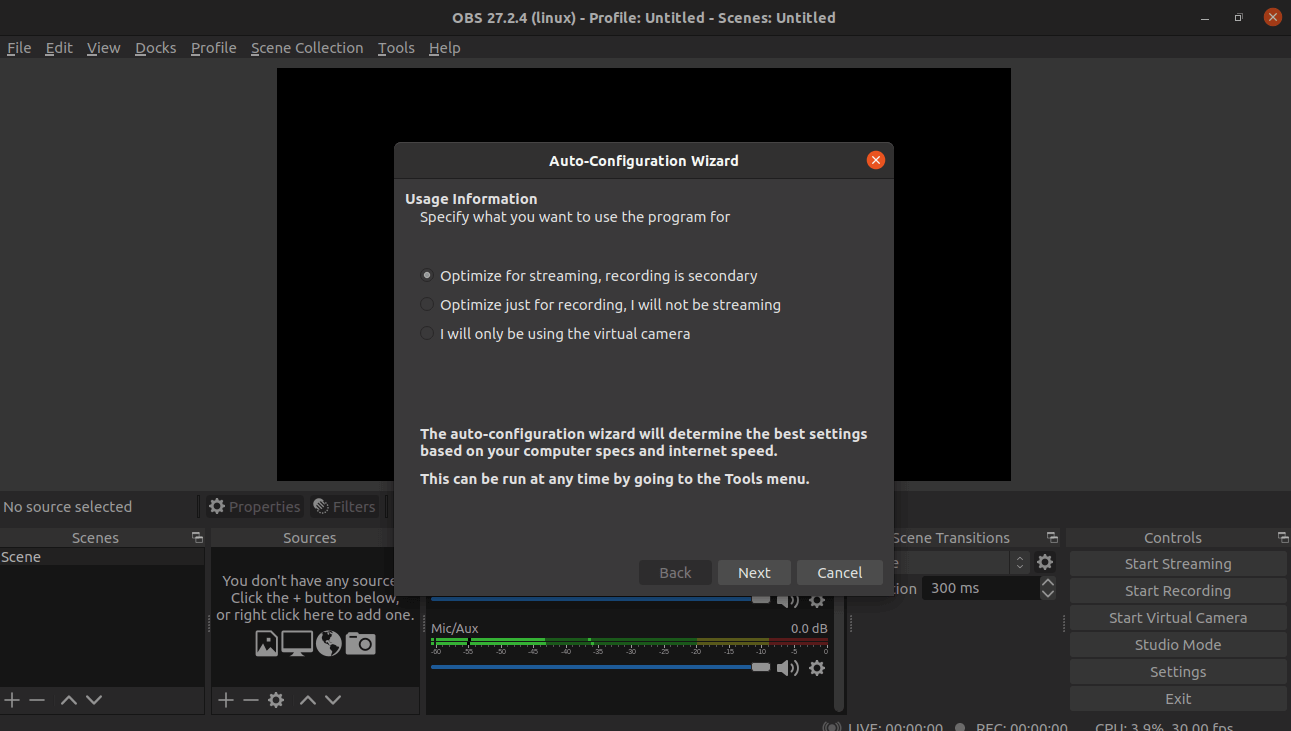
Click Next after confirming usage information…
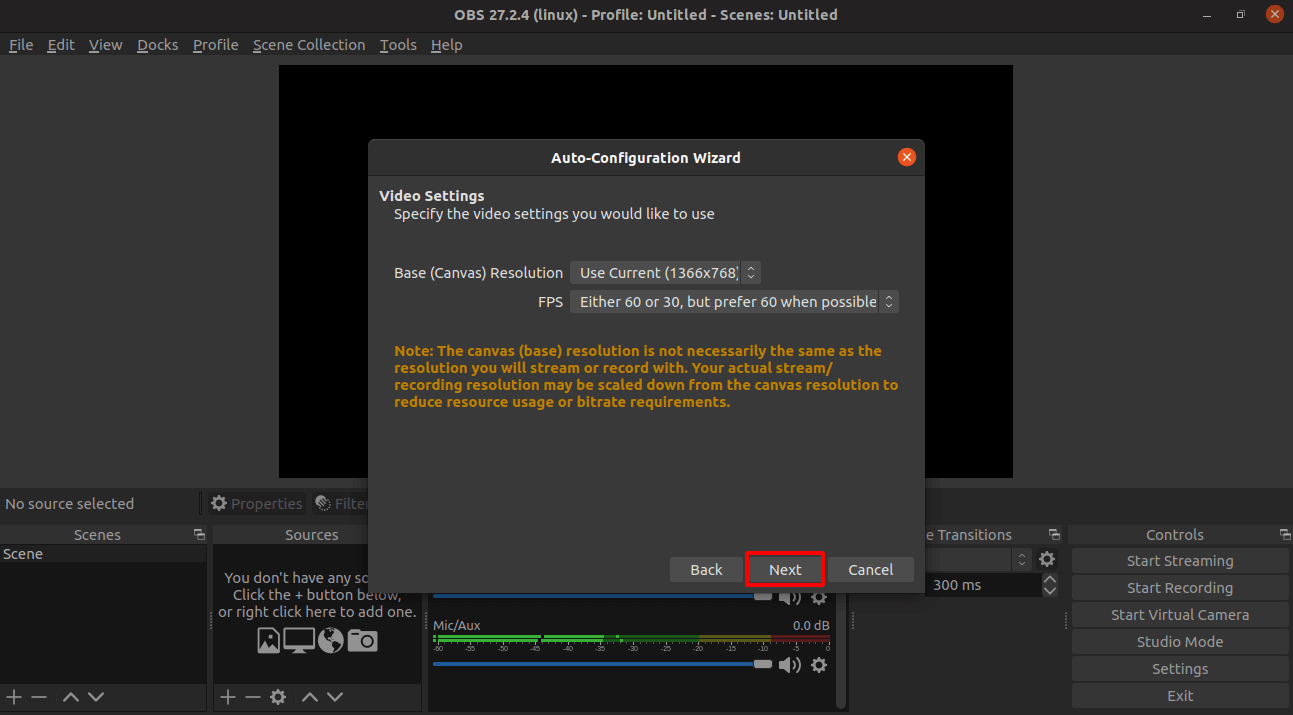
Choose the preferred video setting and click Next.
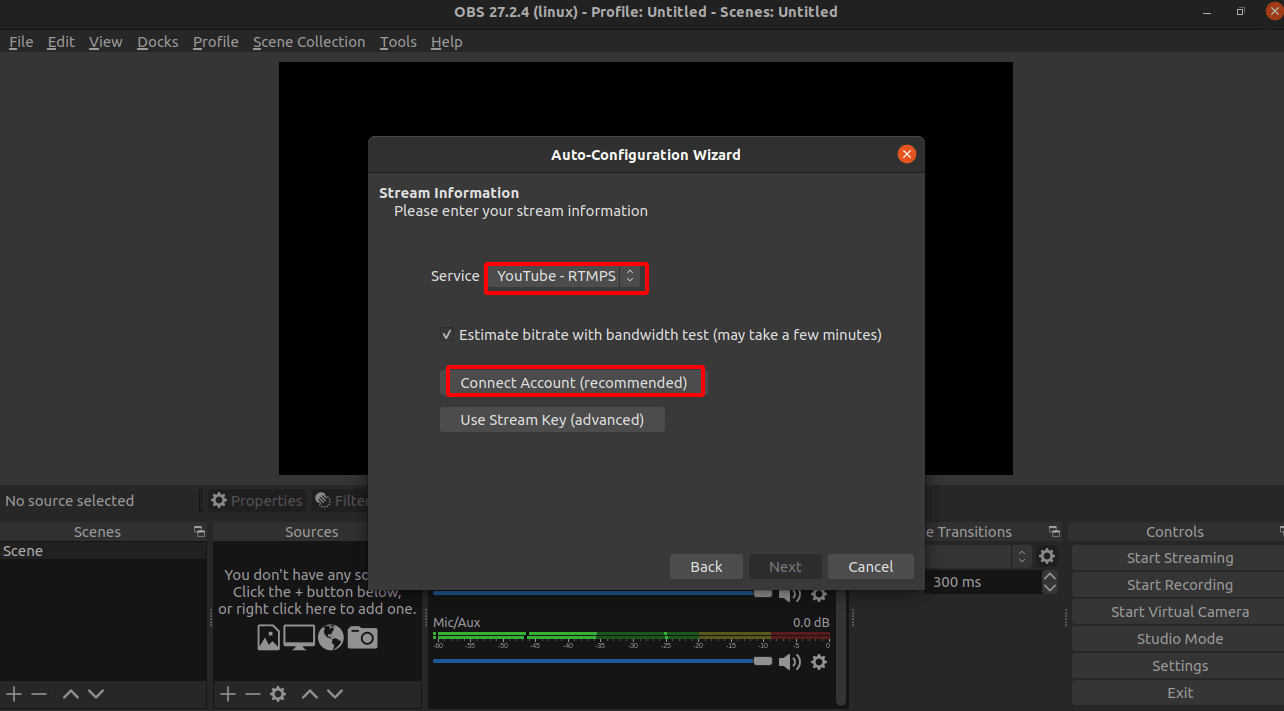
Configure Stream Information depending on the Stream Service you wish to use.
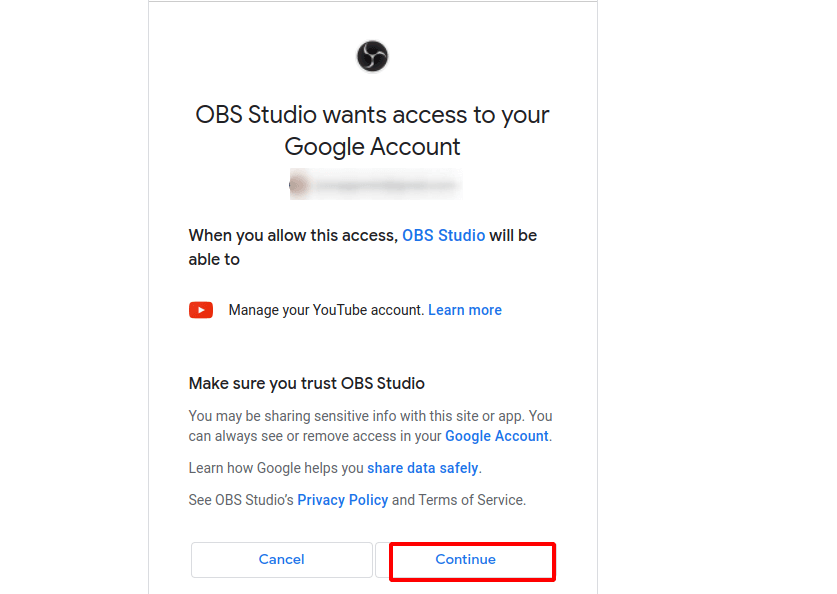
For instance, to stream via the YouTube stream service, click Connect Account and you will be redirected to a web browser to complete the Account Set Up.
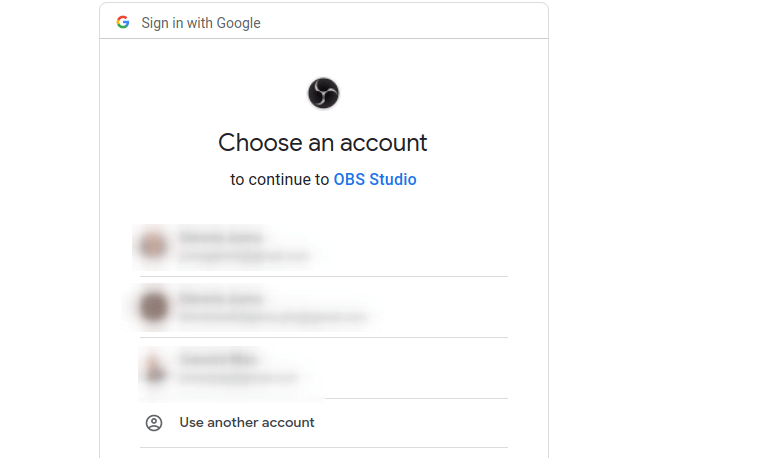
Grant OBS the needed access permission.
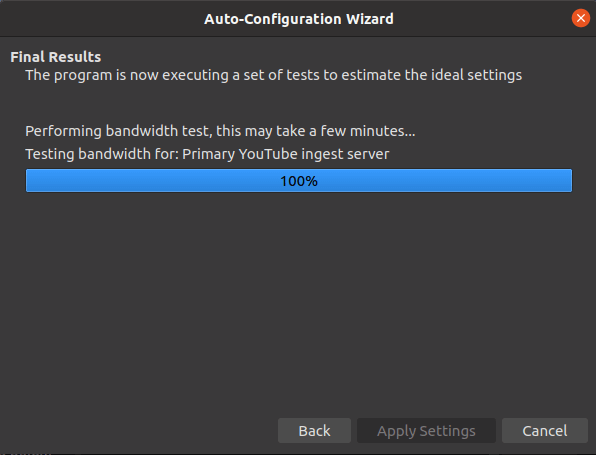
You will be redirected back to the OBS app and then click Next to open the auto-configuration wizard as shown.
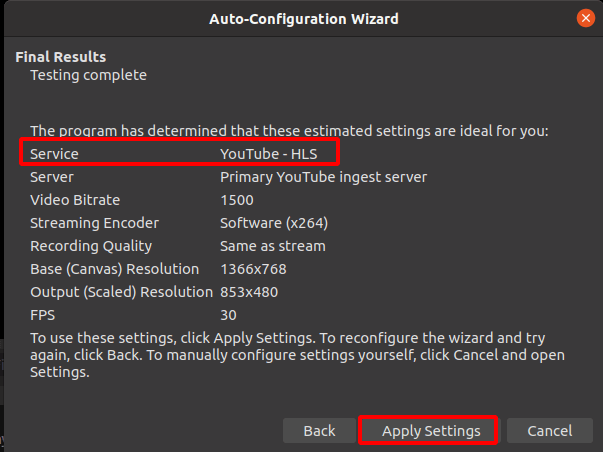
Apply the viable detected streaming settings.
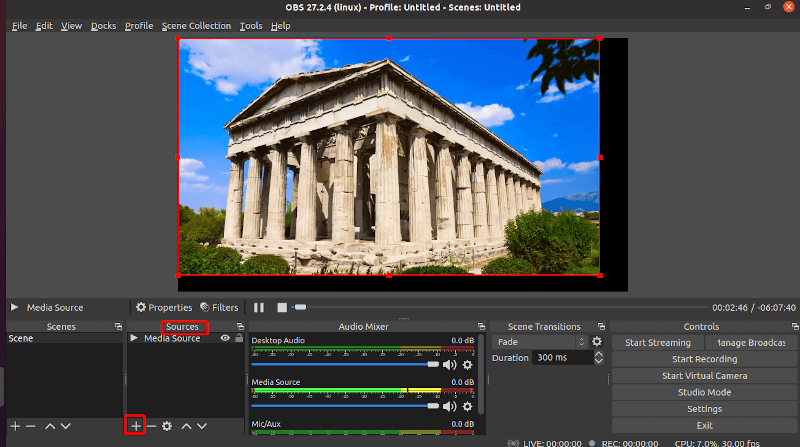
You will be presented with the following screen capture.

Close the YouTube Chat Window on the far right. Go to the Sources tab and click the + button to start your streams.
There are more than enough functionality features to explore under OBS Studio.

With this article, you should be able to do more than create video streams under OBS Studio.
You should add one step for Fedora/RHEL/CentOS installs of OBS Studio. To enable the VirtualCamera option, you also need to install the v4l2loopback packages.