Through TCP/IP protocol, Samba makes file sharing possible between two operating systems not sharing the same architecture. Through CIFS (Common Internet File System) and SMB (Server Message Block) protocols, this open-source software has made file and print sharing services easier for major operating system distributions.
[ You might also like: How to Install Samba on RHEL and CentOS Stream ]
Samba is supported by numerous operating system platforms and environments like SunOS 4, OpenBSD, Aix, Solaris 2, and later versions, Windows, and Linux. The basic packages included in the Samba installation are samba-common, samba-client, and samba server.
Installing Samba on Rocky Linux
To install a Samba file and print sharing software application on your Rocky Linux or AlmaLinux, consider using the dnf package manager.
Before we execute the main installation command, run a system update on the operating system you are using:
$ sudo dnf update
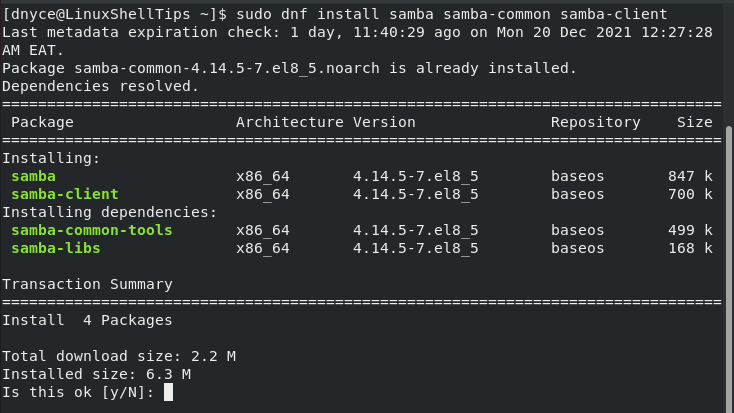
With your operating system now refreshed and up-to-date, we can proceed to install samba and its related packages with the following command.
$ sudo dnf install samba samba-common samba-client
The smb daemon manages file transfer and sharing while nmb is responsible for NetBIOS name resolution. It makes it possible for users to access, view, and browse shareable resources.
To enable these two daemons, execute the following command:
$ sudo systemctl enable --now {smb,nmb}
Remote users need to be able to access your samba-configured machine to view, edit or copy shared resources in relation to their designated user permissions. Adding Samba to the system firewall will permit client computers access to it.
$ sudo firewall-cmd --permanent --add-service=samba
$ sudo firewall-cmd --reload
Creating Samba Users Shared Directory
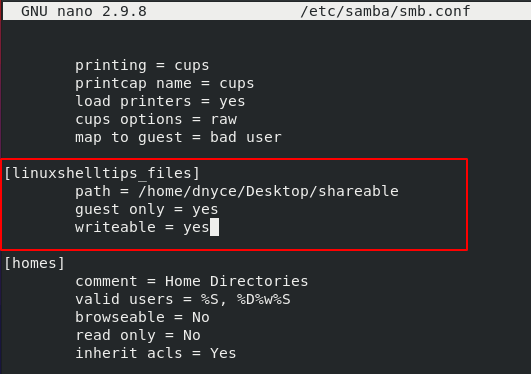
Guest users do not need password authentication to access shared files on a samba server. Trace [global] section on file /etc/samba/smb.conf.
$ sudo nano /etc/samba/smb.conf
Create the entry:
map to guest = bad user

With this configuration, any user that will access the Samba server under username nobody will access shareable files.
A new stanza is needed to define which shareable directory this user can access.
Creating Samba Users for Shared Directory
Alternatively, you could require your Samba users to password authenticate their access to shared files. You will first need to create a dedicated samba user with the needed credentials.
$ sudo adduser -M samba_user -s /sbin/nologin
To create the needed user authentication password, we will add this user to the Samba database.
$ sudo smbpasswd -a samba_user
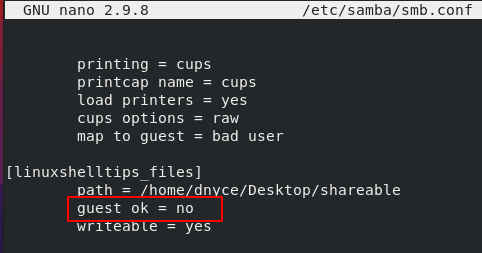
To use this user, re-edit /etc/samba/smb.conf configuration file.
$ sudo nano /etc/samba/smb.conf
The new entry guest ok = no requires Samba users to provide a username and password for their file sharing access.
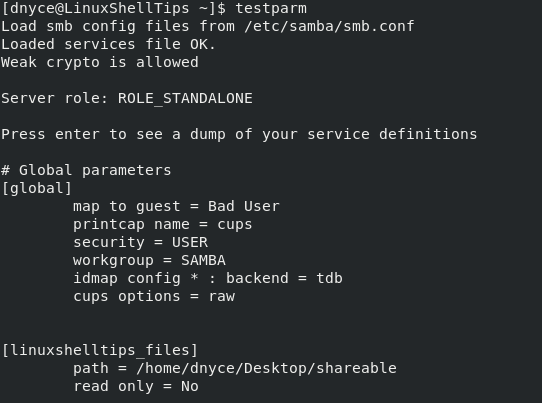
Check for Samba syntax errors on this configuration file.
$ testparm
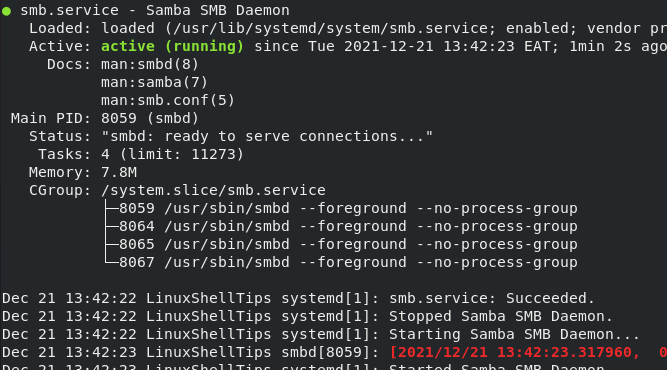
Finally, restart the two daemons and check on their status.
$ sudo systemctl restart {smb,nmb}
$ sudo systemctl status {smb,nmb}
Accessing Samba Shares from Windows Machine
On your Windows machine, log in and create a shortcut from anywhere and name of this shortcut should be the Samba server IP address together with its share name called “linuxshelltips_files“:
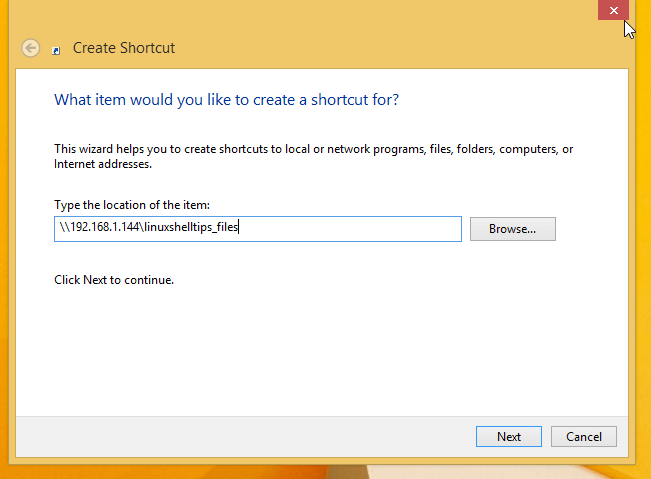
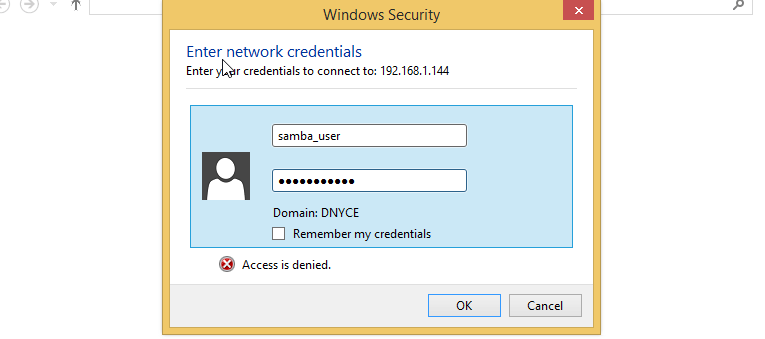
On the next screen, click Finish and open the created shortcut and you will be prompted for a Samba username and password.
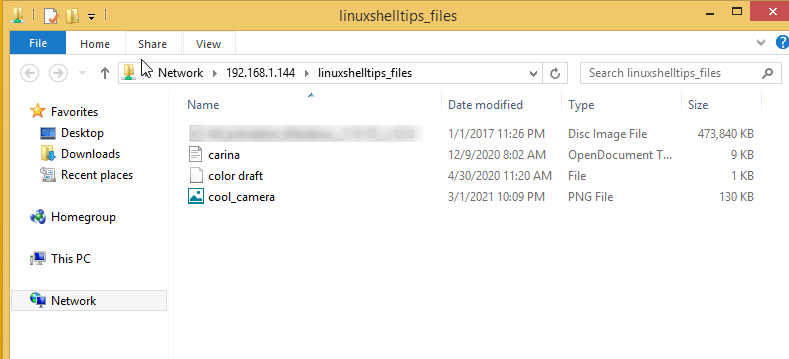
From here, you should be able to access your shared files.
Samba is the perfect file-sharing bridge between operating systems with different software architecture. It is easy to configure, adaptable, and expansive.