WordPress is a free and open-source content management system that is very popular among bloggers, but it can be used for more than just blogging. With WordPress, you can create powerful dynamic websites, mobile apps, and web apps.
[ You might also like: Install WordPress with LEMP Stack on Ubuntu 20.04 ]
In this tutorial, we are going to show you how you can download and install WordPress with the LAMP (Linux, Apache, MySQL, and PHP) stack on Ubuntu 20.04 and Ubuntu 18.04.
Prerequisites
- An Ubuntu 20.04 server with the LAMP stack installed.
- A user with sudo privileges.
Let’s get started…
Install WordPress on Ubuntu Server
If you have a domain name and you would like it to resolve to your WordPress website, then proceed as follows. First, ensure that the DNS A record for your domain name is pointed at the public IP address of your Ubuntu server on your DNS Panel.
Second, run the command below to create a new document root for your domain.
Note: Wherever you see mydomain, replace it with your actual domain.
$ sudo mkdir /var/www/mydomain
Next, run the following wget command to download the latest WordPress archive and extract the downloaded WordPress archive into the newly created document root.
$ sudo wget https://wordpress.org/latest.tar.gz
$ sudo tar -xvf ./latest.tar.gz -C /var/www/mydomain
Grant the Apache service user and group ownership of the newly created document root:
$ sudo chown -R www-data:www-data /var/www/mydomain
Also, modify the permissions on the new document root to give the Apache service user full access while others have read and execute access only.
$ sudo chmod -R 755 /var/www/mydomain
Create a WordPress Database on MySQL
Next, create a database for WordPress with the query below.
MariaDB [(none)]> CREATE DATABASE wordpressdb;
Next, create a user for WordPress:
MariaDB [(none)]> CREATE USER wpuser1@localhost IDENTIFIED BY 'wpPass';
After that, grant the wordpress user full privileges on the wordpressdb database.
MariaDB [(none)]> GRANT ALL PRIVILEGES ON wordpressdb.* TO wpuser1@localhost;
Finally, save your changes with:
MariaDB [(none)]> FLUSH PRIVILEGES;
You may now quit MariaDB as follows.
MariaDB [(none)]> QUIT;
Configure WordPress Database Settings
Now, run the command below to change the current working directory to the wordpress folder in the default Apache document root.
$ cd /var/www/mydomain/wordpress
Now, run the following command to copy the sample WordPress configuration file.
$ sudo cp wp-config-sample.php wp-config.php
Next, open the wp-config file:
$ sudo nano wp-config.php
Scroll down until you see MySQL settings. Here, type the WordPress database name, username, and password which you created earlier in MySQL.
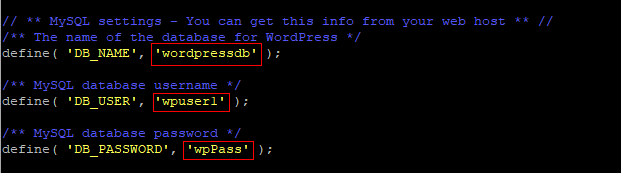
Save your changes and close the wp-config.php file.
Create a WordPress Virtual Host Configuration for Domain
A new virtual host configuration file is required for your WordPress domain. Create one by copying the default virtual host configuration file.
$ cp /etc/apache2/sites-available/000-default.conf /etc/apache2/sites-available/mydomain.conf
You may now disable the default virtual host configuration:
$ sudo a2dissite 000-default.conf
The next step is to modify the new virtual host configuration file as follows.
$ sudo nano /etc/apache2/sites-available/mydomain.conf
Replace the content of the mydomain.conf file with the following.
<VirtualHost *:80>

  ServerName mydomain.com
  ServerAdmin webmaster@localhost
  DocumentRoot /var/www/mydomain/wordpress

  ErrorLog ${APACHE_LOG_DIR}/error.log
  CustomLog ${APACHE_LOG_DIR}/access.log

</VirtualHost>
Save and close the mydomain.conf file.
Now, enable the new virtual host configuration file with:
$ sudo a2ensite mydomain.conf
Finally, restart Apache with:
$ sudo systemctl restart apache2
Setup WordPress On Domain Wesbite
You may now go to mydomain.com in a web browser and follow the instructions to complete your WordPress installation.
https://mydomain.com
You should see the WordPress installer page as shown in the image below.
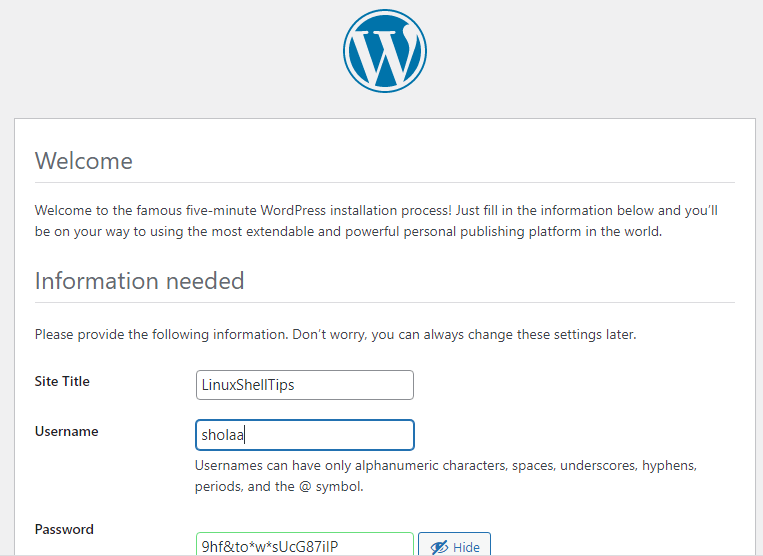
You may proceed to enter your WordPress site title, admin username, password, etc. After that, click Install WordPress.
A “Success!” message should appear as shown in the image below.
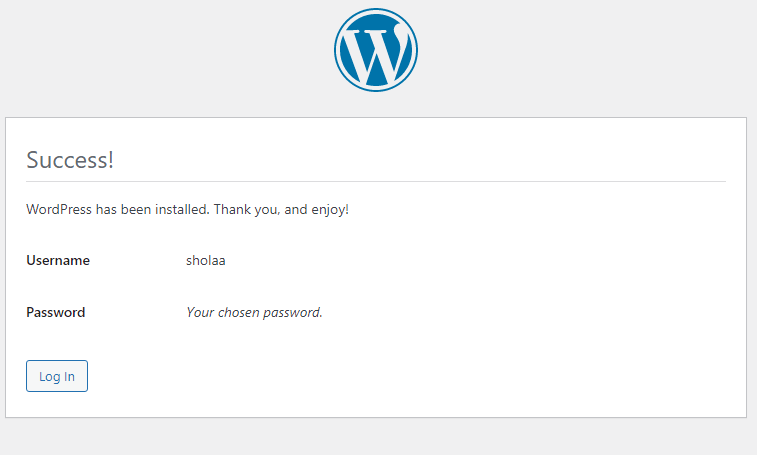
Finally, click Log in to sign in and begin using WordPress.
Conclusion
In this tutorial, we showed you how to download and install WordPress. We did this with the LAMP stack on Ubuntu 20.04. We also showed you how you can connect your registered domain to your WordPress site. We hope that you enjoy using WordPress.