Vi or Vim is an age-old default command line text editor that you’ll come across in any Linux distribution. No doubt, Vim is a simple text editor, but that’s where it has limitations as well. If you want Vim to work like an IDE (Integrated Development Environment), you need to acquire the extra skills to configure various plugins.
So, are you looking for an alternative to Vim?, If yes, Let’s check out NeoVim, which is a fork of Vim with a focus on extensibility and agility. You can easily turn NeoVim very close to an IDE (although this comes under the non-goal of the NeoVim team).
NeoVim – Hyperextensible Vim-based Text Editor
NeoVim is a refactored Vim version that contains the basic features of Vim – fast, versatile, and quasi-minimal with a coating of new advanced features. Being an extension of Vim, Neovim employs new things that you might miss in the Vim text editor. For instance, a new plugin architecture with asynchronous execution.
You might have observed that Vim’s UI freezes when any plugin’s code is executing as all plugin code runs synchronously in Vim. But that’s not the case with Neovim.
Interestingly Neovim’s plugin API is backward-compatible with Vim as well. If you wish to switch to NeoVim, you can use an existing configuration of Vim for NeoVim by symlink ~/.config/nvim/init.vim to your Vim config file.
Furthermore, NeoVim has out-of-the-box support for LSP (Language Server Protocol) that enables options like code highlighting, syntax checking, and auto code completion.
NeoVim Features
Here is the summary of the features of NeoVim:
- Modal editing
- Extremely customizable
- Powerful and Asynchronous Plugins in any language
- Better GUI architecture
- Very fast text editing
- A wide community of plugins and themes
- Built-in terminal support
- External GUIs
- Great Color schemes
- Compatible with most Vim plugins, including Ruby and Python plugins
- Optional embedded Lua 5.1 environment
Let’s install Neovim to get to know more about it.
Install NeoVim on Linux Systems
There are many ways to install and use Neovim on Linux distributions:
Install NeoVim Using Repository
NeoVim may not come as pre-installed, but it’s available in the community repository of major Linux distributions, which you can easily install using a corresponding default package manager.
$ sudo apt install neovim            [On Debian, Ubuntu and Mint]
$ sudo yum install neovim            [On RHEL/CentOS/Fedora and Rocky/AlmaLinux]
$ sudo emerge -a app-editors/neovim  [On Gentoo Linux]
$ sudo apk add neovim                [On Alpine Linux]
$ sudo pacman -S neovim              [On Arch Linux]
$ sudo zypper install neovim         [On OpenSUSE]
Install NeoVim Using Snap
As universal package manager is becoming a new trend, you can use Ubuntu’s pre-installed Snap package manager to get NeoVim on any Linux distribution using a single command:
$ sudo snap install nvim --classic
Install NeoVim Using Flatpak
Likewise Snap, you can also install Neovim on any Linux distribution using the Flatpak package manager. If you already have Flatpak on your system, just run:
$ sudo flatpak install flathub io.neovim.nvim
How to Use NeoVim on Linux Systems
Once you have installed NeoVim on your Linux system, open the terminal and type ‘nvim‘ (not ‘neovim‘) to open NeoVim:
$ nvim
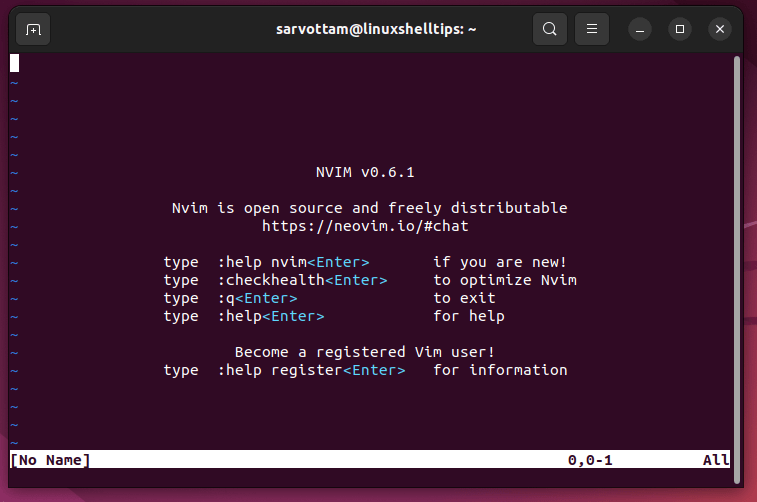
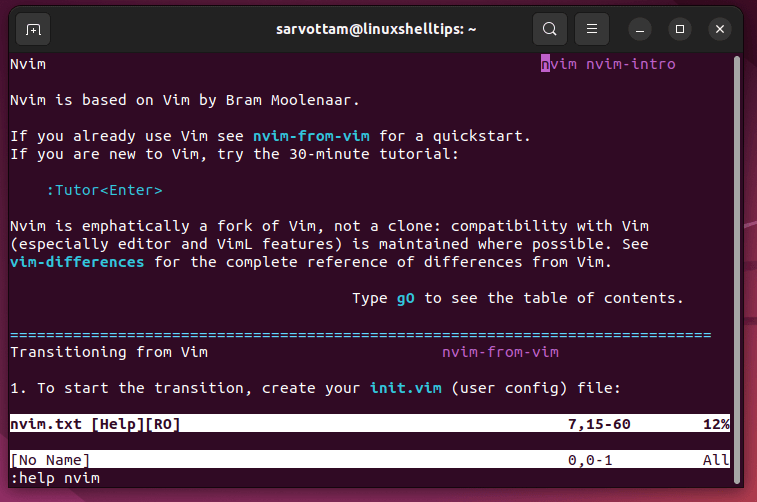
As you can see in the above screenshot, you get initial information about basic commands you can use in NeoVim. Such as just typing ":help nvim" to display a summary of the Nvim tool. To come out or quit the application type ":q".
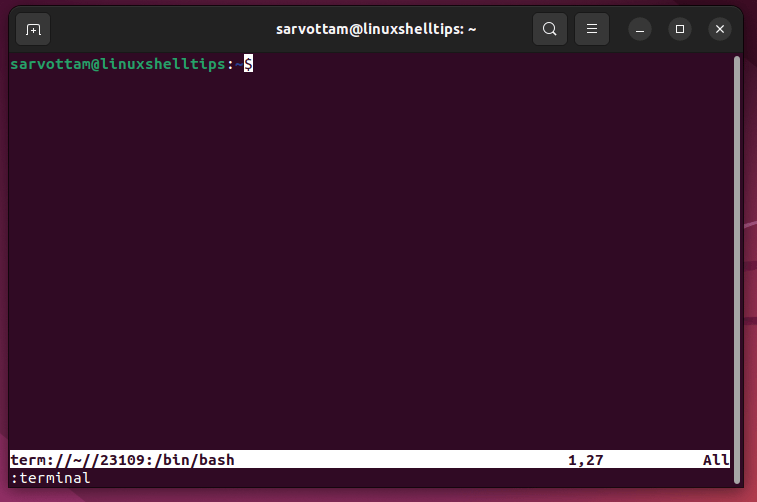
Open Neovim’s Terminal Emulator
Want to open a terminal emulator from NeoVim? just type ":terminal" or ":te". To exit out of the terminal in NeoVim, type ":q" for quit.
Configure NeoVim On Linux Systems
Let’s come to an important function of configuring plugins in NeoVim that brings an integrated experience and makes life easy.
NeoVim uses the XDG Base Directory Specification for placing its configuration files. It means it follows Linux standard location convention for config files i.e. ~/.config/nvim/init.vim Or $XDG_CONFIG_HOME.
If you couldn’t find the default config file in your home folder, just create them manually:
$ mkdir ~/.config/nvim/
$ touch ~/.config/nvim/init.vim
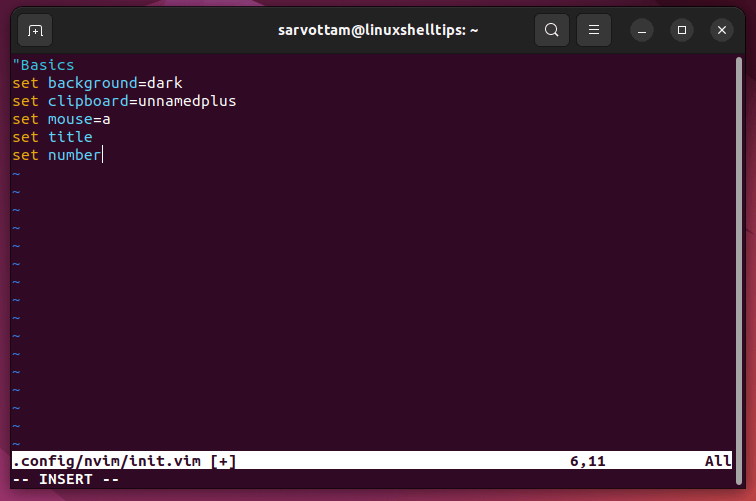
Now open ~/.config/nvim/init.vim file using the nvim command:
$ nvim ~/.config/nvim/init.vim
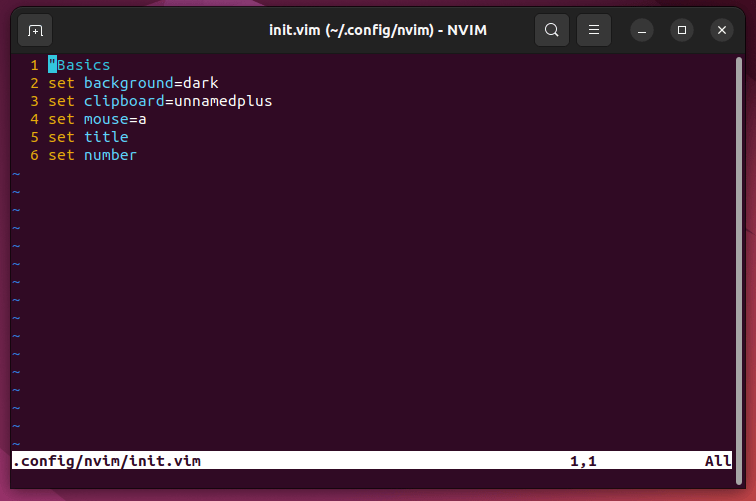
Then, press "i" to add the below basic configuration into the file:
"Basics
set background=dark
set clipboard=unnamedplus
set mouse=a
set number
set title
After adding the line, press "Esc" , and type :wq to save and exit the file. If you’ll reopen the same config file, you’ll spot some changes like numbering and title.
Install Plugins in NeoVim
Now, let’s take an example of installing one of the plugins Telescope. Telescope.nvim is a fuzzy find matcher for NeoVim. To configure Telescope, you first need to have the Vim-Plug extension installed using the following curl command:
$ sh -c 'curl -fLo "${XDG_DATA_HOME:-$HOME/.local/share}"/nvim/site/autoload/plug.vim --create-dirs https://raw.githubusercontent.com/junegunn/vim-plug/master/plug.vim'

Then, open the ~/.config/nvim/init.vim file again and add the below lines:
call plug#begin()
        Plug 'nvim-telescope/telescope.nvim'
call plug#end()
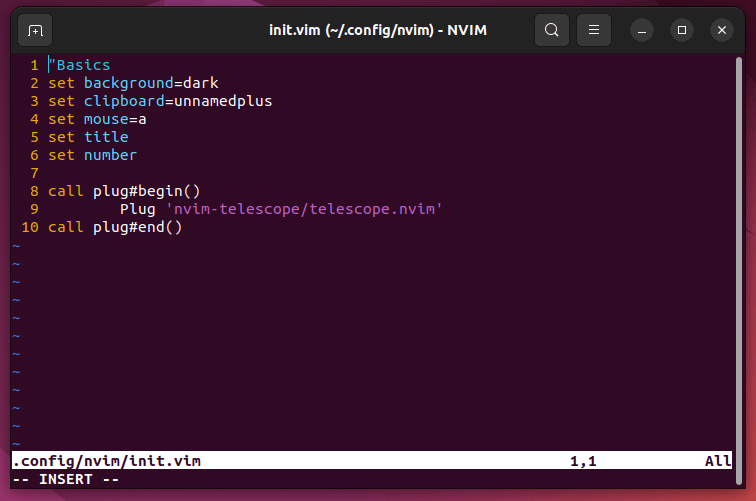
The above line is basically for adding the extension’s name. You can also add multiple extensions at once by just prefixing Plug with the repo path as given above. It’s a Vim-Plug that reads a part of the configuration file to find the extension in GitHub and install it in the editor.
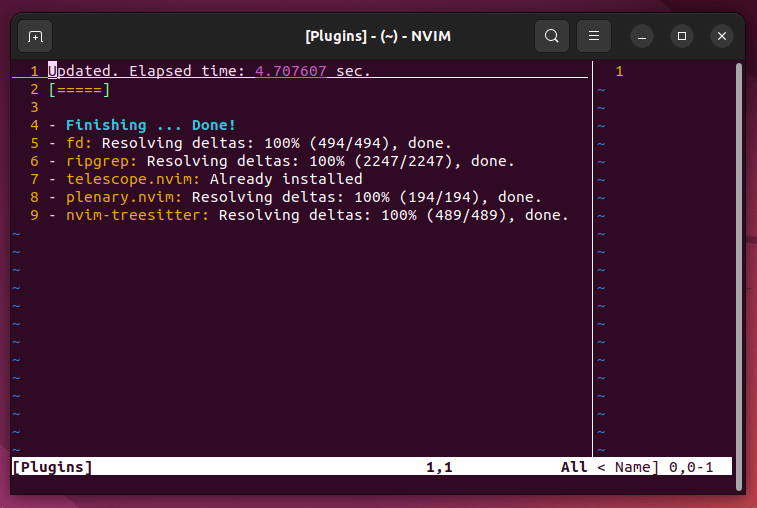
Adding the extension name is not enough, you now also need to save the configuration file, restart NeoVim and run :PlugInstall in command mode to actually install extensions.
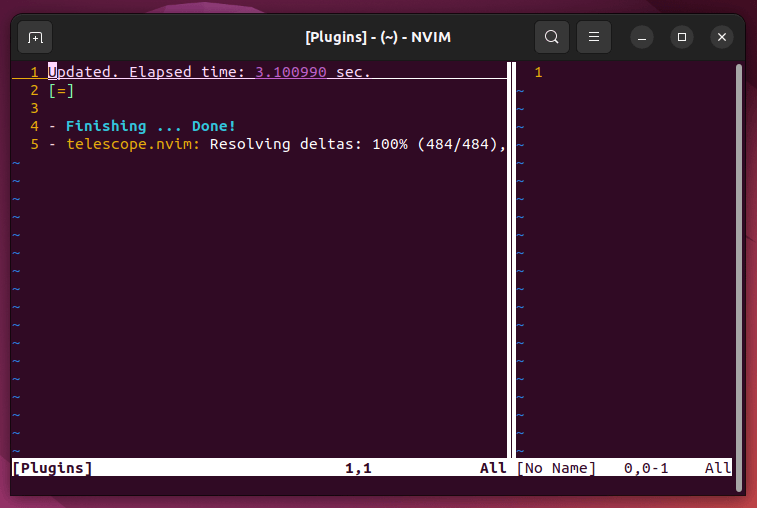
Running :PlugInstall will open a window showing the installation process for each extension. After installation, restart the NeoVim and check whether the telescope is installed properly or not by running ":checkhealth telescope" in command mode.
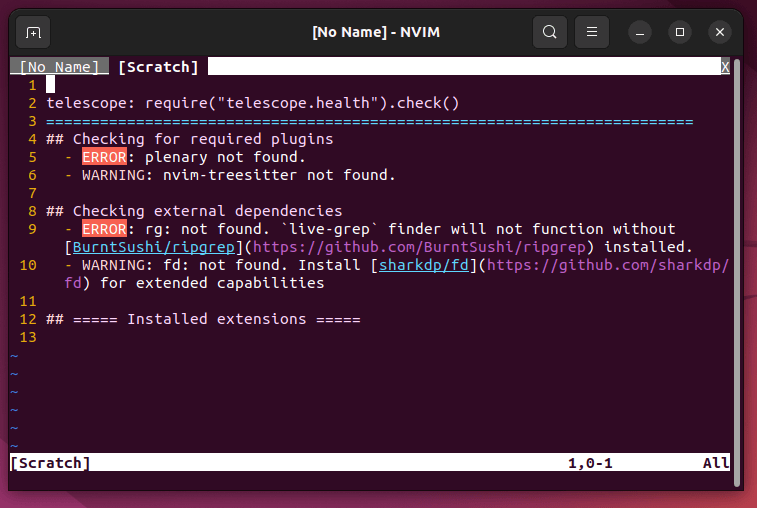
As you can see, Telescope has dependencies issues, which means you also need to install all required plugins to make Telescope work.
So as usual just add the multiple extension name in a config ~/.config/nvim/init.vim file in the below format:
call plug#begin()
    Plug 'nvim-telescope/telescope.nvim'
    Plug 'nvim-lua/plenary.nvim'
    Plug 'nvim-treesitter/nvim-treesitter'
    Plug 'BurntSushi/ripgrep'
    Plug 'sharkdp/fd'
call plug#end()

Now, run :PlugInstall to install all uninstalled plugins.
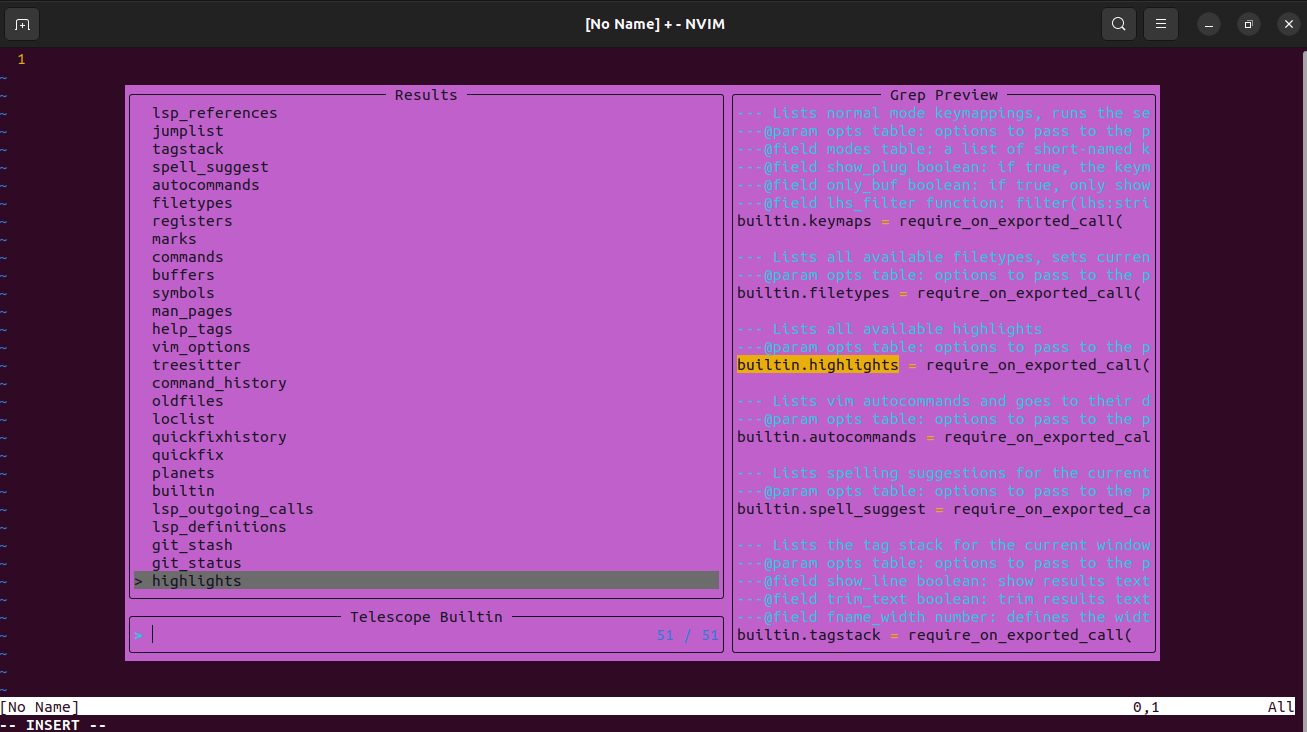
Once everything is installed, type :Telescope in command mode and you’ll see the extension running and displaying all available commands.
You can explore and get more NeoVim plugins and follow the same above method to install it and turn your NeoVim text editor into an IDE.
Is NeoVim Better Than Vim?
Ultimately, you might want to directly know if is NeoVim better than Vim or if is NeoVim faster than Vim. Well, it cannot be a straightforward answer as if you’re already well versed with all commands and configuration tricks of Vim, you might think twice before jumping to an initial steep learning curve of NeoVim and wasting your learning progress of Vim.
For a beginner, you may not have to think as you can hop on NeoVim which will give you a tour of the basic functionality of Vim along with other new features that you miss in Vim for a better coding experience. Surely, you still will have to go through a steep learning curve, whether you choose Vim or NeoVim.
Interestingly, with many extensible editors like VS Code and Atom, you can implement NeoVim extension from their marketplace to use its familiar interface with all correctly mapped keybindings.
So, go, try out NeoVim, and let us know how was your experience with NeoVim.