The power of Nginx should never be underestimated. This performant, lightweight, and fast web server application is capable of handling 10,000 connections simultaneously without straining. To accomplish such strides, Nginx makes use of its asynchronous and event-driven architecture for managing new connections.
Some reputable features associated with the Nginx web server include:
- Its implementation of a reverse proxy server through protocols like IMAP, POP3, HTTPS, HTTP, and SMTP.
- Web servers like Apache benefit from Nginx’s front-end proxy implementation.
- An HTTP cache is also a load balancer.
With these features, the drawn functional implementations associated with Nginx can be countless. For instance, the issue of directory restriction is a major challenge to many World Wide Web users and administrators.
When directory access to a web server is not managed properly, a lot of things could go wrong like data loss with system integrity being the final nail to this coffin.
This article will walk us through configuring directory restrictions on Linux systems with Nginx installed.
Problem Statement
For this tutorial to be more practical and relatable, we also need to meet the following requirements:
- A host machine with the known IP address (192.168.100.3).
- A remote machine (with Nginx installed) with the known IP address (192.168.100.29).
- A directory on the remote machine whose access we wish to restrict from all or specific remote machines (via their IP addresses).
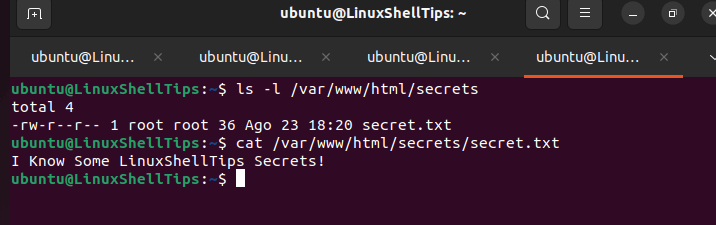
On the remote machine with IP 192.168.100.29, we will be working with the following directory structure:
$ ls -l /var/www/html/secrets
$ cat /var/www/html/secrets/secret.txt
Here, we assume that the /var/www/html/secrets directory is our web app’s primary directory.
Note that /var/www/html is the directory with the Nginx default loading page. We will try to restrict access to the above-created directory from a host machine with IP address 192.168.100.3.
Restricting Access to Directory in Nginx
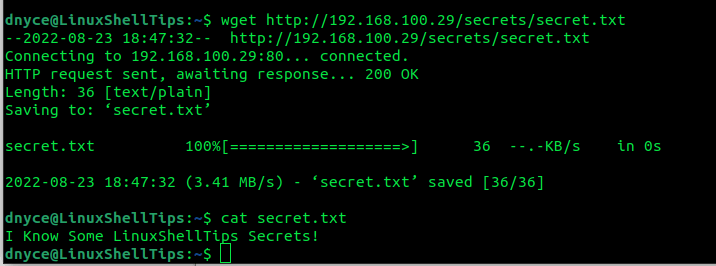
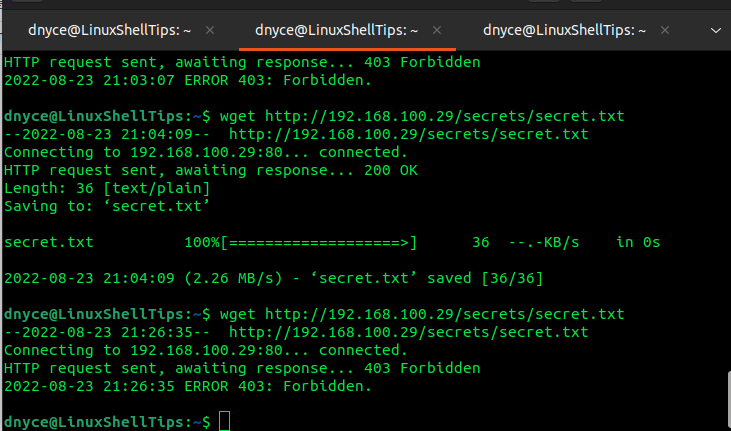
Before restricting access to the directory in Nginx, make sure that we can download our file using the wget command.
$ wget http://192.168.100.29/secrets/secret.txt
$ cat secret.txt
Now, with your preferred text editor, open your site’s Nginx configuration file:
$ sudo nano /etc/nginx/sites-available/default
If you have several virtual host configurations for different sites (e.g your_site.com in /etc/nginx/sites-enabled/your_site.conf), you might need to use that file instead:
$ sudo nano /etc/nginx/sites-enabled/your_site.conf
With the file open, you should be able to trace the server block associated with your web app:
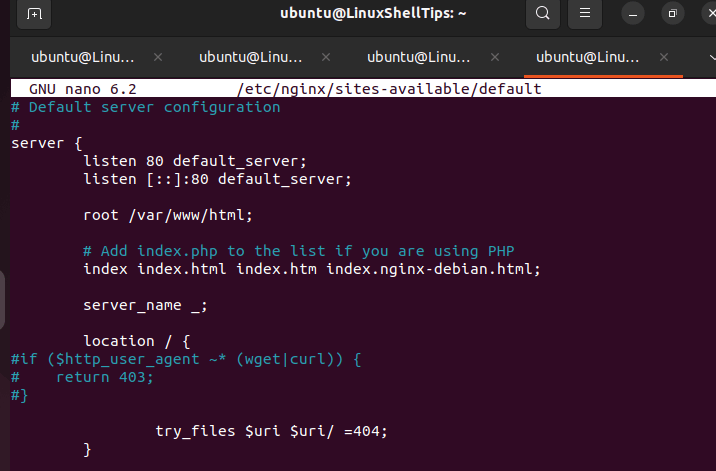
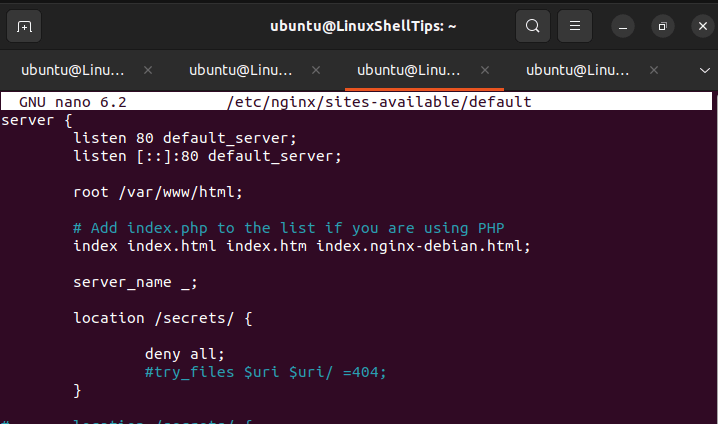
You should also trace the location / {} block within the server block. To restrict access to our directory, we will create the following location block below the above location block:
location /secrets/ {
              deny all;
}
After making changes, restart the Nginx web server.
$ sudo systemctl restart nginx
Let us try to download the file from the restricted directory:
$ wget http://192.168.100.29/secrets/secret.txt
To allow the restriction to only specified IP addresses and deny all other users access, we will change our configuration to resemble the following:
location /var/www/html/secrets {
               allow 192.168.100.3;
               deny all;
}
If you to list more users, add them in the following format:
allow 192.168.100.4;
allow 192.168.100.5;
allow 192.168.100.7;
Again, restart nginx before re-attempting to access the directory.
$ sudo systemctl restart nginx
We can now comfortably put directory restrictions in Nginx. Hope this article guide was helpful. Feel free to leave a comment or feedback.