Brief: This article guide walks users through the installation and configuration of NFS (Network File System) on Rocky Linux 9/8 distributions. Users will also understand the footprints behind NFS like setting up an NFS server (on Rocky Linux) and sharing/accessing files via an NFS client.
NFS (Network File System) is attributed as both a client and server application, which allows browsing and sharing of files between remote Linux hosts over a network and accesses these files as though they are mounted locally.
NFS Features
- Files larger than 2GB benefit from NFS support for 64-bit file sizes and offset.
- Use of extra file characteristics to avoid continuous file re-fetch.
- Improved writing speed due to asynchronous writing support.
- Support for cloning and copying on the NFS server.
- During directory scans, file handles, characteristics, and names are retrievable via a READDIRPLUS operation.
- Use of sec label tags to support any MAC security method.
Prerequisites
- An up-to-date Rocky Linux distribution (to function as an NFS server) with IP address 192.168.100.41.
- An up-to-date RHEL-based or Debian-based distribution (to function as an NFS client) with IP address 192.168.100.33.
Installing NFS Server on Rocky Linux
First, install the needed kernel NFS server daemon and its dependencies:
$ sudo dnf install nfs-utils
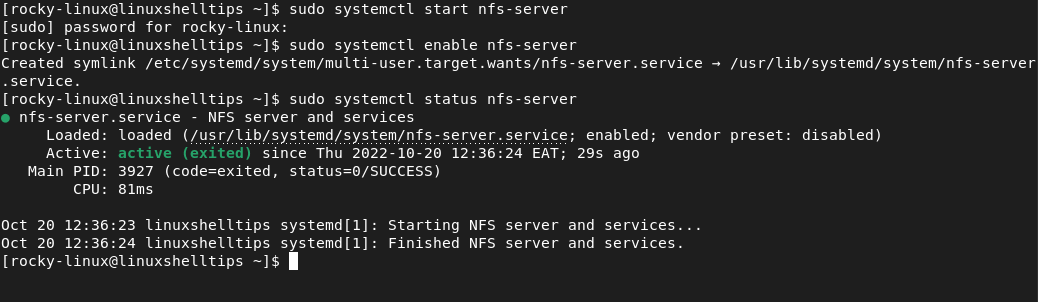
Next, start, enable and verify the status of the NFS server.
$ sudo systemctl start nfs-server
$ sudo systemctl enable nfs-server
$ sudo systemctl status nfs-server
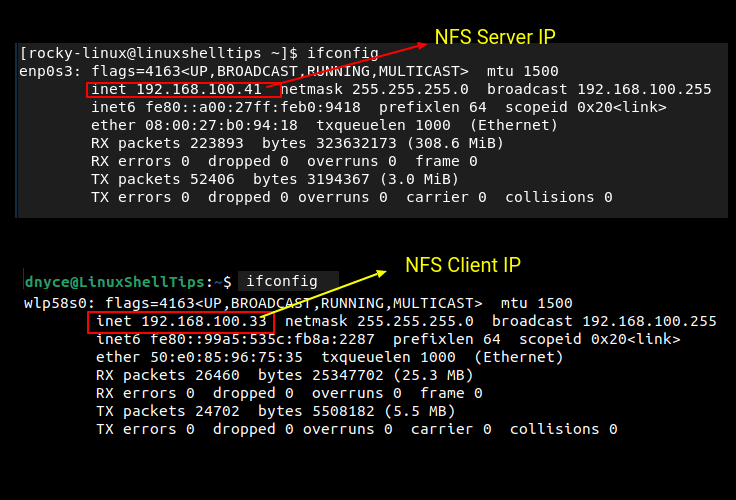
Now create and export NFS Share, but before that find out the IP address of Rocky Linux acting as the NFS server (192.168.100.41) and NFS client (192.168.100.33), in this case, Ubuntu 22.04 using the ifconfig command.
$ ifconfig
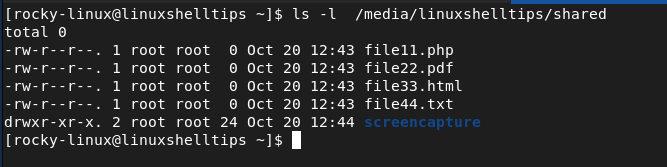
Let’s assume there is a storage drive mounted on /media/linuxshelltips/shared on the Rocky Linux system:
$ ls -l /media/linuxshelltips/shared
To define the above mount point in the NFS server, open the file /etc/exports (which already exists).
$ sudo nano /etc/exports
and add the path to the mounted storage drive in the following manner:
/media/linuxshelltips/shared 192.168.100.33(sync,rw)
In the above case, the NFS client with IP address 192.168.100.33 will have read and write (rw) privileges on the mounted drive or shared directory.
Export the newly established NFS share with the command:
$ sudo exportfs -arv

Explanation of options used in the above command.
-aexports all directories.-rre-exports all directories.-vdisplays the verbose output.
Allow NFS services through the firewall:
$ sudo firewall-cmd --permanent --add-service=nfs
$ sudo firewall-cmd --permanent --add-service=rpc-bind
$ sudo firewall-cmd --permanent --add-service=mountd
$ sudo firewall-cmd --reload
If SELinux is enabled, you need to allow NFS exports on SELinux.
$ sudo setsebool -P nfs_export_all_rw 1
Mount NFS Share on NFS Client Machine
To mount NFS share on client machines, you need to install the NFS client package on the target client machine(s).
$ sudo dnf install nfs-utils nfs4-acl-tools   [On RHEL-based Systems]
$ sudo apt install nfs-common nfs4-acl-tools  [On Debian-based Systems]
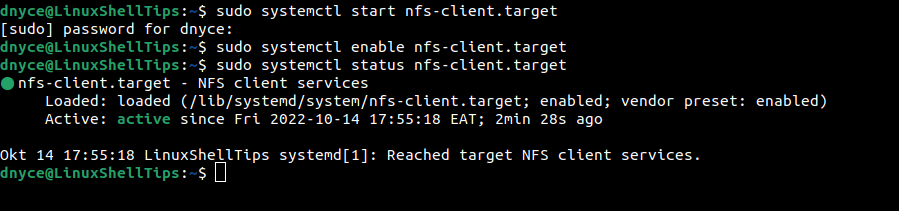
Next, start, enable and verify the status of the NFS client.
$ sudo systemctl start nfs-client.target
$ sudo systemctl enable nfs-client.target
$ sudo systemctl status nfs-client.target
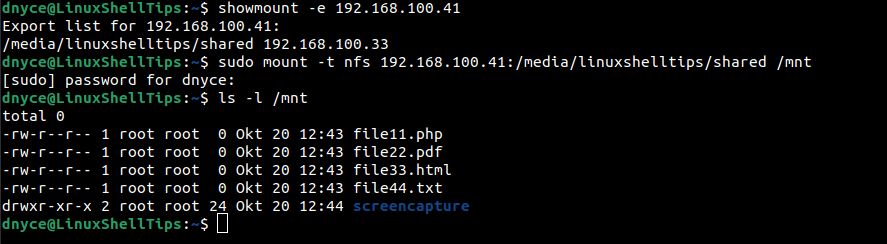
Take note of the NFS server IP address (192.168.100.41) and implement the following command to see NFS mount information:
$ showmount -e 192.168.100.41

/media/linuxshelltips/shared		192.168.100.33
We can also mount the shared directory (192.168.100.41:/media/linuxshelltips/shared) to /mnt on the client machine in the following manner.
$ sudo mount -t nfs 192.168.100.41:/media/linuxshelltips/shared /mnt
For persistent mounts even after a system reboot, update the fstab file.
$ sudo nano /etc/fstab
add the NFS mount point as shown.
192.168.100.41:/media/linuxshelltips/shared /mnt nfs defaults 0 0
To be certain that our NFS share is working, create a sample file on the Rocky Linux server directory (/mnt) and check if it will be visible from the NFS client you are using:
$ sudo touch /media/linuxshelltips/shared/testing.txt
On the NFS client machine, list available files and check on their created date:
$ ls -l /mnt
$ ls -l /mnt/testing.txt
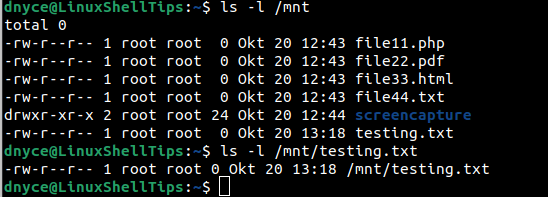
The two timestamps match (Oct 20 13:18), confirming that NFS share works.
We have successfully installed, configured, and tested NFS mount on Rocky Linux for a flexible file-sharing experience among multiple client systems connected to the same network.