Tilix is an open-source advanced Linux terminal emulator that uses GTK+ 3 and offers a lot of features that are not part of the default terminal that ships with Linux distributions.
Some of the popular features of tilix include:
- Horizontal and vertical split-screen.
- Input synchronization between multiple terminals.
- Supports bookmarks.
- Export terminal session to a file.
- Customizable title bar.
- Search through the terminal.
How to Install Tilix in Linux
Tilix is part of the default repository for a variety of distributions and can be installed with:
$ sudo apt install tilix       [On Debian/Ubuntu & Mint]
$ sudo yum install tilix       [On CentOS/RHEL 7]
$ sudo dnf install tilix       [On CentOS/RHEL 8 & Fedora]
$ sudo pacman -S tilix         [On Arch Linux]
$ sudo zypper install tilix    [On OpenSUSE]
$ sudo pkg_add -v tilix        [On FreeBSD]
If the tilix package is not available, you can install it manually using the following instructions:
$ wget https://github.com/gnunn1/tilix/archive/refs/heads/master.zip
$ unzip master.zip
$ cd cd tilix-master/
$ sudo glib-compile-schemas /usr/share/glib-2.0/schemas/
How to Use Tilix Terminal in Linux
Once installed, go to the search bar and type tilix to start the terminal.
How to Access Tilix Shortcuts
There are a lot of shortcuts available for you to know. Start with some important shortcuts by accessing the “keyboard shortcuts” option as shown below image.

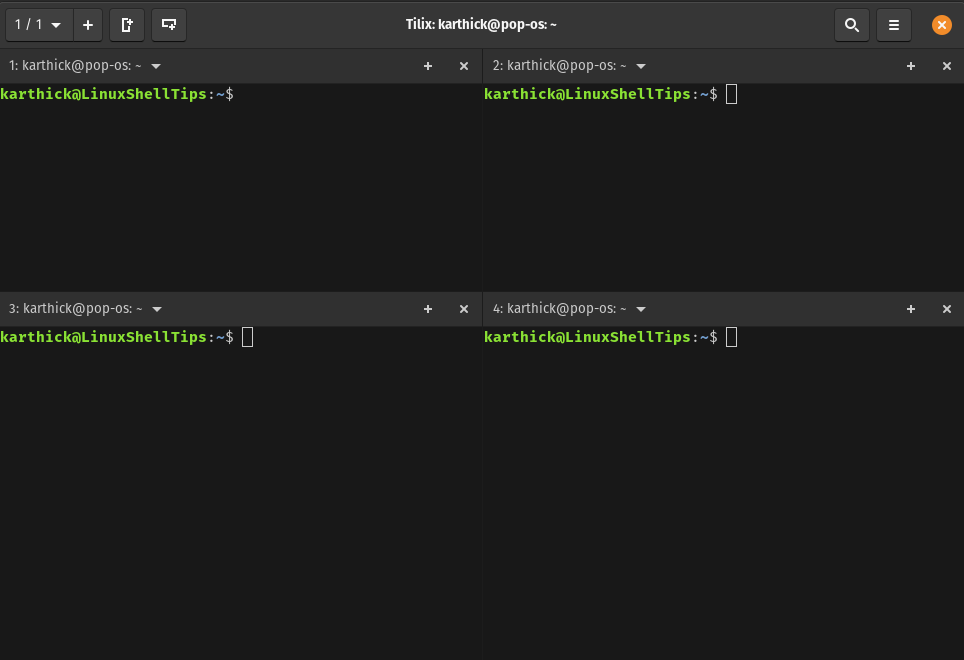
Tilix Horizontal and Vertical Split Screen
The important features of tilix are it supports adding horizontal and vertical tabs.
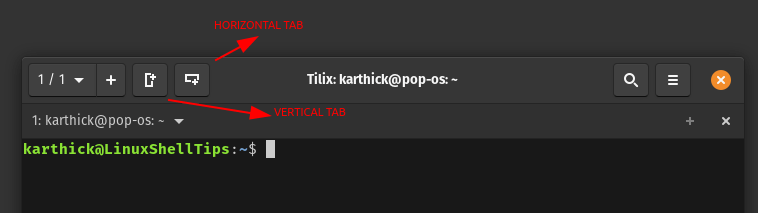
Press the icons as shown in the above image to enable the horizontal and vertical split-screen.
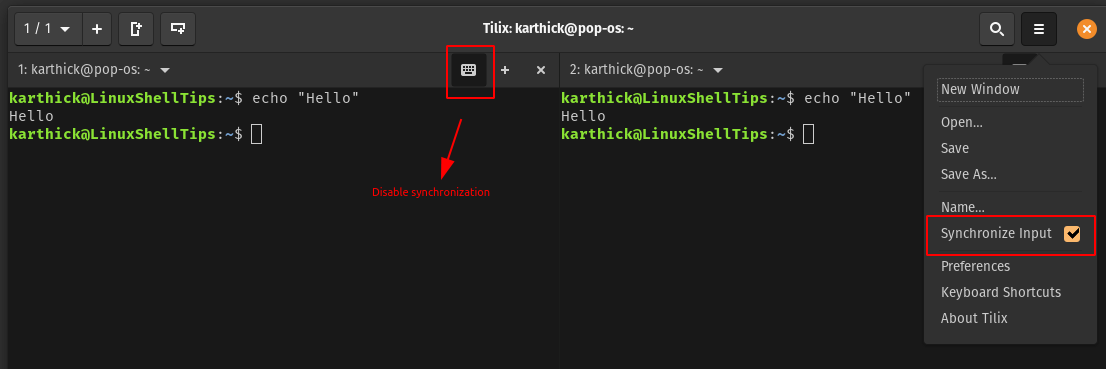
Tilix Synchronize Input
Using synchronize input option, if you type anything in a single terminal the same will be typed across all opened terminals. Select the “synchronize input” option as shown in the below image and start typing whatever you want and see the same will be typed across all opened terminal sessions.
If you wish to exclude any particular session from synchronizing click the icon to disable as shown in the below image.
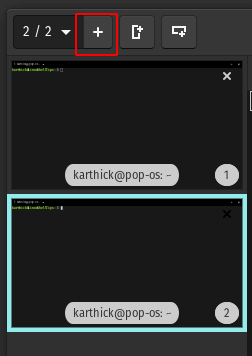
Tilix Workspace
Similar to the workspace concept in Linux distribution in tilix you can create different workspaces and create multiple terminal sessions within that workspace. Press + symbol as shown in the image to create a new workspace.
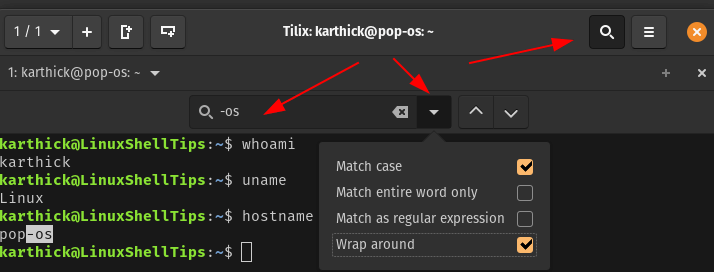
Tilix Search in Terminal
You can use the search option to search for any text from the terminal. You can control how the search works by choosing the appropriate checkbox as shown in the below image.
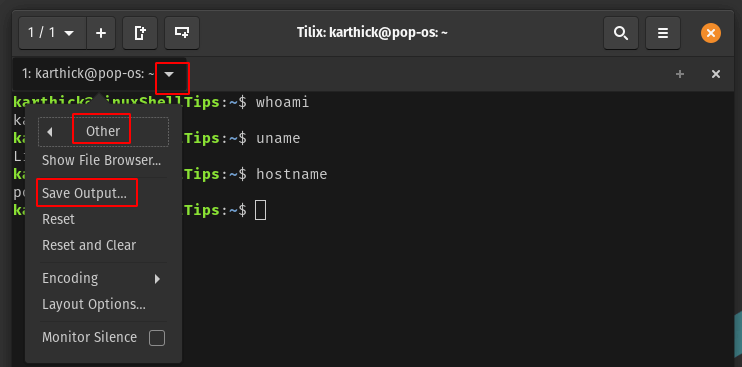
Save Terminal SEssion
You can save your terminal session to a file using the “Save Output” option.
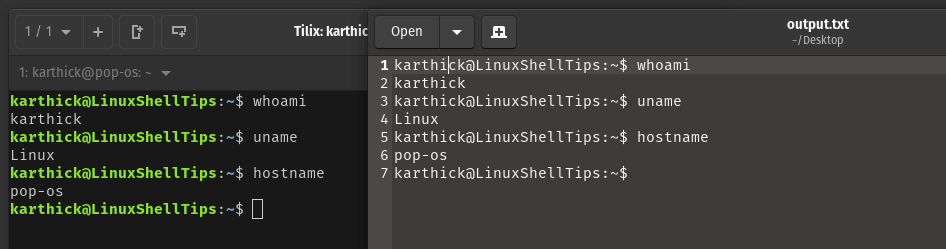
Once you click save the output it will ask for a file name and location to store the output file. Take a look at the below image, whatever is there in my terminal session is captured in the output file.
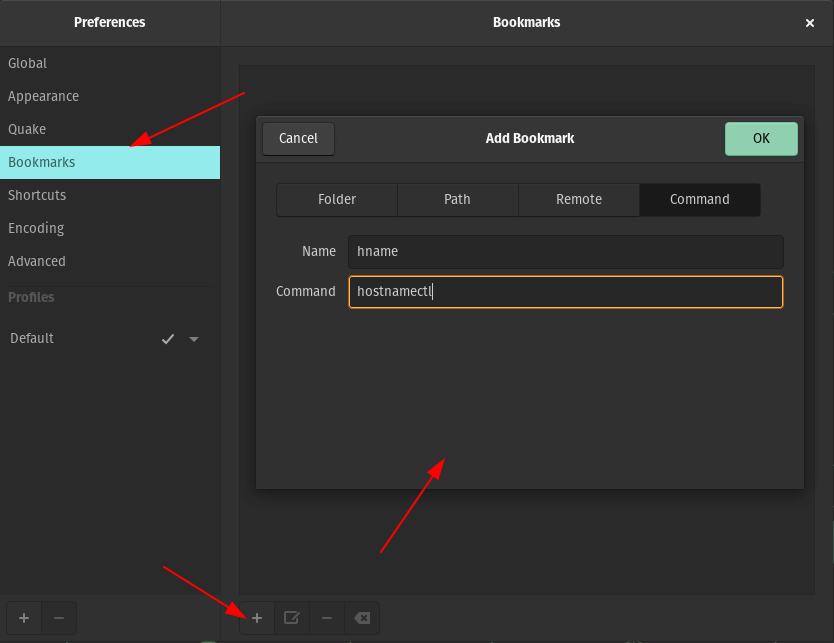
Add Bookmarks in Terminal
You can add bookmarks for any directory, commands and even run remote commands. To create a bookmark go to “Preferences → Bookmarks → press + symbol”.
Take a look at the below image where I am trying to create a bookmark for the hostnamectl command. This is a very simple example but you can create bookmarks for more complex commands.
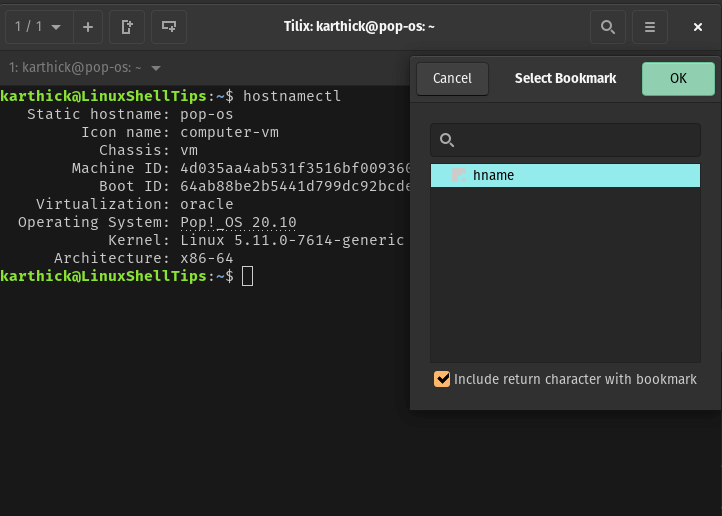
To call a bookmark press SHIFT + CTRL + B which will open the bookmark option. Select the bookmark and press ok which will submit the command. The more flexible and portable option instead of using bookmarks is to use shell aliases. Aliases can be ported to any system you use.
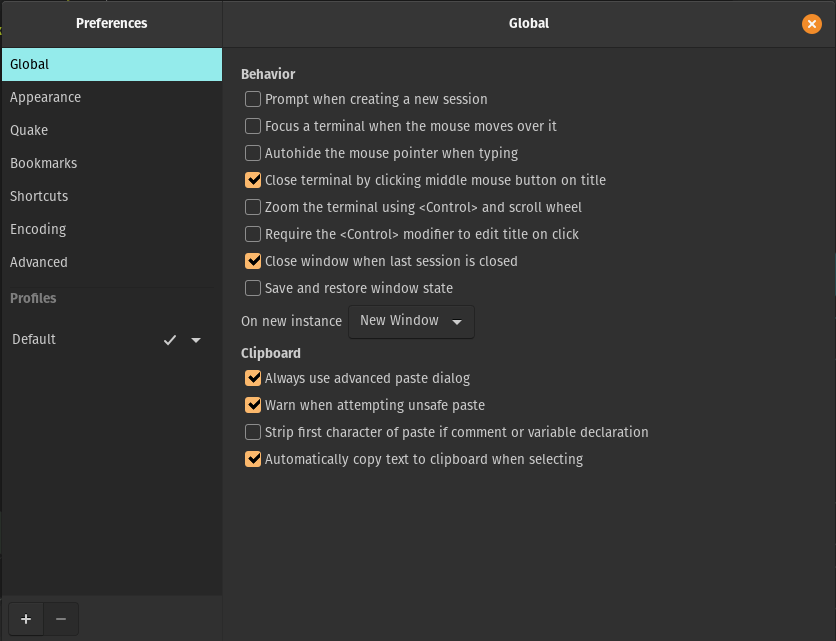
Tilix Customizing Preferences
There is a lot of room for customization. Open preferences and take a look at the list of options that can be enabled or disabled.
That’s it for this article. If you have not tried tilix before I suggest you should give it a shot. Share your feedback about tilix with us in the comment section.
A terminal emulator. Linux was sorely missing such thing.