As the naming convention suggests, tmux is indeed a terminal multiplexer. Linux users that are used to server-based or terminal-based OS environments mostly find themselves opening more than one terminal instance while running programs. With tmux, it is possible to limit your Linux OS interactions to a single terminal.
[ You might also like: Tilix Terminal Emulator and Terminator Terminal Emulator ]
The tmux command flexibility makes it possible to switch between a user or system programs. You can detach from these programs and keep them running on the Linux system background and also re-attach them back to the same command line instance or a different terminal.
Install Tmux in Linux
You can retrieve and install the Linux binary packages for tmux from either of the following commands depending on your distribution.
$ sudo apt-get install tmux     [On Debian, Ubuntu and Mint]
$ sudo yum install tmux         [On RHEL/CentOS/Fedora and Rocky Linux/AlmaLinux]
$ sudo emerge -a sys-apps/tmux  [On Gentoo Linux]
$ sudo pacman -S tmux           [On Arch Linux]
$ sudo zypper install tmux      [On OpenSUSE]
Getting Started with Tmux in Linux
From your Linux console, launch tmux with the following command:
$ tmux
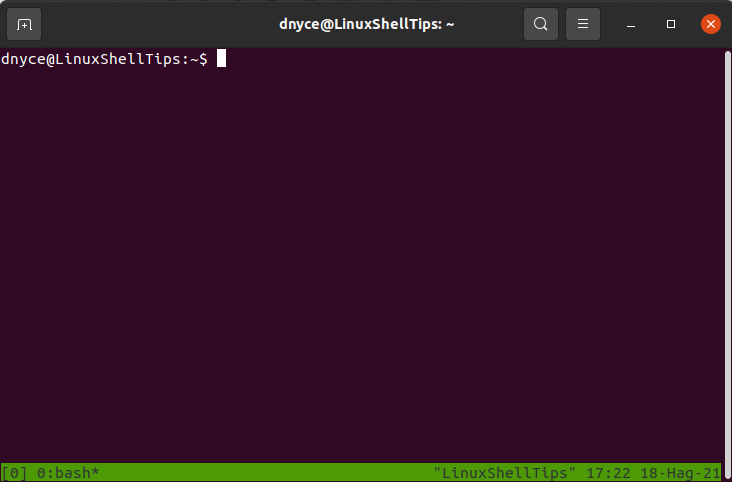
You will be met with a unique environment similar to the one above. It is a newly opened session by tmux. The green highlight at the bottom of this window is its status bar. On the left side of this status bar, [0] indicates that we are running on session 0.
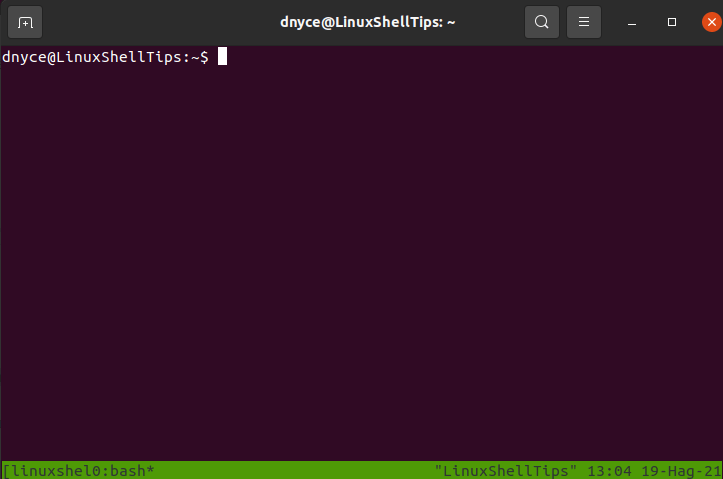
Detaching Tmux Session
To detach from a currently running session, press the Ctrl+b d keys. This command takes you back to the normal terminal window:

Creating a New Tmux Session
You can create other tmux sessions if you wish. You will need to use either of the following command syntaxes. Run it from your normal terminal window.
$ tmux
or
$ tmux new -s new_session_name
The first command will create a new tmux session and assign it a numeric name. The second command lets you give any new tmux session a custom name. Use them to create the needed number of tmux sessions.
The green status bar highlights the custom name given to the new tmux session.
Attaching and Re-attaching to Tmux Sessions
To attach or re-attach from a tmux session or environment, you first need to detach back to the normal terminal window with the command:
Ctrl+b d
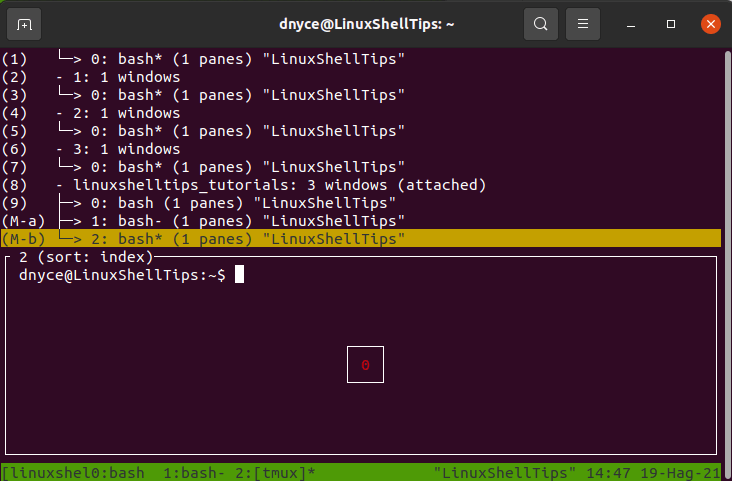
Afterward, since you might have several tmux sessions running in the background, you first need to list them to identify the one that interests you. Use the command:
$ tmux ls
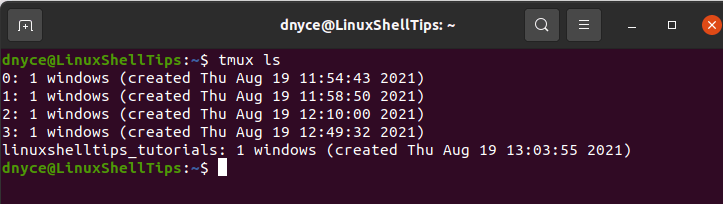
From the above window, we have 5 tmux sessions identified by the names 0, 1, 2, 3, and linuxshelltips_tutorials. We will reference either of these tmux session names to attach or re-attach to either of them.
$ tmux attach-session -t linuxshelltips_tutorials
Tmux Windows
A new tmux session comes with a new window attached to a shell. To create another similar window, run the command:
Ctrl+b c
A new window is automatically assigned a number in the range of 0-9.

The left side of the green status bar panel indicates that we created an additional tmux session window 1. Create another tmux window with Ctrl+b c to see the next status bar response.

The above command has created tmux session window 2.
To choose and work on any of these created windows, you may need to list them first with the following command if you are working under numerous tmux session windows:
Ctrl+b w
To switch to another tmux session window, use the following command syntax:
Ctrl+b window_number
We can switch to window 1 with the command:
Ctrl+b 1
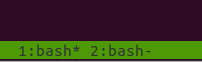
The asterisk sign (*) on the green status bar indicates the tmux session window you are under if the switch was successful. To rename a tmux session window, run the command:
Ctrl+b ,

Tmux Panes
The tmux utility can have multiple sessions, multiple session windows, and finally multiple window panes. This point is where the fun begins.
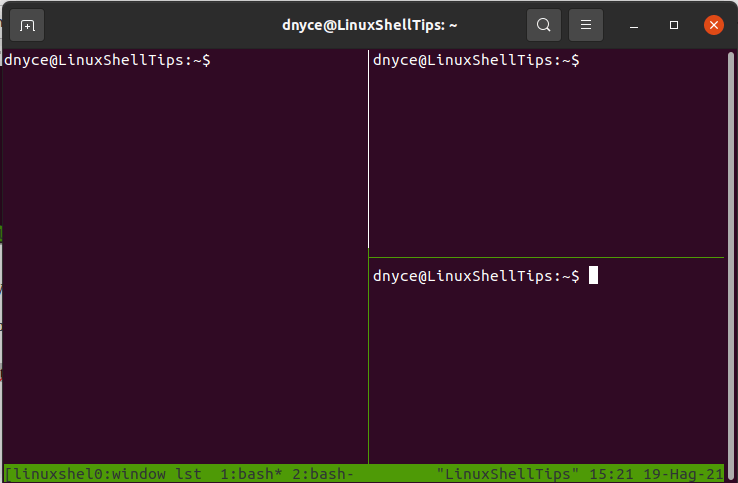
Tmux Horizontal Window
To split a tmux session window into two horizontal window panes, use the following command:
Ctrl+b %

Tmux Vertical Panes
We can also split the above right-hand side window pane into two vertical panes with the following command:
Ctrl+b "
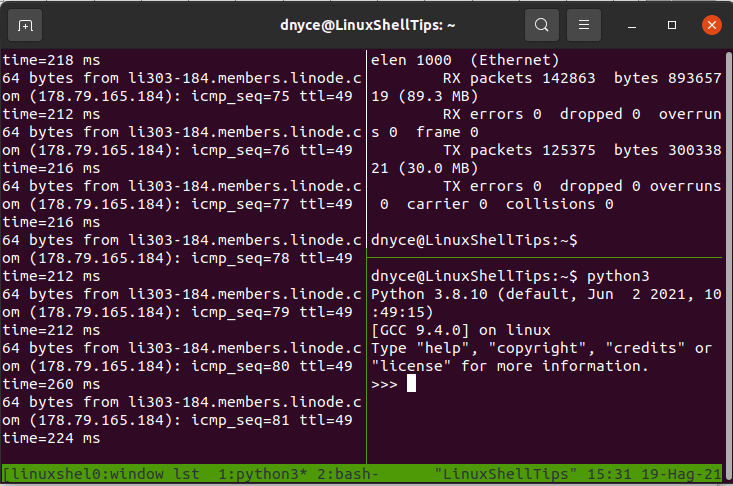
To navigate through all the window panes, use the command:
Ctrl+b o
If you are only working with two window panes, you can toggle between them with the command:
Ctrl+b ;
To exit from a currently active window pane, run the command:
Ctrl+b x
From the above three open window panes, we can demonstrate the power of tmux by having a different command run in each of them.
Tmux Shortcuts
Following are the most common keyboard shortcuts for controlling Tmux sessions, windows, and panes:
Manage Tmux Sessions
CTRL+b + (– Switch to the previous session.CTRL+b + )– Switch to the next session.CTRL+b + s– Display an interactive session list.CTRL+b + d– detach from the current running session.CTRL+b + $– rename a session in tmux.CTRL+b + L– Select the most recently used session.tmux ls– List all available sessions.tmux attach -t 0– Zoom the active pane.tmux kill-server– Destroy all sessions and kill all processes.
Manage Tmux Windows
CTRL+b + c– Create a new window session.CTRL+b + p– Switch to the previous window.CTRL+b + n– Switch to the next window.CTRL+b + 0-9– Switch to a window using its index number.CTRL+b + w– Choose a window from an interactive list.CTRL+b + &– Force kill-all processes in an unresponsive window.CTRL+b + %– Split windows horizontally.CTRL+b + “– Split windows vertically.CTRL+b + M-n– Switch between windows.CTRL+b + M-p– Switch back to a previous window.exit– Close a window.
Manage Tmux Panes
CTRL+b + "– Split the active pane horizontally.CTRL+b + %– Split the active pane vertically.CTRL+b + arrow key– Switch to another pane.CTRL+b + ALT+arrow– Resize the active pane.CTRL+b + z– Zoom in on the active pane.CTRL+b + x– Force kills an unresponsive process in a pane.CTRL+b + k– To move the pane above.CTRL+b + j– To move the pane below.CTRL+b + h– To move the left panes.CTRL+b + l– To move the right pane.CTRL+b + q– Display pane numbers.CTRL+b + o– Toggle/jump to the other pane.CTRL+b + }– swap the current pane with the pane from the left.CTRL+b + {– swap the current pane with the page from the right.CTRL+b + !– move the pane out of the current window.CTRL+b + ;– Go to the last used pane.CTRL+b + M-1– Switch to an even-horizontal layout.CTRL+b + M-2– Switch to an even-vertical layout.CTRL+b + M-3– Switch to the main-horizontal layout.CTRL+b + M-4– Switch to the main-vertical layout.CTRL+b + M-5– Switch to a tiled layout.CTRL+b + space– Switch to the next layout.CTRL+b + C-o– To move all panes, rotating the window up.CTRL+b + M-o– To move all panes, rotating the window down.exit– Close the active pane.
More usage on the awesome features of tmux can be found by the command:
$ man tmux
You now have access to this Linux terminal environment flexibility hack that will make you a more productive Linux user. Have a good one.