RPM, Originally a Red Hat Package Manager, is a free and open-source package management system was created for use in Red Hat Linux. However, RPM is used in many Linux distributions such as CentOS, Fedora, Oracle Linux. An RPM package comes with an extension .rpm.
Sometimes you can access source code files but you might not have an RPM package available to install in your system. In this scenario, you can either compile the source code and install an application, or build an RPM package from the source code and use an RPM file to install the application in your system.
In this article, we are going to learn how to build RPM packages from the source code of an application.
Install rpm-build Package
To build rpm packages, you need to install the rpmbuild package with the following command.
$ sudo yum install rpm-build
After installation, verify the rpmbuild version using the following command:
$ sudo rpmbuild --version
You will get output similar as:

Create Directory Structure
You may need to create directories needed for rpmbuild to keep your source file in the correct directory before rpmbuild complaints of missing directories, it’s better to create these directories manually.
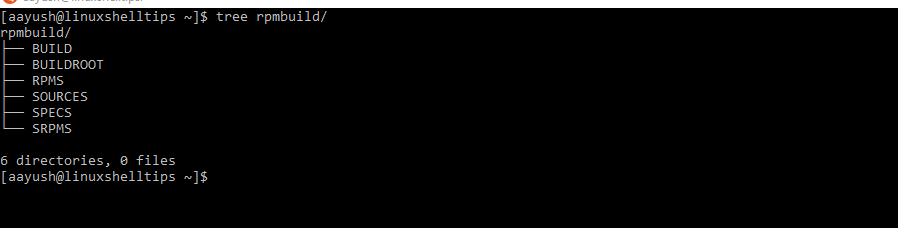
$ sudo mkdir {~/rpmbuild,~/rpmbuild/BUILD,~/rpmbuild/BUILDROOT,~/rpmbuild/RPMS,~/rpmbuild/SOURCES,~/rpmbuild/SPECS,~/rpmbuild/SRPMS}
You can verify the directory structure using the tree command.
$ tree rpmbuild/
Download Source Tar File
Now you will need to download the source code file for the package you want to create an rpm file. The steps are similar to building RPM for any other application. You need to get the source code of the application for RPM that you are going to build.
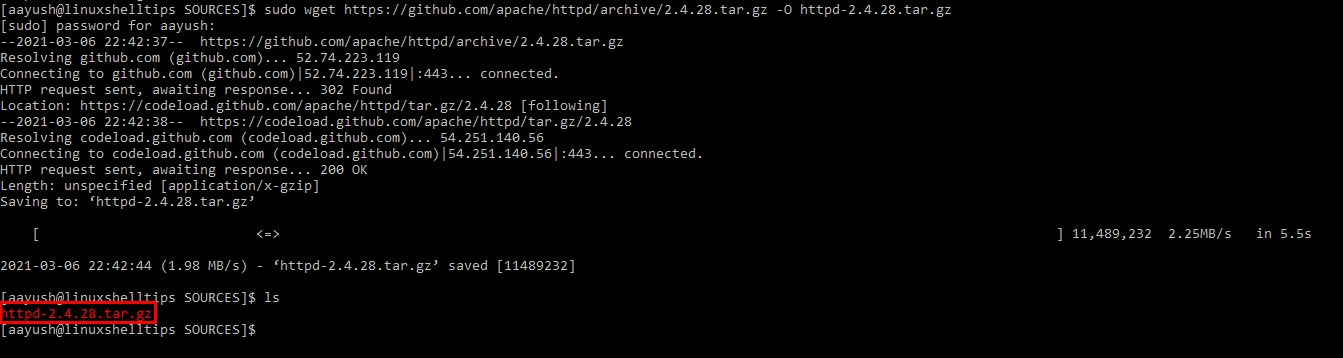
Navigate to the “SOURCES” directory and download the source code of the application. In this example, I am going to create my own sample to build an rpm file.
$ cd rpmbuild/SOURCES
$ sudo wget https://github.com/apache/httpd/archive/2.4.28.tar.gz%20-O%20httpd-2..4.28.tar.gz
Create the SPEC File
In the SPEC file, instructions and information required to build an rpm package are defined. A SPEC file has the file extension .spec and contains build dependencies and runtime dependencies. Build dependencies are the software required to compile the program we want to create an RPM package and build dependencies are the libraries needed for the program to run correctly.
A SPEC file is composed of two macro sections and they are Preamble and Body. In these macro sections, different instructions can be defined.
The preamble section may contain the following instructions:
Name: Name of the package
Version: Version of the package
URL: The URL of the application
Release: Release version of the package
License: License used for the package
Requires: Dependencies needed to run the software
The body section contains the following instructions:
%description: Description of the software package
%prep: Command needed to prepare source code.
%files: List of the files received from the package
Now, create a SPEC file and save it in the directory rpmbuild/SPECS. In this example, I have created a test-application.spec sample file to create a test-application-1.0 rpm package.
$ cd rpmbuild
$ cd SPECS
$ sudo vi test-application.spec
Paste the following contents and modify them as per your requirements.
Name: test-application
Version: 1.0
Release: 1%{?dist}
Summary: Test application script
Group: Miscellaneous
License: License text
Source0: test-application-1.0.tar.gz
BuildArch: noarch
BuildRoot: %{_tmppath}/%{name}-%{version}-%{release}-root-%(%{__id_u} -n)
%description
This is test application
%prep
%setup -q
%build
# %configure
# make %{?_smp_mflags}
%install
rm -rf $RPM_BUILD_ROOT
# make install DESTDIR=$RPM_BUILD_ROOT
install -d -m 0755 $RPM_BUILD_ROOT/opt/test-application
install -m 0755 HelloWorld.sh $RPM_BUILD_ROOT/opt/test-application/test-application-1.0.sh
%clean
rm -rf $RPM_BUILD_ROOT
%files
%defattr(-,root,root,-)
# %doc
/opt/test-application/test-application-1.0.sh
%changelog
Save the file and exit.
Build and Install an RPM Package
Once the SPEC file has been created, build the rpm package with the rpmbuild command.
$ sudo rpmbuild -ba rpmbuild/SPECS/test-application.spec
Assuming that you have not encountered any error, rpm files will be created at RPMS/noarch directory ready for installation. To install the created RPM file, run the following command.
$ rpm -ivh rpmbuild/RPMS/noarch/test-application-1.0-1.el7.noarch.rpm

Now to verify your RPM installation, run the following command.
$ rpm -qa | grep test-application-1.0

To uninstall the RPM package, run the following command:
$ yum remove <rpm-package-name>
In this example, I have removed the test-application-1.0 package as:
$ sudo yum remove test-application-1.0-1.el7.noarch
Conclusion
In this article, you have learned about how to create RPM packages using tarball. Also, you got an idea about creating SPEC files, installing RPM packages, and removing installed RPM packages.