Thanks to the Apache Foundation for the development and maintenance of Apache Tomcat, RHEL 8 users can now proudly boast of having access to an open-source, powerful, lightweight, and popular web server.
Apache Tomcat prioritizes the execution of java web-based applications through a pure Java HTTP server interface implemented by Java WebSocket, JavaServer Pages (JSP), Java Expression Language (EL), and Java Servlet technologies.
This article will walk us through the installation and configuration of Apache Tomcat 10 on RHEL 8 distribution.
Step 1: Installing Java in RHEL 8
Make sure your RHEL 8 system is up-to-date for the operating system’s optimal performance.
$ sudo dnf update -y
Next, install the default available version of Java 11 (latest long-term support) using the following command as shown.
$ sudo yum install java-11-openjdk [Install Java 11]
Next, check on the Java version you have installed on your system.
$ java -version

Step 2: Installing Apache Tomcat in RHEL 8
To install Tomcat, we will need Curl or Wget for the download of Apache Tomcat-related packages.
$ sudo dnf install curl wget tar -y
Next, you need to create a regular (sudoer) Linux user who should be able to run the Tomcat service.
$ sudo useradd -r tomcat
Now head over to Apache Tomcat’s website to download the latest version via the following curl command.
$ wget https://dlcdn.apache.org/tomcat/tomcat-10/v10.0.23/bin/apache-tomcat-10.0.23.tar.gz
Note: If you get a 404 Not Found Error while downloading the file, head over to the Apache Tomcat download page and download the latest tar.gz version.
We should now be able to extract our downloaded file using the tar command and move the extracted files to the /usr/local directory with appropriate permissions.
$ tar -zxvf apache-tomcat-*.tar.gz
$ mv apache-tomcat-10.0.22 /usr/local/tomcat10
$ sudo chown -R tomcat:tomcat /usr/local/tomcat10
Step 3: Creating Apache Tomcat’s Systemd File
The configuration of the Apache Tomcat’s systemd file is necessary for starting, stopping, restarting, and enabling the Apache Tomcat service so that it keeps on running even after restarting your RHEL 8 machine.
The Java installation location is critical in the creation of the Apache Tomcat systemd service file. The following command should list this location for us depending on the Java version(s) present on our RHEL 8 system.
$ alternatives --list | grep ^java

In reference to the above-generated path, open the following file and make the highlighted modifications in regards to your environment in order to create the Apache Tomcat systemd service file.
$ sudo nano /etc/systemd/system/tomcat.service
Populate it with the following highlighted data.
[Unit]
Description=Apache Tomcat Web App Container
Wants=network.target
After=network.target
[Service]
Type=forking
Environment=CATALINA_PID=/usr/local/tomcat10/temp/tomcat.pid
Environment=CATALINA_HOME=/usr/local/tomcat10
Environment='CATALINA_OPTS=-Xms512M -Xmx1G -Djava.net.preferIPv4Stack=true'
Environment='JAVA_OPTS=-Djava.awt.headless=true'
ExecStart=/usr/local/tomcat10/bin/startup.sh
ExecStop=/usr/local/tomcat10/bin/shutdown.sh
SuccessExitStatus=143
User=tomcat
Group=tomcat
UMask=0007
RestartSec=10
Restart=always
[Install]
WantedBy=multi-user.target
You might need to disable SELinux in case it prevents tomcat from starting.
$ sudo setenforce 0
$ sudo sed -i 's/ELINUX=enforcing/ELINUX=disabled/g' /etc/selinux/config
Reload system daemon to acknowledge changes.
$ sudo systemctl daemon-reload
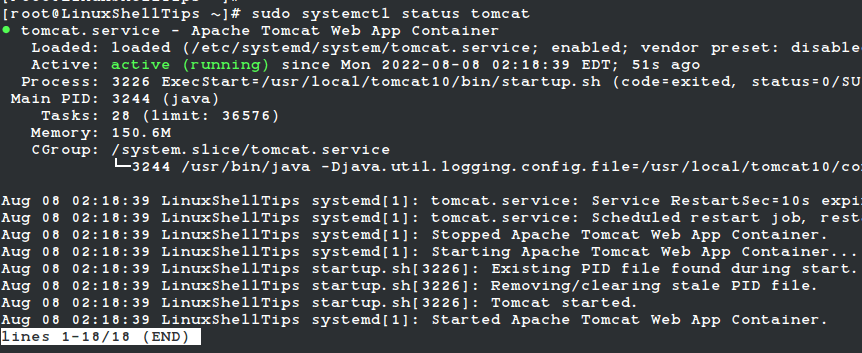
Now start, enable and verify the status of the Apache Tomcat service.
$ sudo systemctl start tomcat
$ sudo systemctl enable tomcat
$ sudo systemctl status tomcat
Since Apache Tomcat uses port 8080, make sure you allow it on your system firewall.
$ sudo firewall-cmd --permanent --add-port=8080/tcp
$ sudo firewall-cmd --reload
Step 4: Access Apache Tomcat Web UI
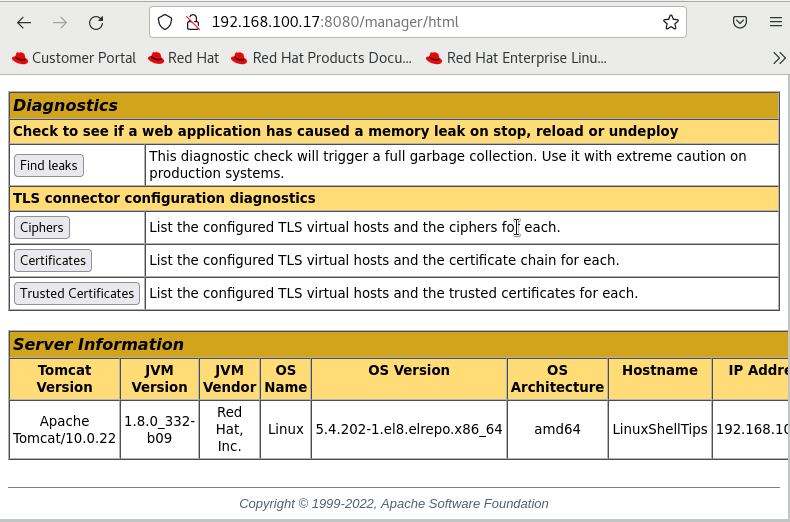
A web manager makes it possible to manage the deployment of new applications, have an overview status of applications (active or inactive), and control web applications (Start or Stop).
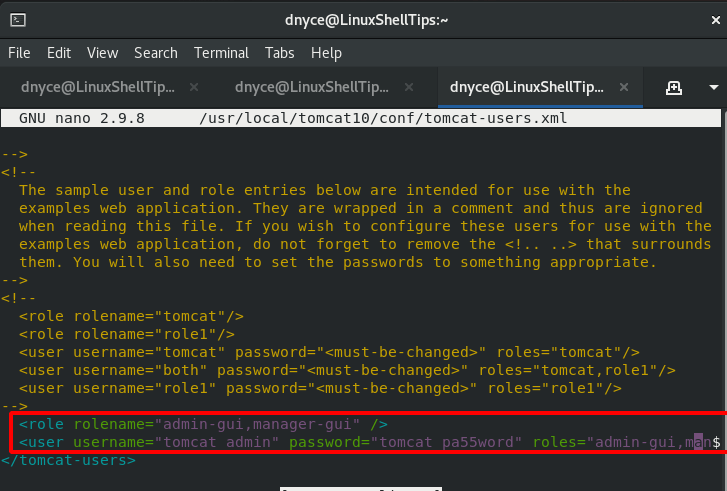
Manager and admin roles are defined in the file tomcat-users.xml.
$ sudo nano /usr/local/tomcat10/conf/tomcat-users.xml
We can key in the following entries to set manager and admin credentials:
<role rolename="admin-gui,manager-gui"/>
<user username="tomcat_admin" password="tomcat_pa55word" roles="admin-gui,manager-gui"/>
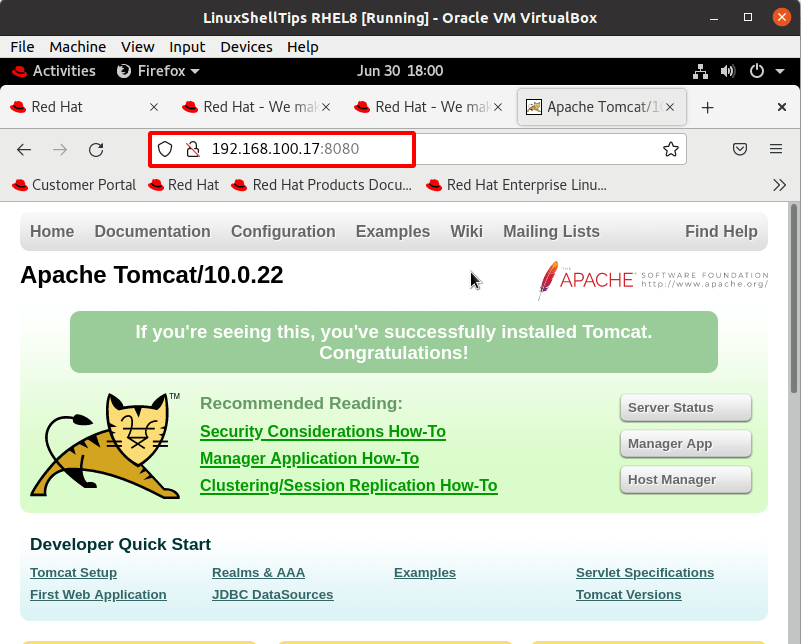
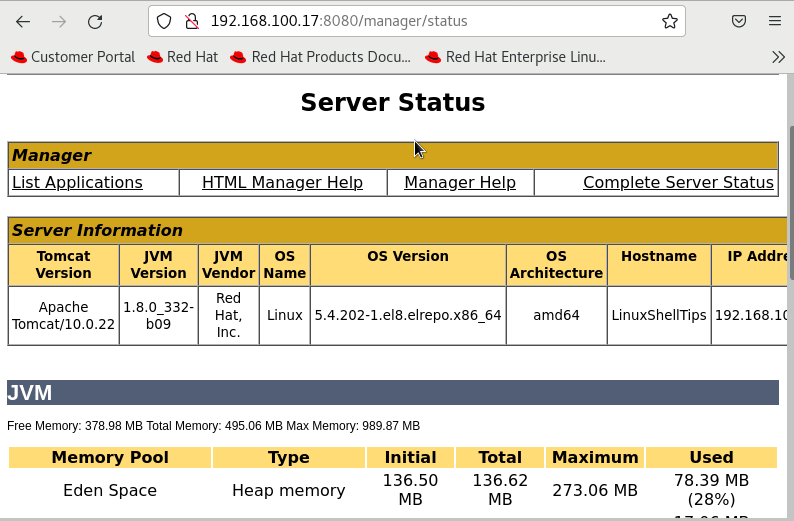
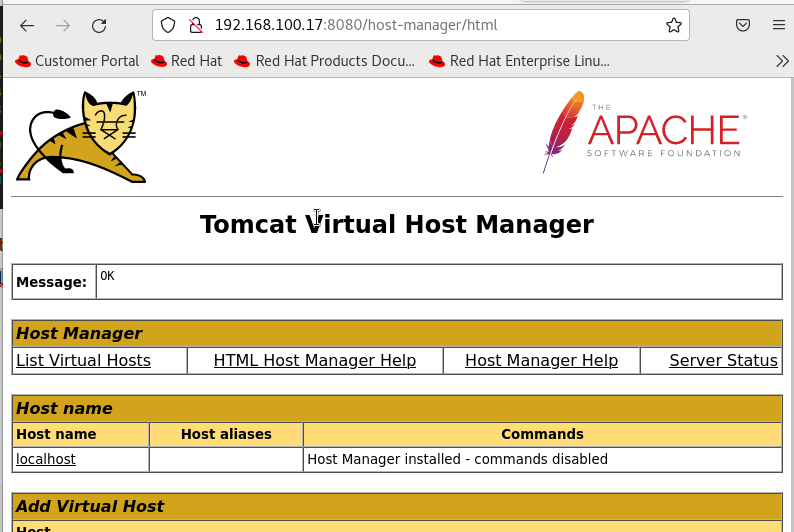
You should be able to access Apache Tomcat Web UI from localhost via port 8080.
At the moment, you won’t be able to access Server Status, Manager App, and Host manager.
To allow Web Manager access, edit the file:
$ sudo nano /usr/local/tomcat10/webapps/manager/META-INF/context.xml

For all user access, use:
allow="127\.\d+\.\d+\.\d+|::1|0:0:0:0:0:0:0:1|.*" />
For organization access on let’s say 192.168.1.0/24 network, use:
allow="127\.\d+\.\d+\.\d+|::1|0:0:0:0:0:0:0:1|192.168.1.*" />

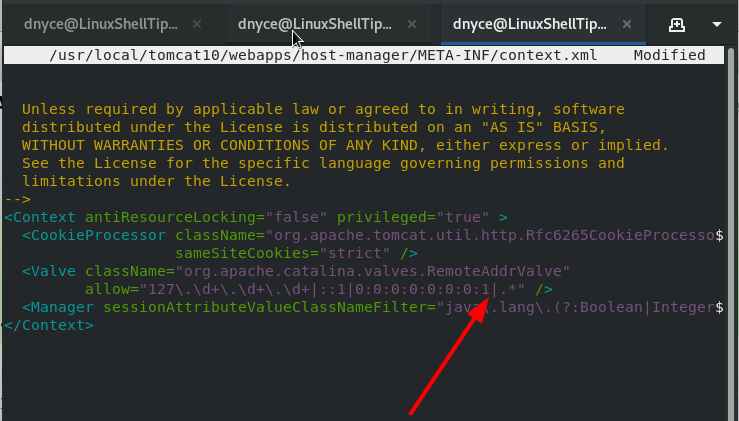
To allow Host Manager access, edit the file:
$ sudo nano /usr/local/tomcat10/webapps/host-manager/META-INF/context.xml
For all user access, use:
allow="127\.\d+\.\d+\.\d+|::1|0:0:0:0:0:0:0:1|.*" />
For organization access on let’s say 192.168.1.0/24 network, use:
allow="127\.\d+\.\d+\.\d+|::1|0:0:0:0:0:0:0:1|192.168.1.*" />
We should now be able to access Server Status, Manager App, and Host manager from the web GUI by using the admin-gui and manager-gui credentials created earlier.
With this Apache Tomcat installation and configuration guide, you are now ready to launch and test your first web app.