File Transfer Protocol (FTP) is needed for seamless transfer or exchange of data between machines and computers defined on the internet or a private network.
Through TCP (Transmission Control Protocol), an FTP application makes uploading and downloading file data easy. This article will help you achieve secure file transfer on an FTP server through Very Secure FTP Daemon (vsftpd) in Rocky Linux and AlmaLinux (same instructions also works on RHEL and CentOS).
Install FTP on Rocky Linux
First, update your operating system and install the vsftpd package as shown.
$ sudo yum update
$ sudo dnf install vsftpd
Once installed, enable the service responsible for vsftpd but don’t start it yet.
$ sudo systemctl enable vsftpd
Creating FTP User and User Directory
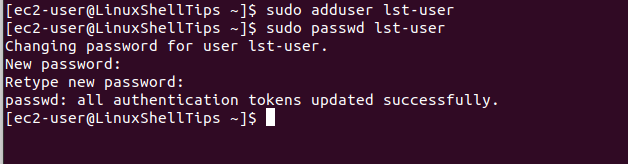
Our FTP server should only grant access to a dedicated user. Let us create one.
$ sudo adduser lst-user
$ sudo passwd lst-user
The created user needs to be associated with an FTP directory upon a successful login into the FTP server. The user (lst-user) now has full ownership of this directory on top of read, write, and execute privileges.
$ sudo mkdir -p /home/lst-user/ftp_directory
$ sudo chmod -R 750 /home/lst-user/ftp_directory
$ sudo chown lst-user: /home/lst-user/ftp_directory
The final step is for the FTP server to recognize this user (lst-user) in its “user_list” file.
$ sudo bash -c 'echo lst-user >> /etc/vsftpd/user_list'
Configure FTP in Rocky Linux
We need certain vsftpd configuration settings enabled and others disabled. Access its configuration file with the following command.
$ sudo nano /etc/vsftpd/vsftpd.conf
OR
$ sudo vi /etc/vsftpd/vsftpd.conf
If you don’t have the nano or vi editors, install it with the command:
$ sudo yum install nano
OR
$ sudo yum install vim
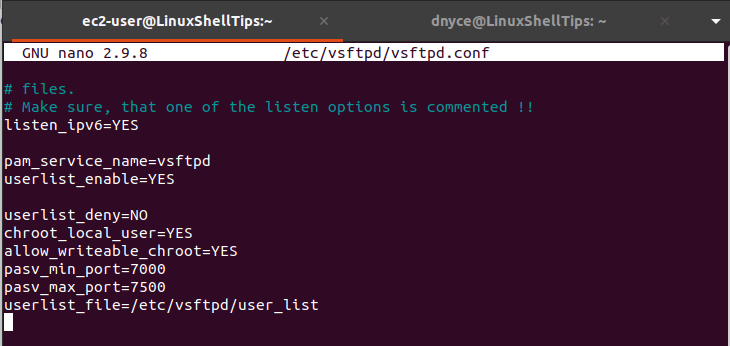
Once the vsftpd.conf file is opened, make sure the file corresponds to the following line entry edits:
anonymous_enable=NO
local_enable=YES
write_enable=YES
Add the following entries.
userlist_deny=NO
chroot_local_user=YES
allow_writeable_chroot=YES
pasv_min_port=7000
pasv_max_port=7500
userlist_file=/etc/vsftpd/user_list
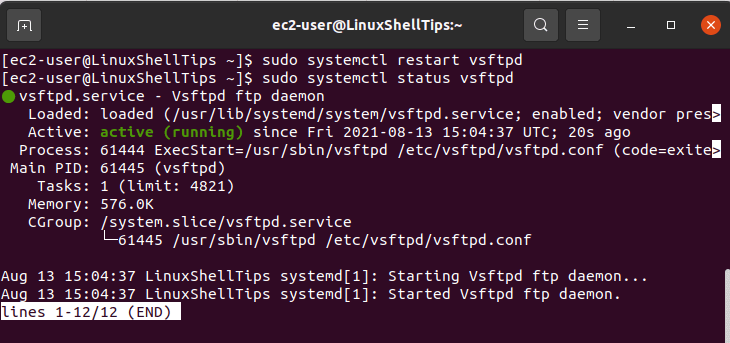
We can now start and check the status of our initially enabled vsftpd service.
$ sudo systemctl restart vsftpd
$ sudo systemctl status vsftpd
Open FTP Ports on Firewalld
Based on the configurations we made in the “/etc/vsftpd/vsftpd.conf” file, the port range “7000-7500” caters to vsftpd passive communication. The system firewall needs to accommodate it together with port range “20-21” for FTP data and traffic respectfully.
$ sudo systemctl enable firewalld
$ sudo systemctl restart firewalld
$ sudo firewall-cmd --permanent --add-port=20-21/tcp
$ sudo firewall-cmd --permanent --add-port=7000-7500/tcp
$ sudo firewall-cmd --reload
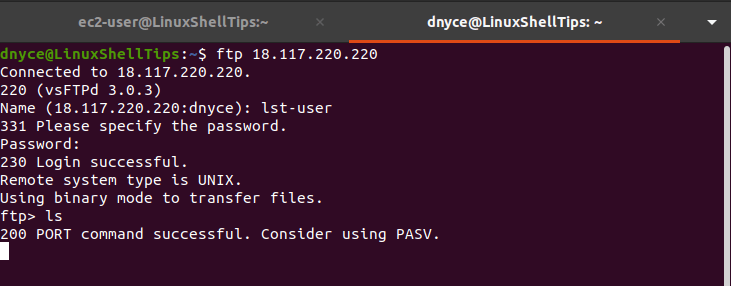
Testing FTP Connection in Linux
The next step is to test this FTP connection from the command line. To achieve this objective, you should be in a Linux desktop operating system environment. Afterward, you will need to key in the ftp command followed by the IP address of your server. We will use the created FTP user (lst-user) credentials to test our FTP access.
$ ftp server-IP-address
Configure VSFTPD with an SSL in Rocky Linux
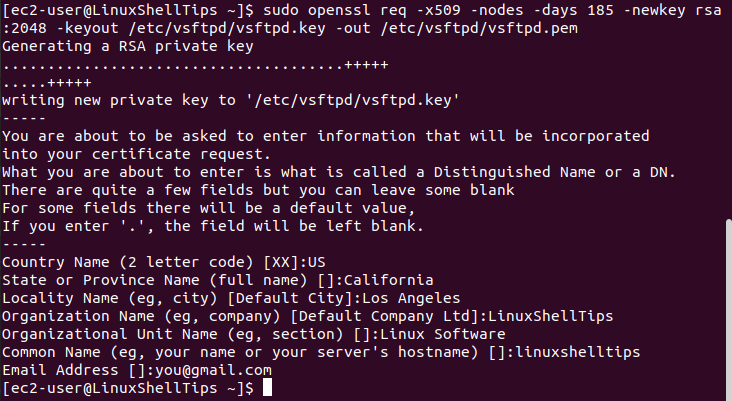
This step lets us create a vsftpd-oriented certificate file for encrypting all FTP connections between a remote server and a desktop environment. It is a recommended security measure to ensure retained file integrity of each FTP-initiated file transfer.
In the following command, the day’s parameter should be an estimate of the duration you intend to use your FTP server or keep it active.
$ sudo openssl req -x509 -nodes -days 185 -newkey rsa:2048 -keyout /etc/vsftpd/vsftpd.key -out /etc/vsftpd/vsftpd.pem
The FTP server needs to be aware of this created certificate location and details.
$ sudo nano /etc/vsftpd/vsftpd.conf
Add the following entries to the above file and save it:
rsa_cert_file=/etc/vsftpd/vsftpd.pem
rsa_private_key_file=/etc/vsftpd/vsftpd.key
ssl_enable=YES
allow_anon_ssl=NO
force_local_data_ssl=YES
force_local_logins_ssl=YES
ssl_tlsv1=YES
ssl_sslv2=NO
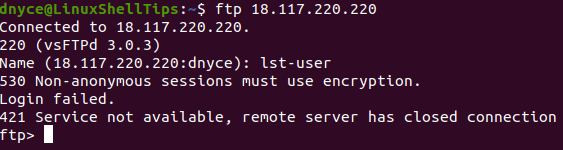
A user will now not be able to log in from the command line due to the newly implemented SSL rules on this configuration file. The following screenshot demonstrates this prohibition.
$ ftp server-IP-address
Before testing our connection after RSA certificate installation, we should restart vsftpd again.
$ sudo systemctl restart vsftpd
Testing FTP Using Filezilla
Install FileZilla client on your Linux desktop environment.
$ sudo apt install filezilla    [On Debian, Ubuntu & Mint]
$ sudo yum install filezilla    [On RHEL/CentOS/Fedora & Rocky Linux/AlmaLinux]
$ sudo pacman -S filezilla      [On Arch Linux]
$ sudo zypper in filezilla      [On OpenSUSE]
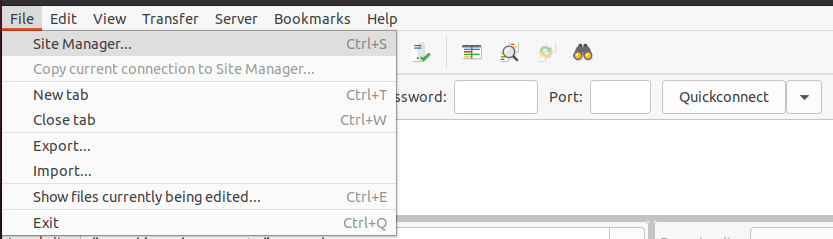
Launch FileZilla and navigate to Site Manager from the File menu as depicted on the screenshot.
Next, you need to enter your FTP server details and click connect.
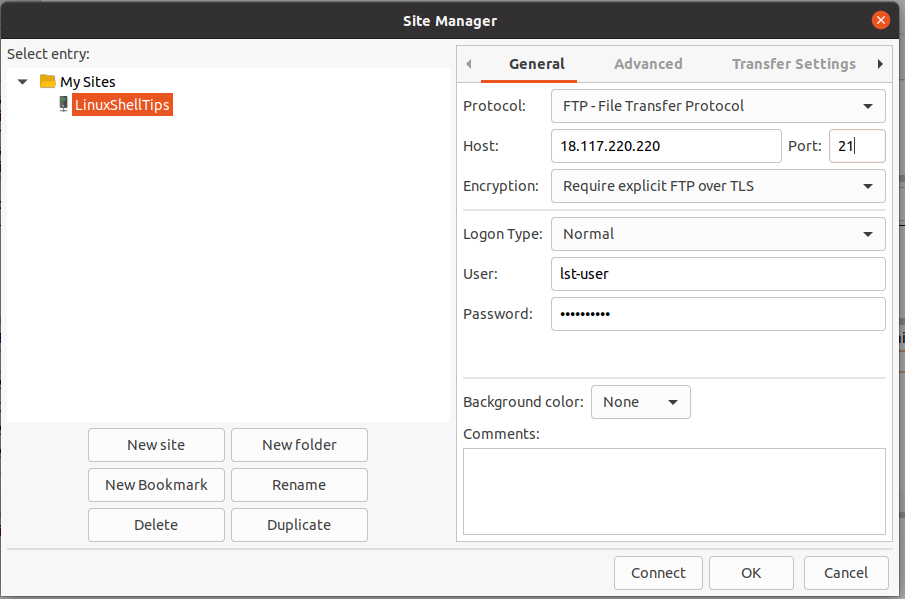
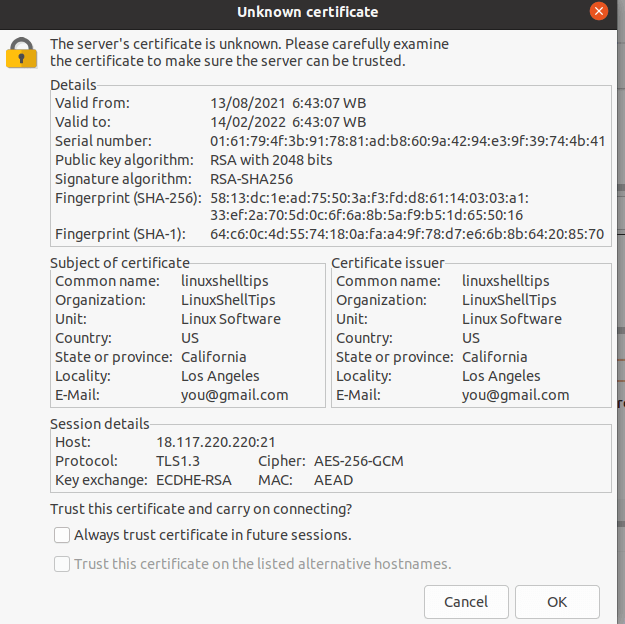
You will be met with an RSA certificate we created earlier for encrypting our FTP connection.
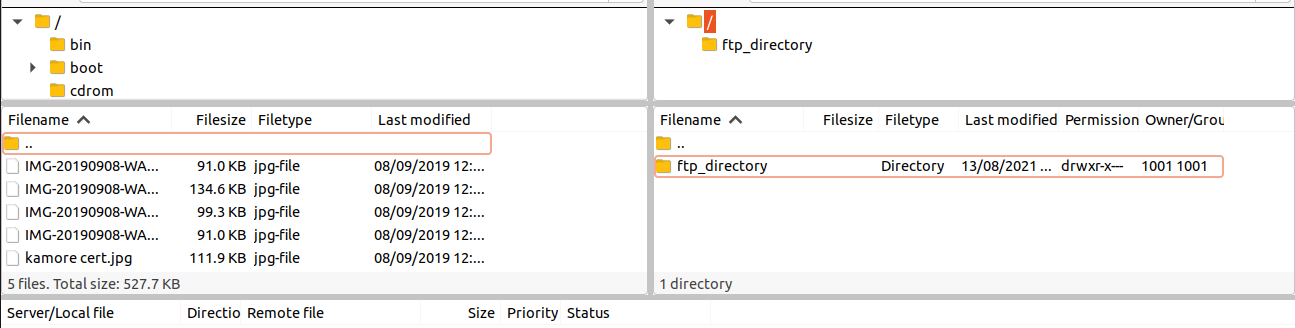
You should be able to see the FTP directory we created earlier for user “lst-user”.
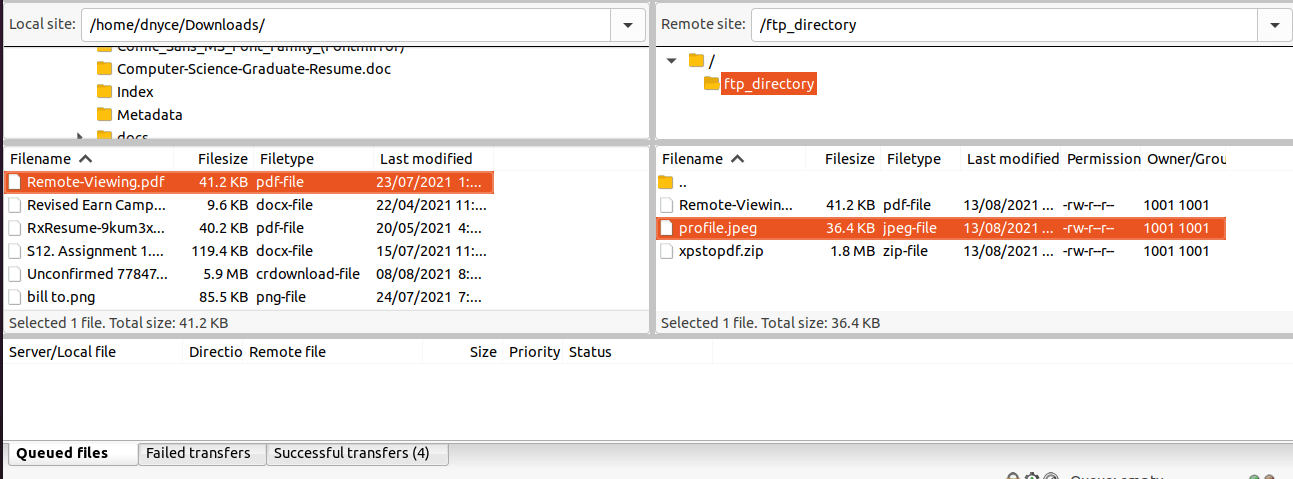
The lst-user can now download and upload data from or to the “ftp_directory”.
Your Linux server is now viable for file transfers through FTP. The use of secure certificate files (RSA) for your FTP connections ensures that your server and desktop environment credentials never compromise while on a network.