The LEMP stack is a group of software used to create and deploy dynamic websites and web applications. This group of software comprises Linux, Nginx, MySQL or MariaDB, and PHP.
Linux is the host operating system, Nginx handles HTTP requests from web clients, MySQL or MariaDB manages the storage, retrieval, and manipulation of data, and lastly, PHP handles the dynamic processing of web contents.
[ You might also like: How to Install LAMP Stack on Ubuntu 20.04 ]
This tutorial describes how to install the LEMP (Linux, Apache, MySQL, and PHP) stack on Ubuntu 20.04 and Ubuntu 18.04.
Prerequisites
- An Ubuntu 20.04 or Ubuntu 18.04 server, which will serve as the Linux host operating system.
- A user with sudo privilege.
Let’s get started…
Install Nginx on Ubuntu 20.04
Before anything else, it is a good idea to update existing Ubuntu packages with the following commands.
$ sudo apt update
$ sudo apt upgrade
Next, install Nginx, which is an open-source web server that operates with very high efficiency and is a commonly preferred alternative to the Apache HTTP server.
$ sudo apt install nginx
On successful installation of Nginx, check the status of the webserver with the following command.
$ sudo systemctl status nginx
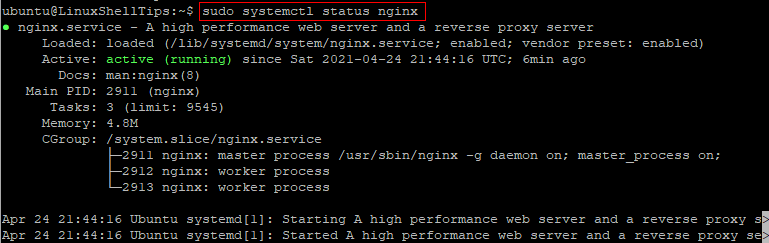
Nginx should already be active and running. If not, start the service with:
$ sudo systemctl start nginx
To enable Nginx to automatically start when the server boots, run:
$ sudo systemctl enable nginx
To test if Nginx is working properly, enter the IP address of your Ubuntu server in a web browser. You should see a web page indicating that the nginx web server is successfully installed.
http://your_server_ip

Install MySQL on Ubuntu 20.04
Having successfully installed Nginx, the next step is to install MySQL to store and manage application data. MySQL is the most popular relational database management system used in web development, and it is open-source too.
To install the MySQL database server on Ubuntu 20.04, run the following command.
$ sudo apt install mysql-server -y
On successful installation of MySQL, run the command below to check the status.
$ sudo systemctl status mysql-server
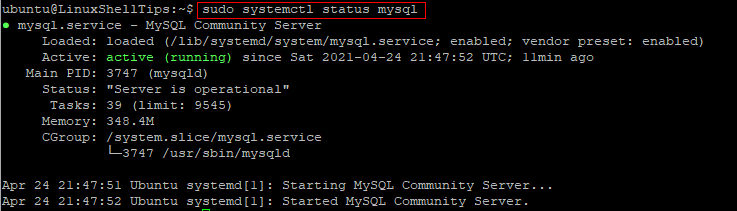
If MySQL is not already running, start the service with:
$ sudo systemctl start MySQL
To enable MySQL to automatically start when the server boots, run:
$ sudo systemctl enable MySQL
Once installed, it is recommended that you run the following built-in script to remove insecure default settings and harden the MySQL database server.
$ sudo mysql_secure_installation

Simply read the instructions carefully and follow the prompts. Basically, you would be prompted to:
- Set root password
- Remove anonymous users
- Disallow root login remotely
- Remove test database and access to it
- Reload privilege tables
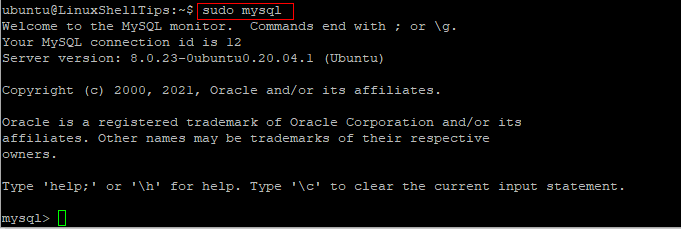
After everything is done, log in to MySQL as follows.
$ sudo MySQL
You should see the MySQL > prompt which confirms that the database server is ready.
Enter quit to exit MySQL.
mysql> quit;
Install PHP on Ubuntu 20.04
Since Nginx does not natively process PHP files like the Apache web server, it requires an external program to handle PHP processing and act as a bridge between the PHP interpreter itself and the webserver. The external program required is called PHP-FPM (FastCGI Process Manager) which instructs Nginx to pass PHP requests to it for processing.
To install PHP-FPM and related components, run the following.
$ sudo systemctl install php php-fpm php-mysql
In preparation to test PHP processing on Nginx, create a new document root for your domain.
$ sudo nano /var/www/yourdomain.com/
Also, create an index.php file in the new document root.
$ sudo nano /var/www/yourdomain.com/index.php
Copy the PHP code below and paste it into the index.php file.
<?php
phpinfo();
?>
Save your changes and close the file.
Adjust ownership and permissions on the new document root as follows.
$ sudo chown -R  www-data:www-data /var/www/yourdomain.com
$ sudo chmod -R 755 /var/www/yourdomain.com
Create Nginx Virtual Host for Domain
Next, create a new virtual host configuration file.
$ sudo nano /etc/nginx/sites-available/yourdomain.com
Copy and paste the configuration directives below.
server {
       listen 80;
       listen [::]:80;
#
       server_name yourdomain.com;
#
       root /var/www/yourdomain.com;
       index index.php index.html;
#
       location / {
               try_files $uri $uri/ =404;
       }
# pass PHP scripts to FastCGI server
        #
        location ~ \.php$ {
               include snippets/fastcgi-php.conf;
        #
        #       # With php-fpm (or other unix sockets):
               fastcgi_pass unix:/var/run/php/php7.4-fpm.sock;
        #       # With php-cgi (or other tcp sockets):
        #       fastcgi_pass 127.0.0.1:9000;
       }
}
Note: Use your own domain name in place of yourdomain.com and, ideally, this should already be configured to point to your web server’s IP address on your DNS control panel.
Save changes and close the file.
Activate the new virtual host and reload NGINX with:
$ sudo systemctl reload nginx
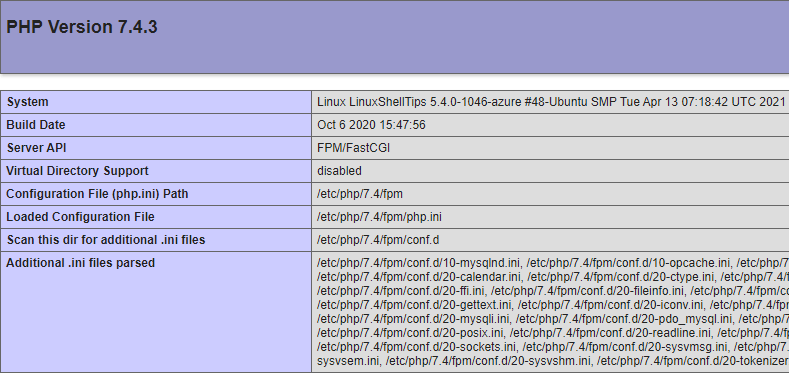
Finally, open your web browser and type yourdomain.com where yourdomain should be your actual domain. You should see the PHP info web page as shown in the image below.
http://yourdomain.com/index.php
Conclusion
In this article, you have seen the steps to install and configure the LEMP stack on Ubuntu 20.04. Feel free to reach out to us with your questions or comments regarding this guide.