Data backup is an important element of successful Linux administration. It is a skill set mastered by most Linux users and administrators. Whether you are after remote or local data backup solutions, it is important to consider the efficiency of a backup tool like Rdiff-backup.
Rdiff-backup data backup utility is attributed as a cross-platform data backup solution. Therefore, its usability also extends to FreeBSD and macOS operating system platforms. This cross-platform flexibility is partially a result of the Rdiff-backup tool being written in Python.
Rdiff-backup Features
Two features of this local and remote data backup utility stand out:
- Reverse Incremental Backup: If you already created a backup of your files and later more files become available for backup, Rdiff-backup will only update the backup destination with the newly added backup files. It prioritizes the latest backup instead of overwriting all the files on the backup destination.
- Flexible Data Restore: Just as it is easy to implement a local or remote backup plan using Rdiff-backup, you can also use it to access your created backups and restore them if needed.
- SSH Protocol Support: When under a network, you can always rely on the flexibility and security of SSH protocols to transfer/backup your data. The initial backup effort replicates the source data directory to a specified remote destination. Afterward, further backup efforts get synced incrementally.
In this article, you will learn how to install and use the Rdiff-backup data backup utility in RHEL, CentOS, Fedora, and Rocky Linux/AlmaLinux distributions.
Install Rdiff-backup in RHEL Systems
To successfully install the latest version of the Rdiff-backup tool on RHEL, we will need to reference one of its supported package managers (dnf or yum or pip3 from Python).
However, your system will first need to meet the following dependencies.
- For remote backup, the targeted/destination backup system should implement a passwordless SSH configuration.
- Extended attribute support via Pyxatrr.
- Optional ACLs support via pylibacl.
- 1.0.0 or later versions of librsync.
- 3.6 or later versions of Python.
To easily install the Rdiff-backup tool on RHEL 8, we are going to consider the flexibility and usefulness of Python’s package manager (pip3). This approach saves us from the separate and mandatory installation of pylibacl and librsync dependencies.
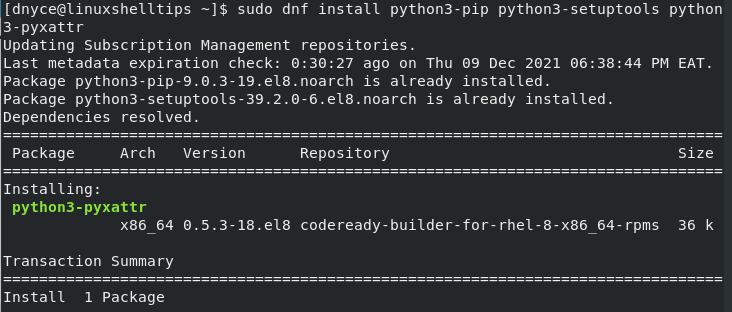
Before installing the rdiff-backup tool via this package manager, you should first install it alongside some of its dependencies.
$ sudo dnf install python3-pip python3-setuptools python3-pyxattr
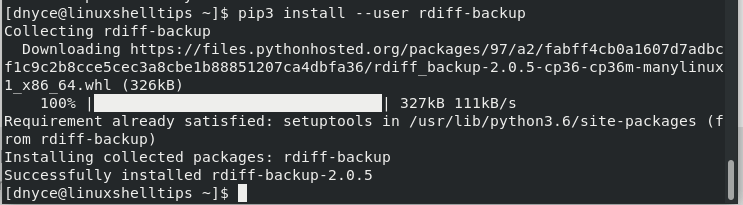
We can now proceed to install the rdiff-backup tool via Python’s pip3 package manager.
$ pip3 install --user rdiff-backup
Confirm the installed version of the rdiff-backup tool.
$ rdiff-backup --version

rdiff-backup 2.0.5
How to Use Rdiff-backup in RHEL Systems
The usage of the rdiff-backup tool depends on whether you want to perform local or remote files backup. Local files backup implies that you want to backup up a specific file directory content to a partition or removable media on your local machine. Remote files backup implies that you want to back up your files from one remote server to another.
Linux Local Files Backup
Identify the pwd (parent working directory) and path of the directory file you wish to backup together with the destination partition or removable media that will store the file backups.
$ pwd
$ ls
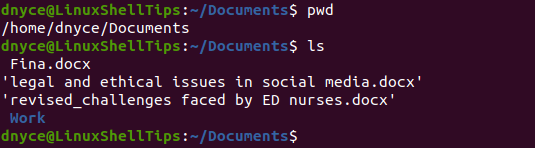
We will attempt to backup /home/dnyce/Documents/Work directory. You also need to identify the path to your destination partition or removable media.

The backup destination will be /media/dnyce/778302783FF74C6A/Backups. Let us now execute the following rdiff-backup command to backup files to removable media.
$ sudo rdiff-backup /home/dnyce/Documents/work /media/dnyce/778302783FF74C6A/Backups
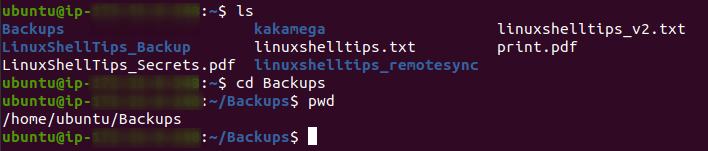
We can also verify the creation of the backup file directory.
$ cd /media/dnyce/778302783FF74C6A/Backups
$ ls

Linux Remote Files Backup
The RHEL 8 server with rdiff-backup installation will act as the machine with file directories we need to backup. You can identify its IP address via the ifconfig command.
$ ifconfig
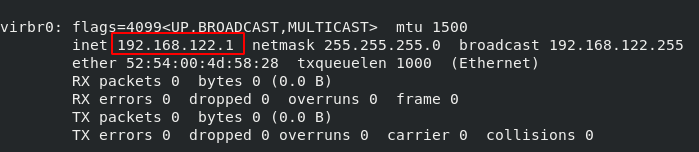
The same ifconfig command can also identify the IP address for the remote machine that will hold our backup files.
$ ifconfig
To backup data from your RHEL 8 machine to another remote server machine, first, identify the path/location of the files you wish to backup.

This path can be represented as 192.168.x.x::/home/dnyce/Desktop/shareable. You also need to identify the path/location on the other remote server for the safekeeping of your backup files.
This path can be represented as 192.168.x.x::/home/ubuntu/Desktop/Backups.
Depending on the Linux operating system distribution on this remote machine, use the appropriate package manager to install rdiff-backup. In my case, since this remote machine is running Ubuntu, I will install rdiff-backup with the following command:
$ sudo apt install rdiff-backup

The associated rdiff-backup command for backing up the shareable directory on RHEL 8 to remote server with IP address 192.168.x.x will look like the following:
$ rdiff-backup /home/dnyce/Desktop/shareable [email protected]::/home/ubuntu/Desktop/Backups
We do not need to specify RHEL 8 IP address since we are already on its interface.

Verify if your files’ backup took place.

Rdiff-backup is a flexible and easy-to-use tool. You can learn more about this command usage from its man page:
$ man rdiff-backup