Being able to manage users and groups in a Linux operating system environment is an important milestone in terms of Linux administration and security. Under Linux, each user account is automatically associated with a single primary group. A Linux user cannot be a member of two or more primary groups, only one.
However, when it comes to secondary groups, it’s a different case. A single Linux user account can be associated with more than one secondary group (up to 15).
In summary, a primary group is OS-assigned to each Linux user account and is linked to user-created files whereas secondary groups can be associated with multiple Linux user accounts and are not always automatically assigned.
This article will walk us through viable approaches to listing all existing groups within a Linux operating system distribution.
1. Reading the /etc/group File
By default, all defined groups in Linux are listed inside the /etc/group file. The entries in this file are represented in the following format:
group_name:password:GID:group_members
All the password entries are encrypted and GID stands for Group ID.
The entries in the /etc/group file are in plain text making it easier to output its content via a simple cat command.
We can therefore list all groups stored inside the /etc/group file in the following manner:
$ cat /etc/group

The above command outputs all groups present in a Linux system as the first column entry followed by the password, GID, and group_members fields if any.
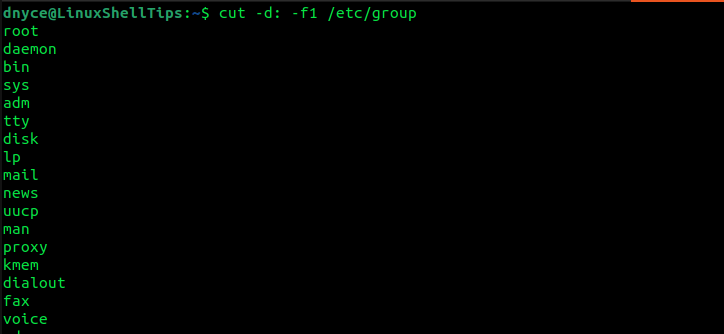
What if we only wanted to output the group_name field? To achieve this objective, we will implement and use the cut command to only extract and output the group_name field from the /etc/group file entries.
$ cut -d: -f1 /etc/group
-dtells the cut command to use field delimiters as TABs replacement.-f1tells the cut command to print the content of the first field (field 1) inside the /etc/group file.

2. Using getent Command
As per its manual page, the getent command is effective in accessing Name Service Switch libraries’ entries. The entries in the /etc/group file are supported by databases easily read by the getent command.
The getent command’s reference syntax is as follows:
$ getent [option]... database key...
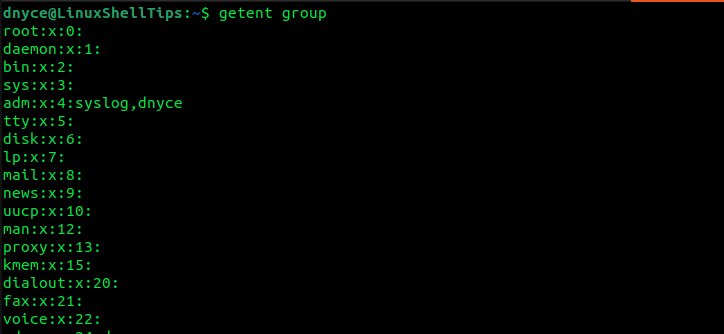
In our case, its implementation in listing all groups in Linux is straightforward and simple as depicted below:
$ getent group

The first entry in each line represents the group names.
Listing All Groups of a Specific User in Linux
We can now comfortably identify and audit the existence of all groups in our Linux OS environment. What if we wanted to list all groups associated with a particular Linux user?
For the currently logged-in user, all you need to do is execute the following single command:
$ groups

If you want to audit the groups assigned to other Linux users on the system, reference the following syntax:
$ groups system_username
For example, we can implement the above command syntax in the following manner:
$ groups newuser
Have any other ideas on listing all groups in Linux? Feel free to leave a comment or feedback.
