Other than being light, fast, lightweight, and simple (in terms of setup and configuration), Nginx is classified as the most sort-after web server for high-traffic websites because of the following advantages:
- Since it utilizes less CPU and Main Memory (RAM) to achieve its functional objective, its Event-driven and Non-blocking Architecture can adapt to minimal hardware requirements.
- Installing and configuring Nginx in a multi-processor environment will remarkably boost its performance.
- For users who want to serve static content (for development environments) or implement some optimization, Nginx is pre-loaded with numerous options for such endeavors.
- You won’t have to worry about protecting your web apps from DDoS attacks as it is prevented by Nginx’s built-in configuration option.
While Nginx pre-configurations cater to essential security needs for our web applications, some security precautions need to be user-defined.
For instance, a website’s web directory may contain files and other subdirectories that we wish to protect from unauthorized user access. A solution to the problem is basic authentication implementation on the Nginx web app configuration file.
This article will walk us through viable steps of password-protecting a web app directory hosted by an Nginx web server.
Problem Statement
For this article to be more relatable and practical, we need to also accomplish the following objectives:
- Access to a remote machine with a known IP address (192.168.100.29).
- This remote machine should have Nginx installed and running on it.
- The remote machine should have a user-defined directory on the path /var/www/html/ (Nginx serves static files from this directory).
$ ls -l /var/www/html/secrets
$ cat /var/www/html/secrets/secret.txt
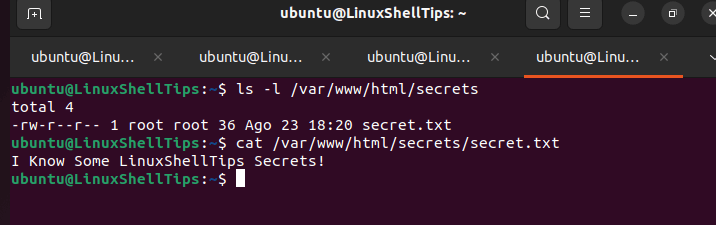
We intend to password-protect the above nginx directory.
Installing Nginx Web Server in Linux
If you do not have Nginx installed on your Linux distribution, reference the following installation guide for different package managers. Also, to password-protect our web app directory, sub-directories, and files, we will need to borrow the htpasswd utility’s functionality availed by apache2-utils or httpd-tools which we must also install.
$ sudo apt install nginx apache2-utils      [On Debian, Ubuntu and Mint]
$ sudo yum install nginx httpd-tools        [On RHEL/CentOS/Fedora and Rocky Linux/AlmaLinux]
$ sudo apk add nginx apache2-utils          [On Alpine Linux]
$ sudo emerge -a nginx apache-tools         [On Gentoo Linux]
$ sudo pacman -S nginx apache2-utils        [On Arch Linux]
$ sudo zypper install nginx apache2-utils   [On OpenSUSE]
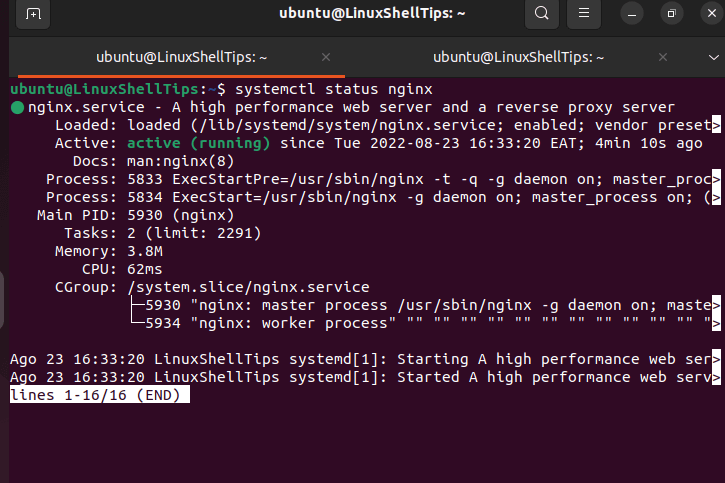
After nginx installation, you can enable, start and verify the status using the following commands.
$ sudo systemctl enable nginx
$ sudo systemctl start nginx
$ sudo systemctl nginx status
Creating User and Password Using htpasswd
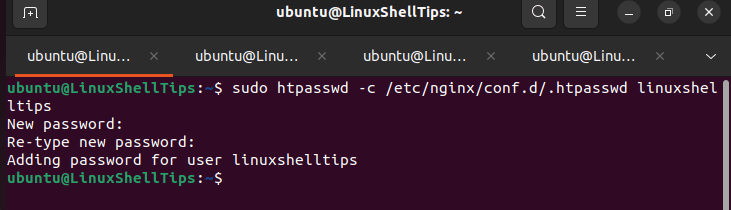
We will now make use of the htpasswd command to create user and password credentials for accessing our web app directory.
$ sudo htpasswd -c /etc/nginx/conf.d/.htpasswd linuxsheltips
The -c flag points to the password file (.htpasswd) storage location. Replace linuxshelltips with a username of your choice. A prompt will be presented for you to create a user password.
Configure Nginx Password Protect Directory
First, open the Nginx configuration file for your site:
$ sudo nano /etc/nginx/sites-available/default
For virtual host configurations, the configuration file for a web app like your_site.com will be at:
$ sudo nano /etc/nginx/sites-enabled/your_site.conf
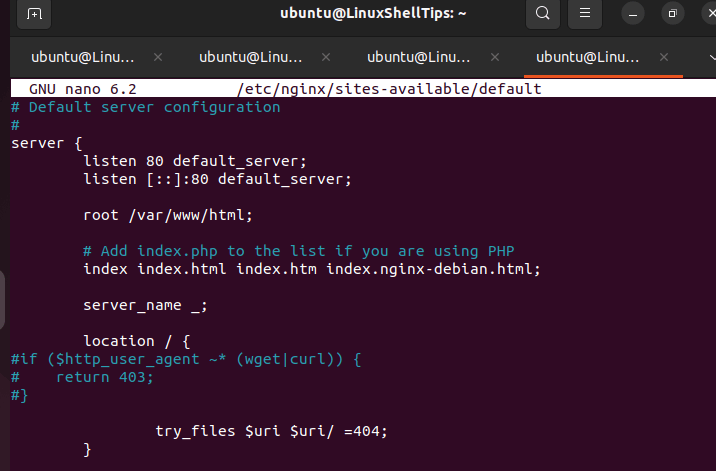
Modify the location {} block to point to the directory we wish to password-protect i.e /var/www/html/secrets and the password authentication lines as shown.
location /secrets/ {
auth_basic "LinuxShellTips Special Access!";
auth_basic_user_file /etc/nginx/conf.d/.htpasswd;
autoindex on;
}
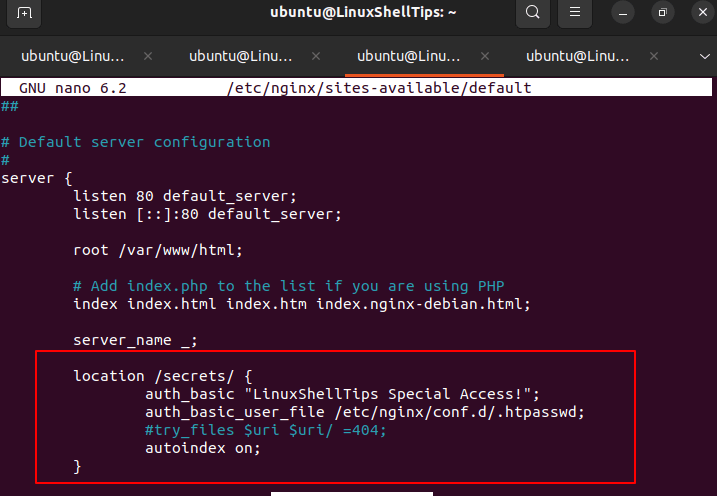
The auth_basic is for message display and the auth_basic_user_file points to the created password file location.
Finally, restart the Nginx web server to take the new configuration changes into effect.
$ sudo systemctl restart nginx
Accessing Nginx Password Protect Directory
We can now attempt accessing our nginx password-protected directory from the host machine.
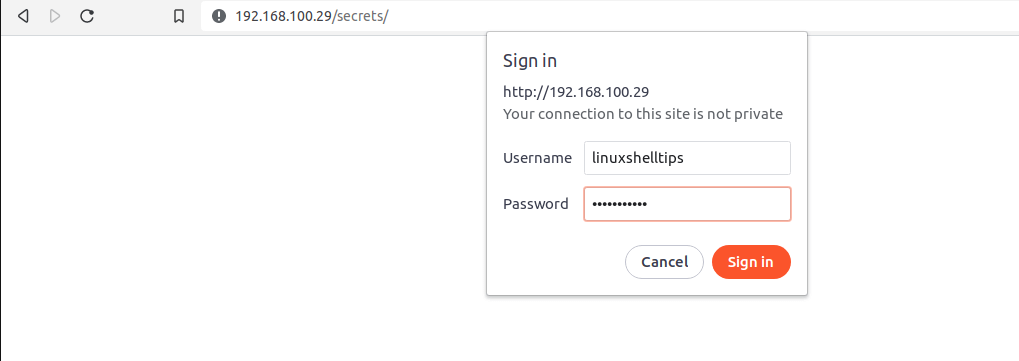
http://192.168.100.29/secrets
We will be asked to provide a username and password.
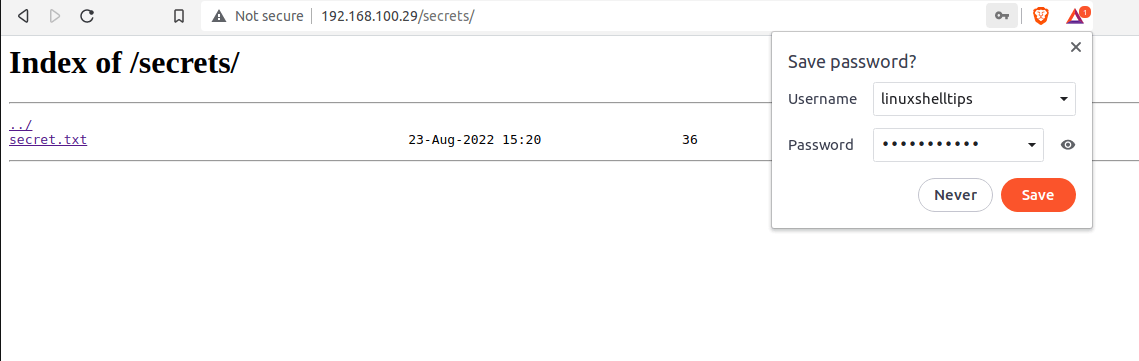
With the right user credentials, we will be able to access the nginx password-protected directory:
We can now protect any directory under the Nginx web server. Hope this article guide was helpful. Feel free to leave a comment or feedback.