SSH or Secure Shell Protocol is a cryptographic network protocol that is used to securely access a remote machine from another computer over an unsecured network via the command line. With SSH, you can execute commands on remote Linux systems and servers, send/transfer files, and normally manage everything you do from one place.
When you are operating with multiple Linux servers in various locations, or if you are just trying to save some ideal time accessing these servers, you will want to use an SSH public and private key pair to make life much easier by logging into remote machines and running commands without entering passwords. Also, the SSH key pairs are more secure as they are not vulnerable to common brute-force password hacking attacks.
[ You might also like: How to Restrict SSH Access to Certain Users in Linux ]
In this article, you will learn the process of creating the SSH keys and setting up your Linux servers for easy remote passwordless access with said keys.
Step 1 – Creating the SSH Key Pair
The first step is to login into your local Linux machine and create an SSH key pair using the following command into your local command line:
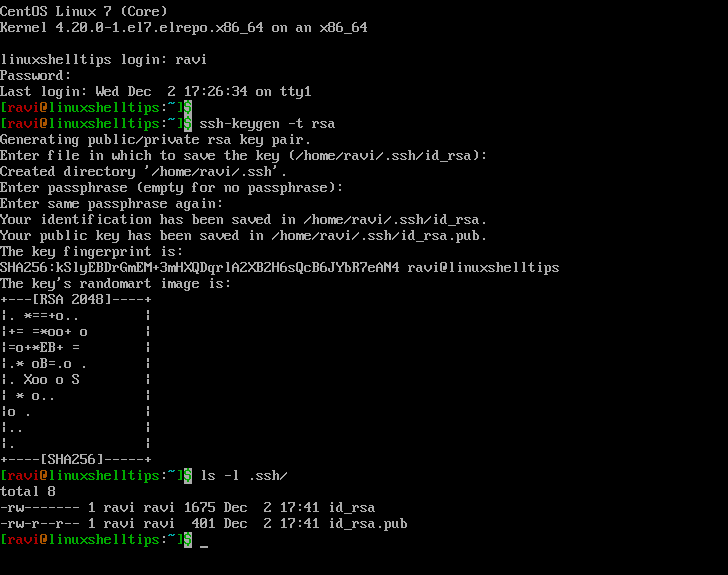
$ ssh-keygen -t rsa
Which will display the following:
Generating public/private rsa key pair.
Enter file in which to save the key (/home/ravi/.ssh/id_rsa):
Here, you can press ENTER to keep the files to the default location in the .ssh directory. Alternately, you can pick a different file name or location by typing it after the prompt and hitting ENTER.
Next the system will ask you to enter a passphrase:
Enter passphrase (empty for no passphrase):
While a passphrase is not required, but it’s up to you whether you want to use a passphrase or not. If you want to use it, you should mention a passphrase to protect the key from unauthorized use. When you mention a passphrase, you must enter the passphrase to connect to the system.
Enter again to proceed to generate a private key without a passphrase:
Enter the same passphrase again:
You now should have an RSA type public and private key pair in your /home/ravi/.ssh directory:
$ ls -l .ssh/
Step 2 – Copying the SSH Public Key to Your Server
Once the SSH key pair is created, it is time to copy the public key (id_rsa.pub) on the server that you are going to be accessing under the server’s authorized_keys file with the ssh-copy-id command as shown. Make sure to change the username and IP address of your server:
$ ssh-copy-id [email protected]
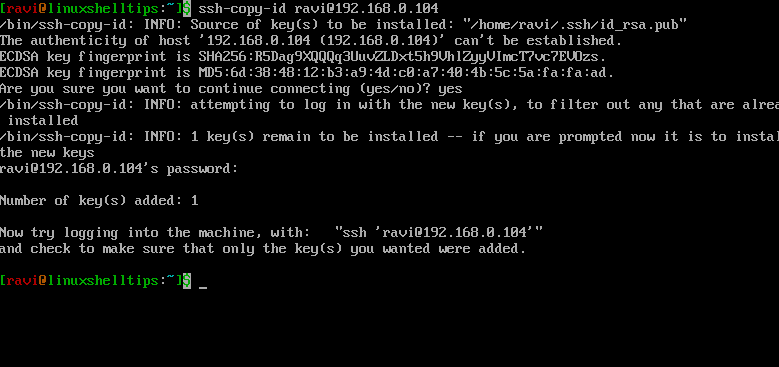
Once the key is copied, you will be able to log into the server without being prompted for a password. However, if you set a passphrase while creating your SSH key, you will be asked to provide the passphrase at that time.
Step 3 – Connect to Server Without SSH Password
Now try to log into the remote server, it will place you on the command line in your home directory without prompting you for a password or passphrase:
$ ssh [email protected]
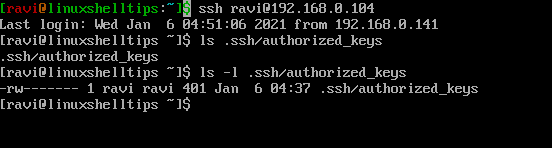
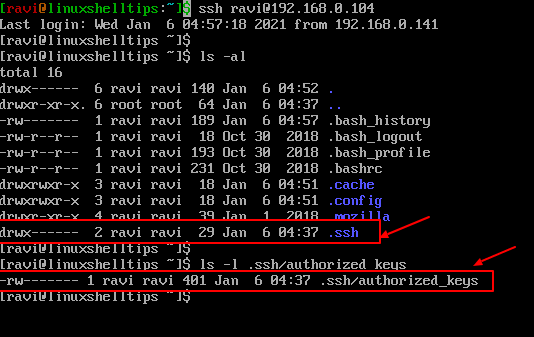
Make sure to check the following permissions are applied on the .ssh/ directory and .ssh/authorized_keys file.
$ chmod 700 .ssh/
$ chmod 600 .ssh/authorized_keys
In this article, you have learned how we created an SSH key pair, copied our public key to a server, and accessed the server without a password.